Roz Ka Khana

A blog about everyday food. Mostly Indian. All vegetarian.

Archive for the category “Bread”

We Knead to Bake Project – Bialys with Caramelized Onions and Paneer
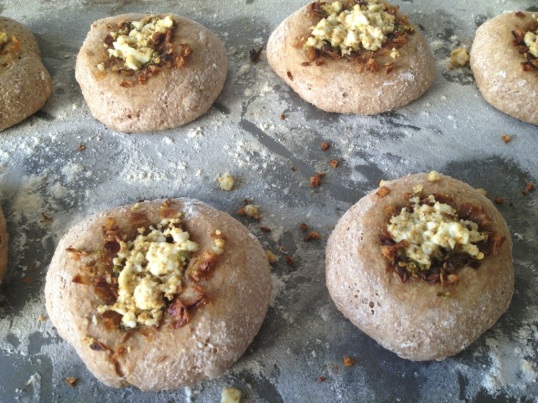
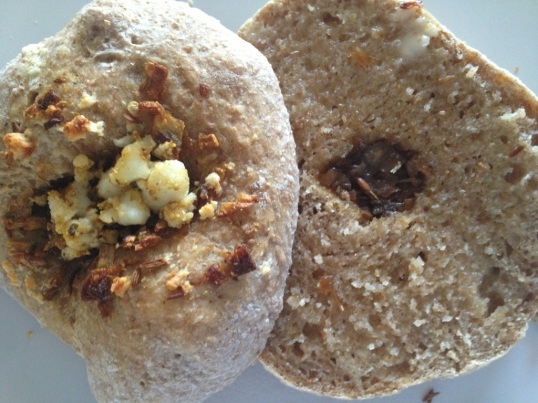
20130607-145951.jpgThis was a new one for me. I had not heard of Bialys before Aparna introduced it to me in this month’s We Knead to Bake Project.

Bialy, a Yiddish word short for bialystoker kuchen, from Białystok, a city in Poland, is a small roll that is a traditional dish in Polish Ashkenazi cuisine. In the early 1900s, many Eastern Eurpoeans, including the Polish, immigrated to the US and settled down in New York bringing their Bialy making skills with them. And that is how the New York Bialy became famous. There you go, that’s a mini history lesson on Bialys for you.

For those new to Bialys like me, they look and maybe taste close to a bagel, but there are some differences. For one, a Bialy doesn’t have a hole in the middle like a bagel but is depressed in the center with a filling (usually onions, garlic, poppy seeds etc). A Bagel is boiled and then baked while a Bialy is just baked. According to Aparna – a good Bialy should have a springy soft crumb but a chewy and floury crust.

I haven’t made bagels from scratch either so I wouldn’t know the actual differences in process but I was quite excited to try these out this past month. These were quite easy to make except for the rising time (still doesn’t beat the croissant process:) and of course, Aparna had Indianized it a bit by adding paneer and garam masala so I couldn’t wait to try this bread.

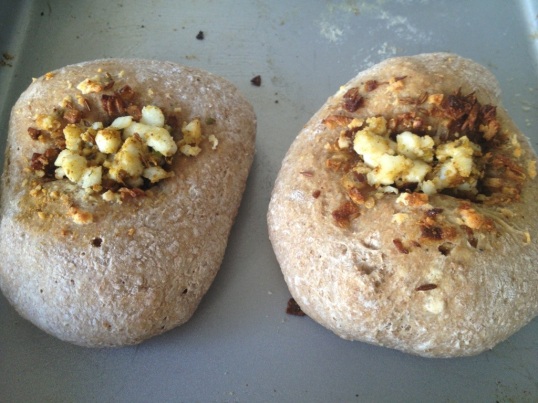
I added green chili (of course, for the spice), paneer, caramelized onions and stuffed paratha masala. It tasted like a paneer kulcha in a bagel form if you know what I mean. The paneer and stuffed paratha masala was a great combo and complimented each other quite well. Here’s the recipe (Adapted from King Arthur Flour) http://www.kingarthurflour.com/recipes/bialys-recipe

Ingredients:

For the dough:

1 teaspoon instant yeast

1 tbsp sugar

1 1/4 cup water

3 cups all-purpose flour (use bread flour if you can find it or all-purpose flour + 1 tbsp vital wheat gluten)- I used 3 cups of wholemeal bread flour

1 tsp salt

Milk for brushing the dough

For the Onion Filling:

1 tbsp oil

3 medium onions, finely chopped

1 1/2 tsp cumin seeds

3/4 tsp stuffed paratha masala

3 green chili crushed or minced

Salt to taste

100gm paneer, crumbled (optional)

Method:

1. Put the yeast, sugar, salt and flour in a stand mixer or food processor bowl. Pulse a couple of times to mix and then add the warm water in a steady stream. Knead until the dough comes together as a mass and then let the dough rest for 10 minutes. This will help the dough absorb water. Knead again, adding a little more water or flour (not too much) if you need it, until your dough is smooth and elastic but not sticky.

2. Shape it into a ball and put it in a well-oiled bowl, turning the dough till it is well coated. Cover and let it rise till about double. This should take about 2 hours.

If you’re not making the Bialys right away, you can refrigerate the dough overnight at this point. When ready to make them, keep the dough at room temperature for about half an hour and then proceed with the rest of the recipe.

3. In the meanwhile, make the filling. Heat the oil in a pan, and add the cumin seeds. When the crackle, add the onions, and sauté over low to medium heat. Sprinkle a little salt and continue sautéing until they become soft and turn golden brown in colour. Add the stuffed paratha masala and stir well. Keep the caramelised onions aside to cool.

4. Sprinkle your work surface lightly with flour and place the dough on it. Divide it into 8 equal pieces and shape each one into a roll by flattening it and then pinching the ends together to form a smooth ball.

(See this video for shaping rolls, if necessary http://www.youtube.com/watch?v=TB908K3Kd6k )

5. Place the rolls on a lightly greased baking sheet and cover them with a towel. Let them rise for about one hour (about 1 1/2 to 2 hours for refrigerated dough) till pressing with a finger on the top leaves a dent.

6. Work on one piece at a time, while you keep the others covered so they don’t dry out. When the rolls are ready, pick them up one at a time and using your fingers, form the depression in the middle. Hold the roll like a steering wheel with your thumbs in the middle and your fingers around the edges. Pinch the dough between your thumb and fingers, rotating as you go and gradually making the depression wider without actually poking a hole through. The depression should be quite thin so the filling can stay in and not rise when the Bialy bakes.

Remember not to press on the edges, or they will flatten out. Once shaped, you should have a depression about 3” in diameter with 1” of puffy dough around the edge, so your Bialy should be about 4” in diameter. Prick the centre of the Bialy with a fork so the centre doesn’t rise when baking.

7. Place the shaped dough on a parchment lined (or greased) baking tray leaving about 2 inches space between them.

8. Place the caramelized onion filling in the depressions of each Bialy. Add some mined green chili to each as a topping. Brush the outer dough circle with milk. If you’re using crumbled paneer, add it to the Bialys in the last 5 minutes of baking or it will get burnt.

20130607-145941.jpg

Bake the Bialys at 230C (450F) for about 15 minutes till they’re golden brown in color. Cool them on a rack. Serve slightly warm or at room temperature. This recipe makes 8 largish Bialys.

Enjoy warm with butter or cream cheese.
20130607-150452.jpg

Hokkaido Milk Bread – We Knead to Bake Project March 2013

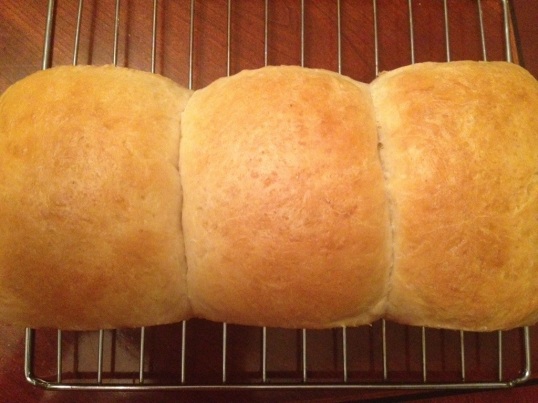
20130424-105247.jpgDespite all the talk about needing a push, the blog prompt, blah blah, I’m late..again. This post is exactly a month late for the “We Knead to Bake Project” for March .

I didn’t get to make it by the 24th last month (the deadline for each monthly post) for all sorts of reasons. But I wasn’t going to miss baking it entirely too – I’d always wanted to try “soft, pillowy bread” as Aparna describes this.

20130424-105310.jpg

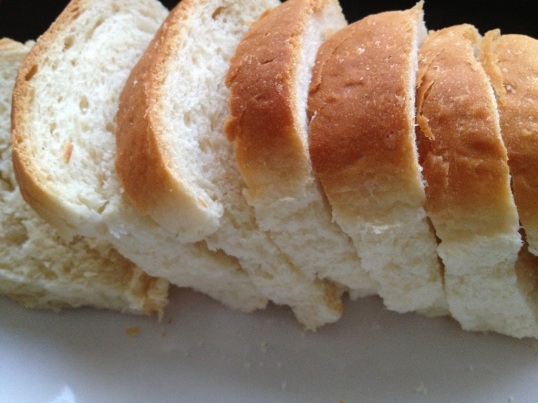
Keep in mind that though the milk bread is the traditional “white bread” made with AP flour or bread flour, this can be easily made with wholemeal or whole wheat flour as well. I tried them all and the texture may not be as soft but it will make for a great toasting bread.

Coincidentally I had come across a Hokkaido bakery in Singapore just last month and this place called Pullman bakery is apparently famous for its curry bun from Hokkaido, Japan. I’m not sure if this is the same technique they use as this Hokkaido bread but there’s got to be a connection, and clearly a sign for me to absolutely try it this month:)
This Hokkaido bread gets its texture due to the use of an interesting ingredient called Tangzhong which involves cooking bread flour with water at 65°C (149 °F) to form what’s called a “roux”. Scientifically speaking, the gluten in the bread flour and water mixture absorb the moisture and create a “leavening” action. This Tangzhong when added into other ingredients produces light, fluffy bread.

Apparently this popular South Asian technique was made popular by Yvonne Chen, in her book which translates to “65C Bread Doctor”.
Since the recipe called for using half of the Tangzhong each time, I made this twice, once with bread flour for the first half and then with all purpose flour. The one with the AP flour was amazingly soft and fluffy and pillowy as promised. The one with bread flour was equally good, a tad less soft but great for toast with toppings/dips etc. Great for bruschetta:)
So once again, Aparna thanks for showing us a new technique this month. Here’s the link to her original post.
I plan to try this Tanzhong method in all my bread baking experiments, with whole wheat, multigrain flour etc. Will keep you posted on how they turn out. I think these will make for great substitute to pav breads as well so the next time I make these I will try making them smaller and probably with a bhaji (curried vegetable) filling:)

Ingredients:
For The Tangzhong (Flour-Water Roux)
1/3 cup all-purpose flour
1/2 cup water
1/2 cup milk
For The Dough:
2 1/2 cups all-purpose flour
3 tbsp sugar
1tsp salt
2 tbsp powdered milk
2 tsp instant dried yeast
1/2 cup milk (and a little more if needed)
1/8 cup cream (25% fat)
1/3 cup tangzhong (use HALF of the tangzhong from above)
25gm or about 1 1/2 tbsp unsalted butter (cut into small pieces, softened at room temperature)
1/2 to 3/4 cup mini chocolate chips if making the chocolate chip rolls (optional – I didn’t use this)
Method:
The Tangzhong (Flour-Water Roux):
  • Whisk the flour, water and milk in a saucepan until smooth and there are no lumps.
  • Place the saucepan on the stove, and over medium heat, let the roux cook till it starts thickening. Keep stirring/ whisking constantly so no lumps form and the roux is smooth.
  • If you have a thermometer, cook the roux/ tangzhong till it reaches 65C (150F) and take it off the heat. If you don’t have a thermometer (like me), then watch the roux/ tangzhong until you start seeing “lines” forming in the roux/ tangzhong as you whisk/ stir it. Take the pan off the heat at this point.
  • Let the roux/ tangzhong cool completely and rest for about 2 to 3 hours at least. It will have the consistency of a soft and creamy pudding (or like thick cooked oatmeal:).
  • If not using immediately, transfer the roux to a bowl and cover using plastic wrap. It can be stored in the fridge for about a day, but not any further as it may spoil.
The Bread Dough:
I used my stand mixer for this part but you could also use a food processor or your hands. Keep in mind that this dough is a bit sticky and can take some time and effort to knead by hand. And do not add more flour to make it less sticky either!
  • Put the flour, salt, sugar, powdered milk and instant yeast in the stand mixer bowl with the dough hook attachment and pulse a couple of times to mix.
  • In another small bowl mix the milk, cream and Tangzhong till smooth and ensure there are no lumps.
  • Add this tangzhong mixture to the processor bowl. Run on slow speed until the dough comes together.
  • Now add the butter and process till you have a smooth and elastic dough which is just short of sticky.
  • The dough will start out sticky but kneading for about 5 minutes will make it smooth. If the dough feels firm and not soft to touch, add a couple of tsps of milk till it becomes soft and elastic. To check if the dough is done, try to break the dough. You should be able to stretch the dough without it breaking right away. When it does break, the break should be form a circle at the end.
  • Make a ball of the dough and place it in a well-oiled bowl turning it so it is well coated. Cover with a towel or plastic wrap, and let the dough rise for about 45 minutes or till almost double in volume. This is the proofing stage.
  • Once it’s risen, place the dough on your working surface. You don’t need flour to work or shape this dough. This recipe makes enough dough to make one loaf (9” by 5” tin), 2 small loaves (6” by 4” tins) or 1 small loaf (6” by 4”) and 6 small rolls (muffin tins). Depending on what you are making, divide your dough. If you are making 1 loaf, divide your dough in 3 equal pieces. If you are making two smaller loaves, divide your dough into 6 equal pieces.
  • I made 3 small loaves in one 9’x5′ tin first with the half Tangzhong and with bread flour for the dough. I divided the dough into three pieces.
20130423-171321.jpg
Roll out each portion of the dough with a rolling pin into an oval shape, approximately about 1/8” thick.20130423-171333.jpg Take one end of the dough from the shorter side of the oval and fold it to the middle of the oval. Take the other end and fold so it slightly overlaps the other fold.20130424-105147.jpg
Roll this folded dough with the rolling pin so the unfolded edges are stretched out to form a rectangle.
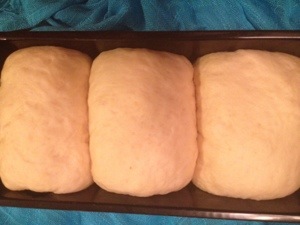
20130424-105156.jpgRoll the rectangle from one short edge to the other, pinching the edges to seal well. Do this with each of the three larger pieces and place them, sealed edges down, in a well-oiled loaf tin.
20130424-105204.jpgCover with a towel and leave the dough to rise for about 45 minutes.20130424-105223.jpg
20130424-105237.jpg

Carefully brush the tops of the rolls and the loaf with milk (or cream) and bake them at 170C (325F) for about 20 to 30 minutes till they are done (if you tap them they’ll sound hollow) and beautifully browned on top. Let them cool in the tins for about 5 minutes and then un-mould and transfer to a rack till slightly warm or cool.
20130424-105257.jpg

20130424-105304.jpg

Paneer Tikka Masala Naanza

20130411-173426.jpgI can almost see this dish being featured on the Indian version of the CopyKat recipes website – the community that posts popular recipes from key chain restaurants in the US- even if I say so myself:).

This particular recipe has been inspired from a food court style restaurant called Eatopia at India Habitat center in New Delhi. We recently returned from a whirlwind but memorable trip to Rajasthan, Agra and Delhi (in that order) with the family. Besides the breathtaking locales and the cherished monument sightings, this was also meant to be a food sighting and savoring trip – a gastronomic experience of sorts. While we couldn’t savor all that north India had to offer in 7 days with a tight schedule and a few Delhi bellies:) we did manage to cram in some key food experiences which I will save for a separate post.

Eatopia was our last food stop in Delhi. Decent food at affordable prices and a good sampling of cuisines to choose from – Nepali, Indo Chinese, Pizza, street food/chat, Punjabi Dhaba and so on. Good one to visit if you have limited time and want to try/taste all that Delhi restaurants would have to offer, well almost:).

This particular entree stood out for me for its flavor and uniqueness. An Indian inspired pizza or rather Naan smothered with tikka masala with chunks of paneer and cheese topping. The tikka masala flavor was so flavorful and distinct (and a great alternative to the usual tomato basil pizza sauce) that it left me wanting to lick the masala off the pizza along with my fingers. Of course I didn’t get to a second piece of that pizza thanks to our ravenous tween/teenagers with us (my son and nephew) who polished it off before we could say “please”:).

So is it a naan, is it a pizza, a Nizza? Naanza was the original name so Naanza it is. Perfect name for a naan pizza. A Paneer Tikka Masala Naanza.

So last weekend, as we were toying with dinner ideas, (keep in mind weekend dish requests are complicated at our home – Girish would rather eat Indian what with all the travelling over the week and noshing on greasy restaurant food, and Nikhil’s usually craving something in between an enchilada, burrito or a pizza) we very amicably settled on the Naanza, a pizza with an Indian twist.:)

Ingredients: (serves 5)

For the tikka masala paste: (Sanjeev Kapoor recipe adapted from the blog Indian Healthy Recipes)

¼ tsp cumin seeds (jeera)

1-2 bay leaves

½ tsp black peppercorns

1 cinnamon stick

2-3 cloves

2-3 green or black cardamom (black cardamom has a better flavor)

¾ cup of finely chopped onions (about 1 medium sized red onion)

2-3 green chilies slit or crushed

½ can tomato paste (original recipe called for fresh tomatoes pureed which is fine too)

1 tsp ginger garlic paste

1-2 tsp olive oil

1-2 tsp red chili powder (depending on your spice tolerance:))

1 tsp garam masala powder (available at Indian food stores or homemade)

1 tsp kasuri methi (dried fenugreek leaves, available at Indian food stores)

¼ cup cashew paste (soak ¼ cup raw cashews in about ½ cup water for 30 mins to an hour. Blend to a smooth paste.)

Other ingredients:

½ cup cilantro chopped

1 ½ cups Paneer (Indian cottage cheese store bought or home made) – sliced into ½ to 1 inch cubes

Tandoori Naans (store bought or home made). You may use frozen store bought naans as well. – 5

2 cups grated mozzarella cheese

Method:

For tikka masala paste:

  1. Heat the oil in a heavy bottomed pan or kadai.
  2. Add the cumin first and when it starts to sizzle, add the bay leaf, cloves, cinnamon and peppercorns. Saute for about 2 minutes till they start to lightly brown.
  3. Add the chopped onions, and green chilies. Fry till the onions turn golden brown.
  4. Add the ginger garlic paste and sauté for another minute.
  5. Add the tomato paste, red chili powder and cook for another 3-5 minutes.
  6. Pour about ¼ cup water, add the kasuri methi, garam masala powder and fry again for 3-5 minutes.
  7. Add the cashew paste and mix well. Continue to cook till the mixture starts to boil.
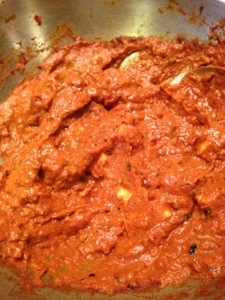
  8. Cook till the gravy becomes thick and almost paste like. Ensure that the mixture is not too watery as it will not stick well to the naan base. For this do make sure you add water to just the right consistency in Step 6, and adjust water quantity as needed.
  9. You may now add half of the paneer pieces to this paste and set it aside until you assemble the naan. This allows the paneer to soak in the tikka masala “juices”.
  10. 20130411-173352.jpg

You may also try this recipe for paneer no butter masala I posted earlier. I wanted to try this Sanjeev Kapoor version for kicks (and licks:) and also since this was supposedly the original “tikka” recipe, but I’m sure either would work.

For the Naanza:

  1. Preheat oven to 375-400F. (190-200C)
  2. Lightly grease and flour a pizza tray. Alternatively if you have a pizza stone, heat the stone at the required temperature for about 10 minutes.
  3. 20130411-173402.jpg
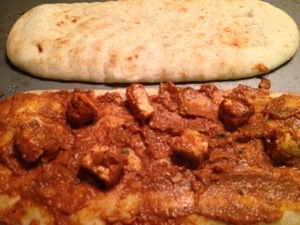
  4. Using a blunt knife, spread the tikka paste on one naan base till it is completely covered.
  5. 20130411-173420.jpg
  6. Now add some of the paneer pieces that are soaking in the masala paste on top. You may also add some of the fresh un-soaked paneer pieces as a topping at this stage. This gives the naanza a good balance of the gravy and paneer.
  7. Top this with some grated cheese ( 1-2 tbsp) and chopped cilantro. For those who like it spicy, add some crushed green chili as well.
  8. 20130411-173410.jpg
  9. Place the naanza on the pizza stone or baking tray and bake in the oven for about 10-15 minutes until the cheese has melted and the base is lightly browned. Since the naan is already cooked, you may not need to wait very long for the base to cook.

Verdict : This recipe came very close to the Eatopia version. Finger licking good and extra credits for the amazing aroma in the kitchen from the tikka masala baking in the oven:). I’m still experimenting with the right pizza cheese to use in Singapore so that’s the only thing I would change since I used an Indian mozzarella cheese. I also tried this with grated Amul cheese which didn’t give it the right consistency either, so I would probably use regular American grated mozzarella cheese the next time for that gooey pizza consistency.

Classic Croissants – We Knead to Bake Project February 2013

DSC01580

I would probably call this challenge the ultimate in baking challenges, at least for me:). After the first pull apart bread, I was all set to turn in my entry to this challenge “on time”, only to discover that Aparna had truly made this a sequel to the “Daring Baker’s Challenge”:). For the uninitiated, that is another group of bakers and as the title suggests the recipes are quite challenging. The recipe for making these croissants is all of 3 pages long and the process takes 3 days. Intimidating and definitely not something I would’ve even bothered to give a second look – those who know me well know how much I love to “cook and get out” – of the kitchen, I mean. But much as I would’ve been rigid in that rule of mine, there does come a time when you know that getting out of that comfort zone and pushing yourself once in a while is what makes life interesting – gives you that rush, that sense of fulfillment. Kinda like managing to finish a 10k. For someone like me who just 14 months ago hated the thought of running – outdoors or indoors. I know, I digress. But to me the two situations were quite similar, and coincidentally happened around the same time, a week apart from each other.

And someone or something does play a major role in pushing all of us. For the run it happened to be my husband Girish who started to run two years ago and got reluctant me into the habit. Now I feel like it has become an addiction of sorts and I’m signing us up for all the running events in the city:). Well sort of.

And Aparna’s group has been that someone and something for pushing me to bake more . I joined the Daring Bakers a year ago and for some reason couldn’t really get into it. It probably didn’t push me enough even if the recipes were equally or more daunting. What’s worked for me here has been Aparna’s concept of a (closed) Facebook group, the daily updates from the 100 or so members, the drooling pictures that make you feel a tad guilty that you are yet another day behind on the challenge – all this has driven me to bake something I would never have dreamed
of a year ago.

In both cases I did learn one thing – nothing is daunting if you plan well and work steadily towards your goal. This recipe looks long but if you read it well and plan it, it’s not all that bad. Yeah I know that sounds cliched. And even if I didn’t think that for a minute while baking them or running those miles, I do now, after I managed to get past the finish line, in both cases:)

Here’s the step by step recipe for Classic Croissants. They were a hit – flaky, soft, layered and just right. Enough to make me feel like a Nigella Lawson, even for a day:)

Ingredients:

For the dough:

4 cups all-purpose flour, and a little more for dusting/ rolling out dough

1/2 cup plus 2 tbsp ice water

1/2 cup plus 2 tbsp cold milk

1/4 cup sugar

40gm soft/melted unsalted butter (about 3 tbsps)

1 tbsp + 1/2 tsp instant yeast

2 tsp salt

DSC01562

For the butter layer:

250 gm cold unsalted butter (~2 sticks + 2 tablespoons)

1/4 cup of milk or mix of milk & heavy cream to brush the rolled croissants

Method:

Day 1:

Make the dough (and refrigerate overnight)

  1. Combine all the ingredients for the dough in the bowl of a stand mixer fitted with the dough hook. You can also use a food processor with the plastic blade, or do this by hand.
  2. DSC01564
  3. Mix everything on low speed for 3 minutes, scraping the sides of the mixing bowl once if necessary. Then mix further on medium speed for 3 minutes. Lightly flour a 10-inch pie pan or a dinner plate. And place the ball of dough on this.
  4. Gently shape the dough into a flat ball by pressing it down before storing it in the fridge, this makes rolling out next morning easier. Making a tight ball will strengthen the gluten which you do not need. Lightly dust the top of the dough with flour and wrap well with plastic so it doesn’t dry out. Refrigerate overnight.
  5. DSC01565

Day 2:

Make the butter layer

  1. The next day, cut out 2 pieces of parchment or waxed paper into 10” squares each. Cut the cold butter into 1/2-inch-thick slabs. Place these pieces on one piece of parchment/ waxed paper so they form a 5- to 6-inch square. Cut the butter further into pieces as required to fit the square. Top with the other piece of parchment/ waxed paper.
  2. Using a rolling pin, pound the butter with light, even strokes. As the pieces begin to stick together, use more force. Pound the butter until it flattens out evenly into a square that’s approximately 7-1/2”. Trim the edges of the butter to make a neat square. Put the trimmings on top of the square and pound them in lightly with the rolling pin. Refrigerate this while you roll out the dough.

Laminate the dough

Note – I don’t have great pictures for this as this was the most important step and I really wanted to focus and yes it was also the most messy with the butter and dough:)

  1. Unwrap and lay the dough on a lightly floured work surface. Roll it out to a 10-1/2-inch square, and brush off the excess flour. Take the butter out from the refrigerator —it should be cold but pliable. If it isn’t refrigerate it till it is. This so that when you roll out the dough with the butter in ti, neither should it be soft enough to melt, or hard enough to break. Unwrap the butter and place it on the square of dough in the center, so that it forms a “diamond” shape on the dough.
  2. Fold one flap of dough over the butter toward you, stretching it slightly so that the point just reaches the middle of the butter square. Bring the opposite flap to the middle, slightly overlapping the previous one. Similarly repeat with the other two so that the dough forms an envelope around the butter. Lightly press the edges together to completely seal the butter inside the dough to ensure the butter doesn’t escape when you roll out the dough later.
  3. Lightly flour the top and bottom of the dough. With the rolling pin, firmly press along the dough uniformly to elongate it slightly. Now begin rolling instead of pressing, focusing on lengthening rather than widening the dough and keeping the edges straight.
  4. Roll the dough into an 8” by 24” rectangle. If the ends lose their square shape, gently reshape the corners with your hands. Brush off the excess flour.Mark the dough lightly equally into three along the long side. Using this as a guideline, pick up one short end of the dough and fold 1/3rd of it back over the dough, so that 1/3rd of the other end of dough is exposed. Now fold the 1/3rd exposed dough over the folded side. Basically, the dough is folded like 3-fold letter before it goes into an envelope (letter fold). Put the folded dough on a floured baking sheet, cover with plastic wrap, and freeze for 15 to 20 minutes to relax and chill the dough.
  5. Repeat the rolling and folding, this time rolling in the direction of the two open ends (from the shorter sides to lengthen the longer sides) until the dough is about 8” by 24”. Once again fold the dough in thirds, brushing off excess flour and turning under any rounded edges or short ends with exposed or smeared layers. Cover once again with plastic wrap and freeze for another 15 to 20 minutes.
  6. Roll and fold the dough exactly in the same way for the third time and put it baking sheet. Cover with plastic wrap, tucking the plastic under all four sides and refrigerate overnight.

Day 3:

Divide the dough

  1. The next day, unwrap and lightly flour the top and bottom of the dough. Cut the dough along the longer side into halves. Cover one half with plastic wrap and refrigerate it while working on the other half.
  2. “Wake up the dough up” by pressing firmly along its length with the rolling pin. Don’t widen the dough but simply begin to lengthen it with these first strokes. Slowly roll the dough into a long and narrow strip, approximately 8” by 22”. If the dough sticks as you roll, sprinkle with flour.
  3. DSC01567
  4. Once the dough is about half to two-thirds of its final length, it may start to resist rolling and even shrink back. If this happens, fold the dough in thirds, cover, and refrigerate for about 10 minutes; then unfold the dough and finish rolling.
  5. Lift the dough an inch or so off the table at its midpoint and allow it to shrink from both sides and prevent the dough from shrinking when it’s cut. Check that there’s enough excess dough on either end so that when you trim the edges to straighten them, you have a strip of dough that is 20’ inches long. Now trim the edges so they’re straight.
  6. If you’re good at “eyeballing” and cutting the dough into triangles, then forget the measuring rule, marking and cutting instructions. Otherwise, lay a measuring rule or tape measure lengthwise along the top length of the dough. With a knife, mark the top of the dough at 5-inch intervals along the length (there will be 3 marks in all). Now place the rule or tape measure along the bottom length of the dough. Make a mark 2-1/2 inches in from the end of the dough. Make marks at 5-inch intervals from this point all along the bottom of the dough. You’ll have 4 marks that fall halfway between the marks at the top.
  7. Make diagonal cuts by positioning the yardstick at the top corner and the first bottom mark. Use a pizza wheel/ pie wheel or a bench scraper and cut the dough along this line which connects each top mark to the next bottom mark and then back to the next top mark and so on. This way you will have 7 triangles and a scrap of dough at each end.
  8. DSC01569

Shape the croissants

  1. Now work with one piece of triangular dough at a time. Using your rolling pin, very lightly roll (do not make it thin but only stretch it slightly) the triangle to stretch it a little, until it is about 10” long. This will give your croissants height and layers. You can stretch it by hand too, but if you don’t have the practice, your stretching could be uneven.
  2. Using a sharp small knife, make a 1/2- to 3/4-inch-long notch in the center of the short side of each triangle. The notch helps the rolled croissant curl into a crescent.
  3. Place the triangle on the work surface with the notched side closest to you. With one hand on each side of the notch, begin to roll the dough away from you, towards the pointed end.
  4. Flare your hands outward as you roll so that the notched “legs” become longer. Roll the triangle tight enough but not too tight to compress it, until you reach the “pointy” end which should be under the croissant.
  5. Now bend the two legs towards you to form a tight crescent shape and gently press the tips of the legs together (they’ll come apart while proofing but keep their crescent shape).
  6. Shape all the triangles like this into croissants and place them on a greased or parchment lined baking sheet leaving as much space between them as they will rise quite a bit.
  7. DSC01572

Proof the croissants

  1. Brush the croissants with milk (or a mix of milk and cream). If you use eggs, make an egg wash by whisking one egg with 1 tsp water in a small bowl until very smooth. Lightly brush this on each croissant.
  2. Refrigerate the remaining milk/ milk+cream (or egg wash) for brushing the croissants again later. Place the croissants in a cool and draft-free place (the butter should not melt) for proofing/ rising for about 1 1/2 to 2 hours. They might need longer than 2 hours to proof, maybe as much as 3 hours, so make sure to let croissants take the time to proof. The croissants will be distinctly larger but not doubled in size. They’re ready if you can see the layers of dough from the side, and if you lightly shake the sheets, the croissants will wiggle.
  3. 20130305-180733.jpg

Bake the croissants

  1. Just before the croissants are fully proofed, pre-heat your oven to 200C (400F) in a convection oven or 220C (425F) in a regular oven. Brush the croissants with milk/ milk+cream (or egg wash) a second time, and place your baking sheets on the top and lower thirds of your oven (if regular) or bake one tray at a time in the convection oven.
  2. Bake them for about 15 to 20 minutes till they’re done and golden brown on top and just beginning to brown at the sides. In a regular oven, remember to turn your baking sheets halfway through. If they seem to be darkening too quickly during baking, lower the oven temperature by 10C (25F). Cool the croissants on the baking sheets on racks.
  3. 20130305-180816.jpg

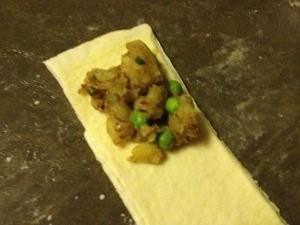
Serve warm. This recipe makes 15 croissants. I used only half (7) and added some filling to the other half and baked it the next day. I filled some with Punjabi Samosa filling, nutella, and PB&J. PBJ was Nikhil’s creation and it oozed a bit but was yummy nevertheless.

Will post those pictures soon and update this post.

20130305-180759.jpg

Here’s a link to a great video that gives you the step by step recipe for more clarity.

Link to video on making croissants – http://www.youtube.com/watch?v=Ot3jKnkTfPY&feature=player_embedded

20130307-064643.jpg

Pain Au Samosa

20130307-064659.jpg

Pain Au PBJ

20130307-065756.jpg

Proofing in the oven

20130307-064725.jpg

An assortment


“We Knead to Bake” Project – Green Chutney Chili and Cheese Pull-Apart Bread

20130204-160429.jpg

I know I said I’m not one for resolutions but if there’s one thing I need to get better at is blogging more often. I need a challenge. Cooking up new and interesting dishes is never an issue – it’s the compilation of the pictures (and I may need to do a post on just the pictures that never made it to the blog), the story behind the post, the flow, the recipe – you get the gist. And when I see inspiring blogs like Panfusine, My Diverse Kitchen, What’s for Lunch, honey? – creative bloggers with jaw-dropping food porn on their blogs, I get that steely resolve to get better at this self-induced hobby of mine. Only the resolve gets blurry as soon as I sit down to blog. It’s a block.

Until I got this prompt from my son’s example, literally. My 5th grader, Nikhil started to blog about a year and a half ago over the summer and sure enough, after the school year began, the blog lay on the wayside. The move to Singapore and the new school was the perfect antidote – and I would tell him to capture his memories and travels on his long forgotten blog, which he momentarily did.

Interestingly his new school’s syllabus added an introduction to blogging as a part of their writing and language art curriculum. Every child would get to start a new blog and write about anything that fancies him/her. They regularly got what were called “picture prompts” to help them get out of a writer’s block and stay on track. Great idea – not only to spark some creative writing juices among kids but also to engage the classmates to read each other’s blog and comment and critique. Pretty soon, my son was on a blogging roll and it’s now almost second nature (well, of course its homework so its mandatory but enough to start a habit;) for him to write even if a few lines every other day. He does take the critiquing quite seriously as he did with my blog posts recently:)

Here was my answer. I needed a “picture prompt” to get me on track.

And so when I chanced upon the “We Knead to Bake” project it was my antidote. Aparna Balasubramanian, the author of My Diverse Kitchen just started this group for culinary enthusiasts with the idea of getting like minded bloggers together to bake one bread a month for 2013. January’s theme was Herb and Cheese Pull Apart Bread which was my prompt for the month.

I joined the group at the end of January, and made it to the group by the skin of my teeth – so it has taken me an additional week to bake and post this recipe, what should have been done by the 24th. I guess I also need to work on meeting baking deadlines:). I’m linking this post to Aparna’s blog post on the theme.

I followed the recipe for the most part except for the mix-ins. I used Amul cheese and a green-chili, mint paste or chutney as the spread for the bread. (my favorite combination for making grilled toast – Chili Cheese toast)

II haven’t had great luck baking breads before but this recipe was perfect in terms of the consistency and texture.

Note: I would add more of the mix-ins as I couldn’t really taste much of the chutney or green chilies in the bread with the original measures for the ingredients so would double the measures (which is what I have noted here in the ingredients).

Also I’m still in the process of updating all the pictures from my camera so look out for another update to this post shortly.

Ingredients:

For the Dough:

1/2 cup warm milk

1 tsp sugar

2 tsp active dry yeast

2 3/4 to 3 cups all-purpose flour

1 tsp salt

2 1/2 tbsp butter, soft at room temperature

3/4 to 1 tsp garlic paste

3/4 cup milk (+ a couple of tbsp to brush over the bread)

For the Filling:

3 tbsp melted butter or a mix of olive oil (EVO) and butter

1/4 cup green chutney (thick and not watery) – 1/2 cup cilantro+1/4 cup mint leaves+1/4-1/2 tsp black salt. Blend together with very little water to a smooth paste.

2 tbsp crushed green chilies (you may use longer chilies or jalapenos for less spice. I used thai chilies that are extra spicy:)

3/4 cup grated Amul cheese

Method:

1. In a small bowl, dissolve the sugar and the yeast in the 1/2 cup of warm milk. Set this mixture aside for about 5 minutes till it starts to froth and rise up.

2. Mix the flour, salt, softened butter, and garlic paste in a stand mixer with a hook attachment. Now add the yeast mixture and the 3/4 cup of milk and knead till you have a soft, smooth and elastic/ pliable dough which is not sticky. Add a little extra flour if your dough is sticking, but only just as much as is necessary.

3. Shape the dough into a ball and place it in a well-oiled bowl, turning the dough to coat it completely with oil. Cover and let it rise for about 1 to 1 1/2 hours or until almost double in volume.

Dough for pull apart bread

4. Prepare the work surface by dusting it lightly with flour. Deflate the dough, divide it into 2. Return one of the portions back to the bowl and cover. Take the other portion and shape it into a large square or rectangle.

5. Brush the rectangle liberally with the melted butter/EVO. Spread the green mint,cilantro, green chili mixture on the rectangle.

DSC_0072

Using a pizza cutter, slice the dough from top to bottom into 8 long and even strips – they do not have to be perfect. Lay each strip on top of the next, with the topping facing upwards, until you have a stack of the strips.

You can put the 2 strips cut from the sides in the middle of the stack so it looks neater. Using a pastry scraper or a sharp knife, cut straight down through the stack dividing it into 6 equal pieces (8 square stacks).

6. Now take the other dough portion and shape it into another large rectangle. Brush with EVO or butter, add the grated Amul cheese on to the surface of the rectangle. Use a cutter and make another 8 square stacks.

DSC_0074

7. Grease and lightly flour a 9” by 4” (or 5”) loaf tin. Layer the square slices, alternating the chutney slices with the amul cheese slices.

DSC_0077

8. Cover the loaf tin dough with a towel and allow the dough to rise for an hour. Lightly brush some milk over the top of the loaf.

DSC_00819. Bake the dough at 180C (350F) for about 30 to 40 minutes until it is done and the top is golden brown. This recipe bakes one 9” by 5” loaf.

Hot Bread Tikkas


Its Snow day #2 in Plano, TX…17F with a wind chill of minus whatever, 2 inches of ice, (ice, not snow) on the streets, rolling blackouts everywhere, frozen pipes…you’d think the world was coming to an end in Plano! Jokes aside, it has been pretty serious and I have to say I’m very thankful I’m still typing this. This means that I have power at home, heat to keep us warm, groceries to last us for at least the next day…and, internet connection.  At least for now. Thank you (silent prayer) for an uneventful day today.

You’d think that a day like this is perfect to cook and blog…only, when you have a bored 9 year old at home for 2 whole days and you have to work, its the perfect recipe for disasters, cooking or otherwise. “Amma, can you play with me?” or “Can I go outside to play by myself”…only to be back in 5 minutes with a frozen chin and a “Do we have anything to cover my chin?”  to “I’m sledding umm ice-skating outside”…aargh!! We’ve had painted t-shirts, hand made water bottle people traps (don’t ask!), catapults, paper ninjas strewn all over the house..all Nikhil’s original creations. And school just announced that they are closed again tomorrow. Help!! Who has time to cook, or blog!
But again, I’m thankful for Amma, who continues to ensure her babies (me and her grandson:) are well-fed, as she whips up the perfect antidote to a gloomy snow day…steaming hot bread tikkas! Add some chili sauce and ketchup and I’m all set for snow day #3:)

Ingredients:

Whole wheat bread – cut into small squares – 4 slices

1 cup chickpea flour (besan)

1/2 Yellow onion chopped fine

1/2 cup cilantro, chopped

1tbsp red chili powder (add more if you like it spicy)

1 tsp garam masala (available in Indian stores)

1 tbsp oil

1/2 cup water

salt to taste

Method:

Take the chickpea flour in a mixing bowl. Add about 1/2 cup water to make a smooth paste. The batter needs to be a little runny so as to coat the bread, not too watery but a slightly thicker paste, so adjust the water accordingly.

Add the onions, chili powder, salt and cilantro and mix well.

Take a bread cube, dip it in the batter so it coats the bread completely.

Heat a flat skillet and the oil, when the skillet is hot. Add the bread slices coated with the batter and shallow fry till well browned on all sides. Serve piping hot with ketchup or chili sauce.

Banana Bread French Toast

I know…surprise, surprise! Two posts in two days? Rather, three if you count the fact that I finally clicked “publish” to the Kothu Parotta post from almost two months ago;) Yes, I have slacked, but I’ve also set the bar so low that anything looks good now:) 

This Banana Bread French Toast is inspired from this breakfast place we went to a a few months ago. “Bread Winner’s Cafe” is a popular restaurant in the DFW area and , in my opinion has the best pancakes and french toasts . Easy recipe, and not sure why I didn’t think of it before, but that’s why I don’t call myself a cook…my recipes are all inspired. Its made with my favorite ingredient…bananas so I couldnt resist sharing it here.

Ingredients:

4 slices banana bread (recipe link here)

2 eggs beaten lightly

1 tbsp maple syrup

Banana slices and pecans/walnuts for garnish

Method:

Beat the eggs in a bowl. Soak a slice of banana bread for about a minute on each side till completely coated.

In the meantime, melt some butter in a skillet (or use oil/butter spray). Add the egg-coated slice of banana bread and cook each side till done and browned.

Serve the french toast with banana slices, pecans or walnuts, whipped cream and of course, a drizzle of maple syrup.

As you can see here, I went a little overboard on the syrup and cream, making this look like a scrumptious ice cream instead, but you get the idea!

Lunchbox Series – Kothu Parotta (Scrambled Spicy Tortilla/Parotta)

A very Happy New Year to all. I know this is a belated wish as with most of my recent posts. I’m not going to start this year with another resolution like last January….resolutions are jinxed, at least mine seem to be:).
Amidst the pick ups and drop offs from school, work and back, its been chaotic. But there is always time for food, lunch box food and otherwise. I try hard to not compromise on that. Its just writing it all down that I find it hard to keep up with. Trust me, I’m trying to get better at it, so hopefully 2011 will be a better year for RKK.

I had not personally tasted Kothu Parotta as it is dished out in the streets of South India, Chennai and south of it. Girish told me about it as he remembers eating it while in college in Chidambaram at the Railway Station. So when our local Indian restaurant (the same one that had Pondicherry Masala Dosa on their menu) had this on their menu, we had to venture out to try it. That was my first taste of Kothu Parotta, probably not close to the authentic street food version, but enough to tantalise my taste buds and try it for myself. A search online led me to Kanchana’s blog “Married to a Desi“, where she tastefully recounts her connection to India after being Married to a Desi, that is. I used regular wheat chapathis here but as she specifies, layered parottas or flaky flat bread will add to the aunthentic taste. I followed her recipe for the most part, and Nikhil loved it for lunch. I added some cucumber
raita as an accompaniment and to cool it down a bit (we like our food spicy if you haven’t figured it out with the extra green chilies in the recipe:)
Ingredients:

  • 2-4 leftover or store bought parottas torn into pieces (if using store bought, use the Malaysian parathas or any parathas with layers)
  • 1 large tomato chopped or 2 small tomatoes
  • 1 red onion chopped
  • 1 tsp turmeric
  • 1 tsp chili powder
  • 2 tsp pav bhaji masala
  • 3 Thai green chili minced
  • 1″ piece ginger minced
  • 1/2 cup chopped cilantro
  • 1 egg beaten (optional)

Method:

Saute the green chilies, ginger, and then onions in oil. Add the turmeric, and chili powder.

Add the tomatoes and cook them until they get mushy. You may also add the salt to make it a little pasty. Add the beaten egg now and mix well till it resembles a scrambled mixture (this step is completely optional as the parotta tastes great even without eggs) Add the pav bhaji masala, and then the parotta and mix. Garnish with cilantro. Serve with a squeeze of lime, and cucumber or onion raitha.

Daring Cook’s Mezze Challenge – Pita Bread & Hummus

The 2010 February Daring COOKs challenge was hosted by Michele of Veggie Num Nums. Michele chose to challenge everyone to make mezze based on various recipes from Claudia Roden, Jeffrey Alford and Naomi Dugid.

As if I didn’t have enough challenges making and posting recipes, I decided to take on one more. But I’ve realized that I need a challenge to get me inspired to do anything. I had step by step instructions to make the dish, but the best part about the challenge was the deadline, so I had no excuses. Or so I thought. I was so fired up that I made them the very next week the challenge was posted. I invited a few friends over and spent 4-5 hours in the kitchen. My mother was there, of course, to help me all the way. What would I do without her help? In fact, I realized after various attempts at rolling out the pita dough that there is a skill to it as well. Amma was able to effortlessly roll them out evenly and sure enough, they puffed up with pockets and all!

The reality of this challenge, however, is that the post was due on Feb. 14th, the day of the “reveal” and I am already a couple of days late posting my first completed Daring Cook’s challenge. I do hope I am within the “grace period” of one week.  I have to admit that I had a lot of fun trying this challenge out. I also bought a pizza stone finally from Williams-Sonoma just to make these pitas. Didn’t I mention that I have expensive hobbies?:)

So I made hummus, baba ghanoush , falafels and of course the pita bread. I also added some olive tapenade and tabouleh to finish the mezze, though these were all optional. Would I do this again? The , falafels, hummus and baba ghanoush…absolutely! The pita bread…umm..I’d rather head to the nearest Mediterranean store. These were a little time-consuming and I don’t think I got it just the way it was supposed to be. It may have been other factors in play, I was using a pizza stone for the first time and I don’t know if it was heated enough, as all the initial batches of pita bread didn’t rise very well. Then of course, the even rolling. When I was almost done with my dough (and Amma gave it a hand), the last few pitas started to rise and puff up really well. That’s probably how long it took for my pizza stone to heat to just the right temperature!

All the same, I was quite satisfied with my first venture at being a “Daring Cook”.

Pita Bread – Recipe adapted from Flatbreads & Flavors by Jeffrey Alford and Naomi Duguid
Prep time: 20 minutes to make, 90 minutes to rise and about 45 minutes to cook

2 teaspoons regular dry yeast (.43 ounces/12.1 grams)
2.5 cups lukewarm water (21 ounces/591 grams)
5-6 cups all-purpose flour (may use a combination of 50% whole wheat and 50% all-purpose, or a combination of alternative flours for gluten free pita) (17.5 -21 ounces/497-596 grams)
1 tablespoon table salt (.50 ounces/15 grams)
2 tablespoons olive oil (.95 ounces/29 ml)

Directions:
1. In a large bread bowl, sprinkle the yeast over the warm water. Stir to dissolve. Stir in 3 cups flour, a cup at a time, and then stir 100 times, about 1 minute, in the same direction to activate the gluten. Let this sponge rest for at least 10 minutes, or as long as 2 hours.
2. Sprinkle the salt over the sponge and stir in the olive oil. Mix well. Add more flour, a cup at a time, until the dough is too stiff to stir. Turn it out onto a lightly floured surface and knead for 8 to 10 minutes, until smooth and elastic. Rinse out the bowl, dry, and lightly oil. Return the dough to the bowl and cover with plastic wrap. Let rise until at least doubled in size, approximately 1 1/2 hours.
3. Place a pizza stone, or two small baking sheets, on the bottom rack of your oven, leaving a 1-inch gap all around between the stone or sheets and the oven walls to allow heat to circulate. Preheat the oven to 450F (230C).
4. Gently punch down the dough. Divide the dough in half, and then set half aside, covered, while you work with the rest. Divide the other half into 8 equal pieces and flatten each piece with lightly floured hands. Roll out each piece to a circle 8 to 9 inches in diameter and less than 1/4 inch thick. Keep the rolled-out breads covered until ready to bake, but do not stack.
5. Place 2 breads, or more if your oven is large enough, on the stone or baking sheets, and bake for 2 to 3 minutes, or until each bread has gone into a full balloon. If for some reason your bread doesn’t puff up, don’t worry it should still taste delicious. Wrap the baked breads together in a large kitchen towel to keep them warm and soft while you bake the remaining rolled-out breads. Then repeat with the rest of the dough.


Hummus – Recipe adapted from The New Book of Middle Eastern Food by Claudia Roden
Prep Time: Hummus can be made in about 15 minutes once the beans are cooked. If you’re using dried beans you need to soak them overnight and then cook them the next day which takes about 90 minutes.

1.5 cups dried chickpeas, soaked in cold water overnight (or substitute well drained canned chickpeas and omit the cooking) (10 ounces/301 grams)
2-2.5 lemons, juiced (3 ounces/89ml)
2-3 garlic cloves, peeled and crushed
a big pinch of salt
4 tablespoons tahini (sesame paste) OR use peanut butter or any other nut butter—feel free to experiment) (1.5 ounces/45 grams)
additional flavorings (optional) I would use about 1/3 cup or a few ounces to start, and add more to taste

Directions:
1. Drain and boil the soaked chickpeas in fresh water for about 1 ½ hours, or until tender. Drain, but reserve the cooking liquid.
2. Puree the beans in a food processor (or you can use a potato masher) adding the cooking water as needed until you have a smooth paste.
3. Add the rest of the ingredients and mix well. Adjust the seasonings to taste.

Falafels – Recipe from Joan Nathan and Epicurious.com
Prep Time: Overnight for dry beans and 1 hour to make Falafels

1 cup dried chickpeas, soaked in cold water overnight OR use well canned drained chickpeas (7 ounces/100 grams)
1/2 large onion (roughly chopped, about 1 cup)
2 tablespoons fresh parsley, chopped OR use a couple pinches of dried parsley (.2 ounces/5 grams)
2 tablespoons fresh cilantro, chopped OR use a couple pinches of dried cilantro (.2 ounces/5 grams)
1 teaspoon table salt (.1 ounce/5 grams)
1 teaspoon dried hot red peppers (cayenne) (.1 ounce/2 grams)
4 whole garlic cloves, peeled
1 teaspoon cumin (.1 ounce/2 grams)
1 teaspoon baking powder (.13 ounces/4 grams)
4 tablespoons all-purpose flour (1 ounce/24 grams) (you may need a bit extra)
tasteless oil for frying (vegetable, canola, peanut, soybean, etc.), you will need enough so that the oil is three inches deep in whatever pan you are using for frying

Directions:
1. Put the chickpeas in a large bowl and add enough cold water to cover them by at least 2 inches. Let soak overnight, and then drain. Or use canned chickpeas, drained.
2. Place the drained, uncooked chickpeas and the onions in the bowl of a food processor fitted with a steel blade. Add the parsley, cilantro, salt, hot pepper, garlic, and cumin. Process until blended but not pureed. If you don’t have a food processor, then feel free to mash this up as smooth as possible by hand.
3. Sprinkle in the baking powder and 4 tablespoons of the flour, and pulse. You want to add enough bulgur or flour so that the dough forms a small ball and no longer sticks to your hands. Turn into a bowl and refrigerate, covered, for several hours.
4. Form the chickpea mixture into balls about the size of walnuts.


5. Heat 3 inches of oil to 375 degrees (190C) in a deep pot or wok and fry 1 ball to test. If it falls apart, add a little flour. Then fry about 6 balls at once for a few minutes on each side, or until golden brown.
6. Drain on paper towels.

Baba Ghanoush:

This recipe is from Anusuya’s kitchen.

Ingredients:

1 eggplant roasted

2-3 green chilies

2 tsp lemon juice

2 garlic pods

a small bunch of parsley

1 tbsp olive oil

1 tbsp tahini paste

1. Roast the eggplant and remove the skin.

2. Grind all the ingredients except eggplant in a blender. Add the roasted eggplant last and blend again. Do not over blend.

3. Garnish with some olive oil and parsley leaves.

Apple Raisin Bread

I suppose I have an expensive hobby. Cooking and blog writing isn’t really expensive I know but in my case, I seem to fall into a lull often. This time my new Vita-Mix got me inspired. Ha, for how long do I hear you all say? Well, let’s not get too cynical . Instead, allow me to share my enthusiasm and the recipe for this apple raisin bread that I baked this Thanksgiving weekend. Happy Thanksgiving everyone! Oh also I’m trying to use my wordpress app on my iPhone as I try to churn recipes and blog entries quickly. So this one comes to you straight from my phone. I know, two new gizmos to get me to get back into RKK mode…this IS an expensive hobby, don’t you think?
One neat and very healthy aspect of this recipe is that it has zero oil, zero butter and uses the natural juices from apples and dry fruits to moisten the batter making this a wholesome and nutritious bread. I’m sure you can make it without a Vita-Mix as well and it must have similar results. Do let me know if you do.

Ingredients:
1 cup whole wheat flour
1/4 cup uncooked rolled oats
1 medium apple quartered
1 thin slice lemon peeled and sliced
2 tbsp water
1 thin slice orange with peel
1/2 cup honey
1/2 tsp ground cinnamon
1/4 tsp salt
1 tsp baking soda
1/4 tsp allspice
1 cup raisins, dates or other dried fruit

Method:
1. Preheat oven to 350F. Spray an 8×8 inch baking pan with cooking spray.
2. Add the wheat flour and oats into the Vita-Mix container and secure the lid.
3. Turn machine on and increase speed to high till the mixture becomes a fine powder.
4. Remove lid and add rest of the ingredients.
5. Turn speed to variable and then to high.
6. Blend for 30 seconds until batter is smooth. Pour into greased pan.

7. Bake for 20-30 mins or until knife inserted comes out clean.

Verdict: The bread turned out quite soft and moist, with just the right amount of sweetness to it. The only thing I would consider adding are some nuts, walnuts or almonds to get the right crunch to it.

Post Navigation