Roz Ka Khana

A blog about everyday food. Mostly Indian. All vegetarian.

Archive for the category “Desserts”

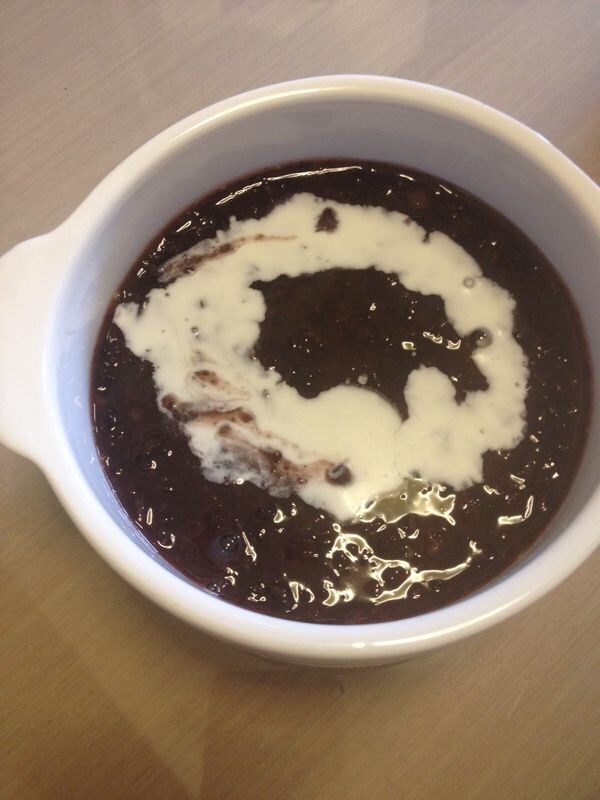
Pulut Hitam – Sticky Black Rice Pudding

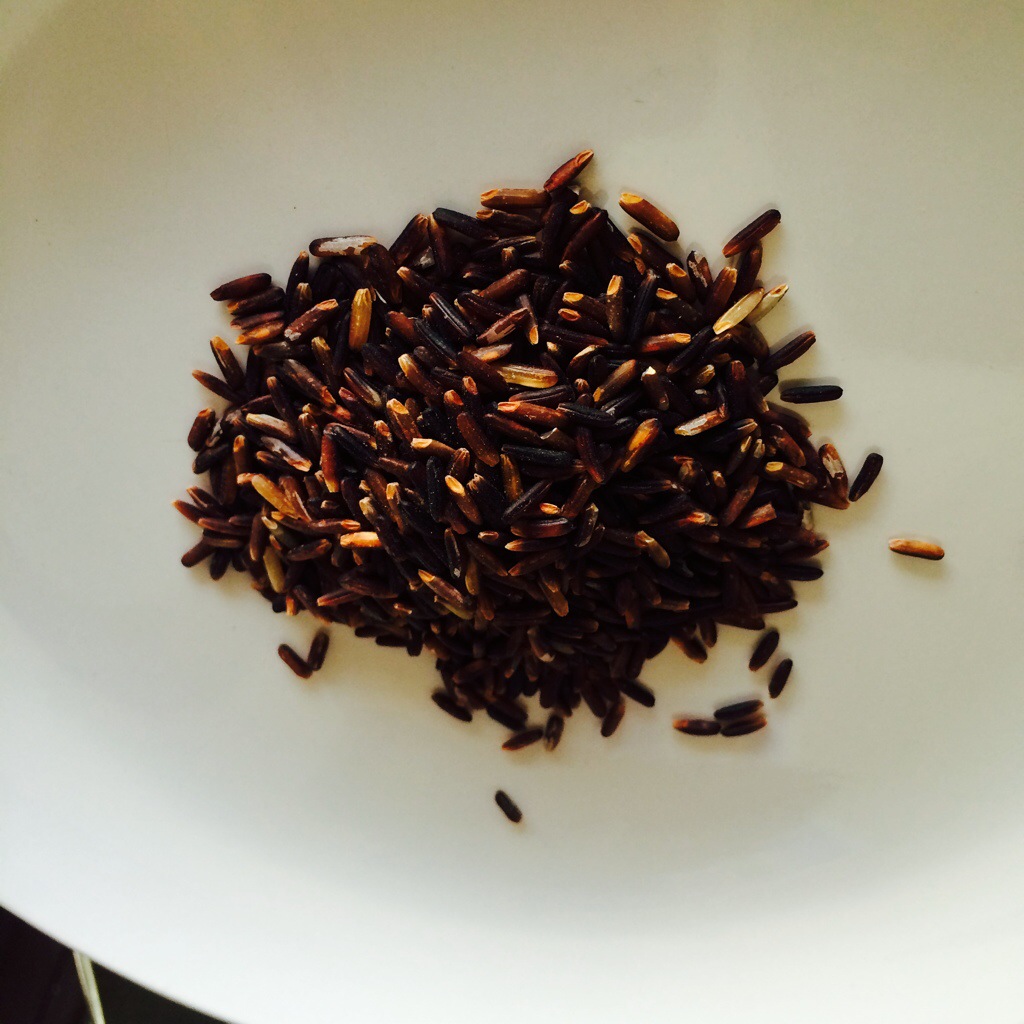
Desserts made with sticky black rice are a specialty of Southeast Asia. This unpolished, short-grain rice is often labeled as glutinous rice, a reference to its consistency when cooked and not to its gluten content. The color isn’t black either, which becomes obvious when you start to wash it. The grains stain the water a deep wine and turn purplish when cooked.

It wasn’t until I started researching black rice that I discovered its health benefits. The pigment comes from anthocyanins, antioxidants found also in purple vegetables and fruits such as beetroot, blackberries, and mangosteen. Besides fiber, black rice is also rich in iron.

I first tasted sweetened black rice as a filling in a dumpling. However, a more popular black rice dessert, especially in Malaysia and Singapore, is pulut hitam (Malay for black glutinous rice), a mélange of the grain, coconut milk, and palm sugar.

This is not your traditional, mushy rice pudding. Black rice is far more assertive – it has a nutty flavor and retains some bite when cooked as the husks are still intact. This also means it requires more water and takes much longer to cook than its polished white counterpart so a bit of planning is necessary. But once you’re done with that stage, the dish requires very little effort.

The other nice thing about pulut hitam is that it allows you to experiment. You can use virtually any type of sugar. I have used the Indian jaggery and brown sugar with equal success. Pandan leaf (screwpine leaf) is the traditional flavoring ingredient but you can add cardamom pods or vanilla. You can also substitute the coconut milk with pouring or whipped cream, fruit puree, or even custard. The dessert pairs well with many fruits. Try mango or banana slices, or lychee for an exotic twist.

Ingredients:

  • 200 g black glutinous rice
  • 200 g palm sugar (gula melaka) or jaggery (unrefined cane sugar), or brown sugar to taste
  • 6-8 cups water
  • Pinch of salt
  • 150 ml coconut milk


Optional

  • Two pandan leaves or three cardamom pods, skinned and crushed
  • Coconut cream and fruits to serve

20140710-094155-34915862.jpg


1. Toast the rice in a frying pan or low oven to bring out the aroma. Wash and soak it for a couple of hours.

2. If you’re cooking the rice on an open fire, cover it with water and bring it to the boil. Add the pandan leaves, turn the heat to low and cook, stirring every now and then and adding more water as necessary until the grains are soft. The process may take 1.5-2 hours. Alternatively, you can use a slow cooker or a pressure cooker, if you have one. I usually let the rice cook overnight in a slow cooker. If you’re using a pressure cooker, allow about 15 minutes.

3. Meanwhile, boil 100 ml water and dissolve the palm sugar or jaggery and a pinch of salt until syrupy. Add the crushed cardamom pods, if using.

4. Stir the syrup into the rice.

4. Add the coconut milk.

5. Swirl some coconut cream on top and serve.

20140710-094155-34915998.jpg


“Best” Brownies from scratch

20131201-110825.jpg

I was looking for a fudgy brownie recipe this weekend. Strangely I’ve never managed to make that perfect brownie – moist, fudgy with that crusty texture on top. The only times I have been successful is when I use boxed mixes but my attempts “from scratch” have always ended up tasting like chocolate cake which as you know is not the same:(.

A brownie is a brownie and a cake is a cake. And a brownie made from a box is not the same as one from scratch – I wouldn’t have said this 5 years ago I know. I’m trying to be more “health conscious”now. No processed foods and mixes. Whatever, you say. These are still quite “sinful” brownies. Okay, I’m not being snooty. But you will agree with me that as you begin to experiment with creations from scratch it is a whole new world out there. It raises the bar. So the perfect brownie from scratch remained an elusive recipe for me.

Until I found this recipe on allrecipes that calls itself “best” brownies. The recipe and video links are easy enough to follow and got me to try them yesterday. These were gone in a day – enough testament that out of 16 brownies I made on Saturday for my son and his friend we had 3 left on Sunday morning with 1 being devoured for breakfast :). “Best brownies” for sure – at least among all the recipes I’ve tried. I modified them a bit to include some organic plain and wholemeal flour, raw cacao powder for cocoa powder and muscavado sugar instead of white sugar and powdered demerara sugar for the icing. I am trying to make them as “healthy”as possible:)

These are not vegan, however and I did use butter and eggs, though I’m sure substituting applesauce instead of butter and flax seed meal for eggs will give you a similar result. I plan to try the vegan version next weekend and will let you know. Note – for the flax seed egg substitute – grind flax seeds to a powder. Use 1 tbsp flax seeds mixed with 3 tbsp water and beat well by hand or in a blender till you get a frothy mixture. This is for 1 egg. and you can double for 2 eggs. Add the frothy mixture instead of the eggs to the batter.

And I also used my own frosting recipe, not the one shown in the link.

Ingredients:

1/2 cup organic unsalted butter

1 cup muscavado sugar (you may also use palm or coconut sugar)

1/2 cup mix of organic all purpose flour and wholemeal flour (you may use 100% of any one flour as well)

2 eggs

1 tsp vanilla extract or 1/2 tsp vanilla bean paste

1/3 cup raw cacao powder (or regular cocoa powder)

1/4 tsp salt

1/4 tsp organic natural baking powder

Frosting:

1/4 cup unsalted butter

3/4 cup confectioner’s sugar or powdered demerara sugar

1/8 cup raw cacao powder

1 tsp vanilla extract

1 tbsp cream or 2 tbsp milk or almond milk

Method:

Here’s the step by step with pictures:

1. Preheat the oven to 175C or 350F. Take the butter in a microwave safe glass bowl. Microwave for 30 seconds till butter completely melts.

20131201-110609.jpg

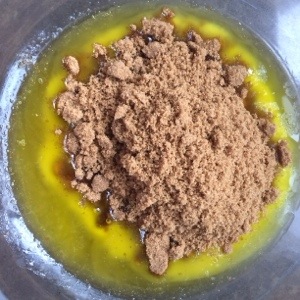
2.Add the muscavado sugar and mix the butter and sugar mixture well with a beater.

20131201-110624.jpg

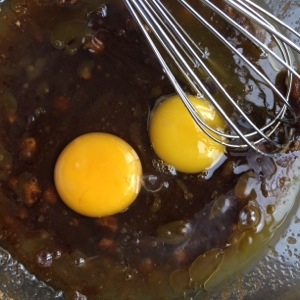
3. Add the 2 eggs. Beat well with the hand beater till you get a homogenous mixture.

20131201-110632.jpg

4. Now add the raw cacao powder. Mix well again.

20131201-110647.jpg

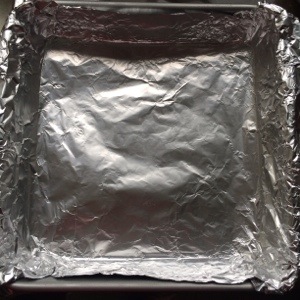
5. Take a 8×8 inch baking pan and line with aluminium foil. Ensure that the foil overhangs from the sides and you can fold over the rim. This step is very helpful when you have to remove the brownies from the pan.

20131201-110655.jpg

6. Pour the prepared brownie batter in the pan.

20131201-110709.jpg

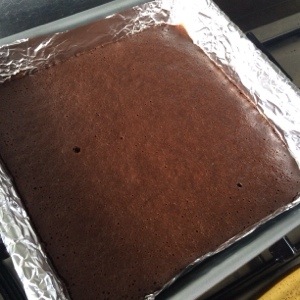
7. Bake at 175C or 350F for 25-30 minutes. Make sure you don’t overcook. You can use the knife test to see if done (should come out clean)

20131201-110722.jpg

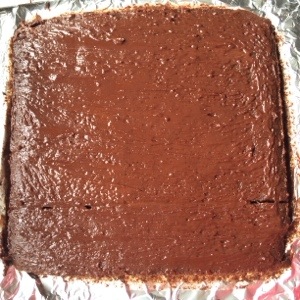
8. Frosting method: In a stand mixer with the paddle attachment or in a food processor or in a large bowl using a hand beater or a wire whisk, cream the butter and stir in the confectioners/powdered sugar and cocoa, mix on low speed and cream again until soft and creamy. Stir in the vanilla extract or other flavouring of choice and beat again for a couple of minutes.This is a flexible recipe and if your icing is stiff add a little more milk, a tablespoon at a time and if your icing is thin, stir in more powdered sugar.

Spread the frosting over the warm brownie with a spoon or spatula.

20131201-110733.jpg

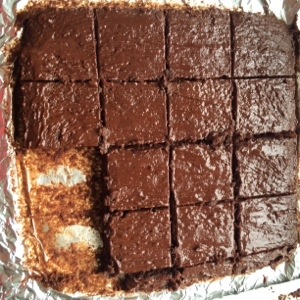
9.Cut into equal squares. Enjoy warm.

20131201-110742.jpg

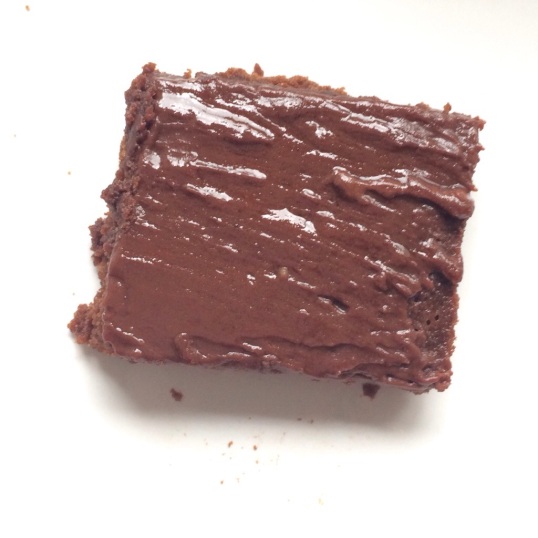
Makes you want to lick the batter and frosting , doesn’t it? Here’s another picture just to add to the food porn:)

20131201-110804.jpg

Navaratri Recipes – Cous Cous Payasam, Easy Sundals, and Quick Ladoos

This is exactly a week late so let’s say this is more of a post Navarathri round up. But you could use these recipes for most festivals so I am classifying these as  Tambrahm (Tamil Brahmin) festival recipes:).

Between the green smoothie frenzy, golu (dolls) exhibits and a real Navarathri schedule, things weren’t just busy – they were chaotic. This was my first year actually celebrating Navarathri traditionally and to be perfectly honest I didn’t know where to begin.

For the uninitiated, Navaratri literally means nine nights and represents a celebration of the Goddess Amba, (the Power). Over the nine days and nights, nine forms of Shakti (the sublime, ultimate, absolute creative energy) are worshipped.

In South India, prayers are offered for the 10 days in honor of the Goddesses Durga, Lakshmi and Saraswathi. There is also the tradition of keeping a “golu”  – an exhibition of various dolls and figurines predominantly of Gods and Goddesses in Indian mythology, placed on odd (usually 3,5, 7, 9, or 11) steps (padis). Girls and married women are usually invited to homes to view the exhibits, and are given vermillion and gifts and a token of the offerings made during the 10 days. This festival symbolizes what I would call a true expression of “girl/woman” power in the Hindu tradition.

As you can tell, a celebration for 9 days and nights needs quite a bit of organization and planning to make it a stress free festival. This year, I was also starting a new job the same week so you can see why I was beginning to obsess about it weeks before it began:)

One phone call to my mother-in law was the antidote. She is by far the most resourceful person I know when it comes to planning for festivals and events. She has always been the  “cook it and leave (the kitchen)” type of person and her secret has been her inimitable way of organizing and planning her schedule. I say “inimitable” as there is no exact science to it – it’s all in her head and still quite well planned:)  She has a simple rule –

  • Start the day before – make a few easy desserts that will last you the 10 days.
  • Keep these desserts for those rushed mornings when you don’t have the time to make neivedyam (offering) from scratch
  • Create a schedule of payasams and quick desserts for the slightly relaxed mornings.

I felt so much better when I spoke to her. But I realized this was going to be an annual routine and I needed to record these somewhere to actually remember the tips. So I created a time table or menu of sorts for Navarathri.  Again, this is probably too late but am sharing it for posterity and for referring back to this next year. Plus these recipes are pretty standard Tamil festival fare, use them for Diwali, Varalakshmi puja,you get the gist:)

Day before Navarathri :

I made these simple rava and Maa laddos. Recipe courtesy – Indra V, my mother-in-law:).

Simple, ghee laden delicacies.The best part, they don’t need any cooking really and last through the 10 days, well refrigerated of course.

Rava and Maa Ladoos:

For Rava Laadoos:

20131018-212452.jpg

  • 1 cup semolina or rava
  • 3/4 cup sugar (I used raw sugar which may make the laadoos light brownish)
  • 1/4 cup ghee or clarified butter
  • 1/2 tsp cardamom powder
  • 1/4 cup broken cashews

Method:

  • In a pan add 1 tsp ghee and roast the cashews till golden brown.
  • Remove the cashews and in the same pan, add the rava and roast till you get a nice aroma. Do not let it change color so ensure you keep stirring for about 5 minutes or so.
  • Let this cool completely.
  • Grind the rava to a fine powder.
  • Grind the sugar to a fine powder.
  • Mix the two in a bowl and add the cardamom powder. Mix well.
  • Transfer this mixture to a wide bowl. Add the remaining melted ghee slowly to this and mix well.
  • The mixture will begin to get a bit sticky like when you add water to sand. Take fistfuls of this mixture and make round balls. If there is enough ghee you will find it easy to make the balls. If not you may add a bit of milk to the mixture to ensure the balls hold together.
  • Allow the ladoos to cool and store in air tight containers.

For Maa Ladoos: (the exact same procedure only the ingredients are slightly different)

Ingredients:

  • Roasted gram dal or pottu kadalai – 1 cup
  • Raw sugar – 1 cup
  • Ghee – 1/4 cup to 1 cup
  • Cardamom powder – 1.2 tsp
  • Cashews, broken – 1/4 cup

20131018-212217.jpg

20131018-212238.jpg

20131018-212252.jpg

20131018-212302.jpg

20131018-212315.jpg

20131018-212330.jpg

You can also make Date Almond Pooran Polis and/or Carrot Coconut Squares the day before.

Day 2 and Day 5:

Cous Cous Payasam

I had never made payasam with cous cous before though the method was the same as any other jaggery based payasam recipes. This one is adapted from Biny’s recipes. Result was a creamy payasam with the right texture and just the right amount of sweetness. You may substitute the cous cous with broken wheat as well to make on another of the days.

Ingredients:

  • Couscous-1cup
  • Jaggery-1cup
  • Coconut milk-1cup
  • Hot boiling water11/2cup
  • Cumin seeds1/2tsp,roasted and crushed
  • Cardamom pods-3,crushed
  • Nuts and raisins-3tbsps
  • Ghee/Butter-2tbsp

Method:

  • 1. Heat about 1 tbsp ghee in a small kadai and when hot add the broken nuts and raisins. Fry till golden brown and keep aside.
  • 2. Take the cous cous in a bowl. Pour some boiling water (1- 1 1/2 cup) on the couscous and close the lid.
  • 3. Take the jaggery in another bowl, add some boiling water (2 tbsp) and heat it on a low flame till the jaggery melts,

20131018-212405.jpg

  • 4. Add the jaggery to the cous cous. Also add the cardamom powder.
  • 5. Heat this mixture on a medium flame. until the cous cous and the jaggery are well mixed and the mixture becomes thick.
  • 6. Turn off the heat. Slowly mix in the coconut milk and mix well.
  • 7. Add the nuts and raisins.

20131018-212435.jpg

You can serve warm or chill in the refrigerator before serving.

Sundal Varieties: 

Sweet Corn Sundal Recipe

20131018-212544.jpg

Ingredients :

  • Sweet corn kernels- 1 cup
  • Grated coconut – 2 tbsp
  • Salt to taste

For the seasoning

  • Oil – 1 tsp
  • Mustard seeds – 1/2 tsp
  • Urad dal  -1/2 tsp
  • Red chilli – 2-3
  • Hing – a pinch
  • Green chilli – 3
  • Curry leaves – a sprig

Method:

  • 1. Microwave or steam the corn with some salt till it is cooked.
  • 2. Heat some oil in a heavy bottom vessel, add mustard seeds. When it begins to splutter, add the urad dal, red chili and asafetida.
  • 3. Now add slit or crushed green chilies and curry leaves.
  • 4. Add the corn and season with salt. Mix well. Garnish with grated coconut, cilantro chopped and some lemon juice if needed.

Peanut sundal:

Ingredients:

  • 1 cup 
Grated Coconut
  • 3-4 thai green chilies
  • 1/2 cup cilantro
  • 2 sprigs curry leaves.
  • 1 inch ginger

For seasoning

  • 1 tsp 
Mustard Seeds
  • 1/2 tsp
 Urad Dhal
  • 2 Dry Red Chilly
  • Curry Leaves – a sprig
  • Asafetida – a pinch
  • Oil – 1 tsp

Method:

  • Pressure cook the nuts with some salt.
  • Grind the coconut, green chili, cilantro, ginger and curry leaves in a blender to a coarse powder.
  • Heat the oil and add the mustard seeds, urad dhal and asafetida.
  • Add the curry leaves, red chili and stir for a minute.
  • Mix in the boiled peanuts and salt and stir well for a few minutes.
  • Add the ground chili coconut powder/paste and mix well. Garnish with cilantro and serve hot.

You can also make black bean sundal the same way as above (use either the corn recipe or the peanut sundal recipe, just substitute the corn with the black beans.

20131018-212508.jpg

Sumathi’s Medley – Easy Gulab Jamuns

IMG_1126

I was introduced to this recipe more than 30 years ago by some good friends in Lagos, Nigeria. These ladies were not only formidable cooks, they were also masters of substitution – they had to be since dinner parties were the chief mode of entertainment and while the markets had plenty of locally grown vegetables and fruit, food stores were rare and supplies, basic. In the eight years we lived in Lagos, I don’t think I ever saw a packet of potato chips. If you craved chips, of any kind, you made your own.

From the vantage point of today, it seems we had an amazingly healthy – and sustainable – diet but back then the difficulty in finding many common food items only increased the determination to find a way to recreate the dishes we could no longer get so easily. I learned many tips, tricks, and shortcuts during those years – my friends were generous with their knowledge and enormously patient – but if I had to pick the one recipe that has worked every time and everywhere, it would have to be the gulab jamun. The traditional way of making these spongy, syrup-soaked balls of fried dough is daunting what with first having to boil milk down to its solid form (khoya).

There is a reason why I call these “easy”. Here, milk powder replaces the milk solids. Give this recipe a try and you’ll be amazed at how incredibly simple the process is – you need no more than 30-40 minutes from start to finish. Do watch the frying though – the oil shouldn’t be too hot or the jamuns won’t cook inside.

The end product is lighter than the traditional jamun but tastes just as good.

Serve the jamuns warm. If you’re not fussed about the calories, add a scoop of ice cream!

Makes 8-10
Syrup:
2 cups sugar
2 ½ cups water
Crushed cardamom seeds (optional)
A pinch of saffron, soaked in a tablespoon of warm water (optional)

Ingredients:
8 tablespoons full-fat milk powder
3 tablespoons self raising flour
¼ tsp baking soda
2-3 tbsps plain yogurt or full-fat milk
1-2 tsps butter or oil or ghee

Method:
1. Boil sugar and water until the mixture reduces a bit and the colour deepens to a pale caramel.
2. Add the crushed cardamom pods and saffron mix, if using.
3. Take the syrup off the flame but make sure it is warm when you add the fried balls to it.
4. Sieve the milk powder, self-raising flour, and baking soda.
5. Add the butter and then the yoghurt, a little at a time, and work the mixture with your hands until it forms a ball. Don’t overmix or you’ll end up with tough jamuns.
6. Heat the oil. If it starts to smoke, switch off the fire to let the temperature drop a bit – the oil should be hot enough so that a piece of bread rises to the top but not so hot that it browns immediately.
7. Break off small lime-sized pieces of dough and roll each between your hands to a smooth, crack-free ball. If the dough feels a bit dry, moisten your hands with some milk before rolling the balls.
IMG_1106
8. Drop the balls in the oil. Turn them often so that they brown evenly.
9. Drain the balls and add them to the warm syrup. Wait for an hour or more for the balls to absorb the syrup and swell.

In honor of Krishna’s Birthday – Nei Appam – An Indian Ebleskiver

20130829-131921.jpgYes I’m talking about the lovable lotus eyed little Krishna or Kutti Krishna, (the Hindu God-child, prankster, divine hero and various other roles he adorns in Indian mythology) whose birthday was celebrated yesterday/today around the world. As I said earlier in this post, I haven’t been one to make elaborate dishes for festivals. Festivals were almost always synonymous to good food, new clothes and most importantly a day off from school. This was when I was growing up, a child, a teenager, a college-goer. While I associated festivals with food it wasn’t about making the dishes- I was always at the receiving end – Amma would make the amazing dishes, arrange for the puja (worship) and I almost always behaved like a guest – in my own home – helping out a bit here and there. Amma would ensure that everything was perfect while I would enjoy the fruits of the perfection. Was something wrong with this picture? Everything possibly.

So for the past year I have been getting more conscious about trying to get a bit more “independent” with festivals and festival creations – more to relive what Amma would typically do or make and to get Nikhil to experience and taste dishes that he wouldn’t get to try on other days of the year.

There is this other deeper probably more meaningful reason that I have begun to explore which is which is the whys of celebrating a Krishna Janmashtami or a Ganesh Chaturthi or a Varalakshmi Vratham (or any religious festival for that matter). I won’t get into each one of them but I do believe that the ultimate goal of all the festivals is the same – they are all reminders to awaken and celebrate the divinity within each one of us. I suppose we all need dedicated days of the year as reminders to look inward and recognize the Krishnas, the Ganesha, the Buddha, Jesus, Allah and (insert religious figure)/the Higher Power in all of us. The ultimate goal is to make everyday a festival – and hopefully by the time we are done celebrating all the festivals over the years, the concept of knowing and celebrating our own divinity will become second nature to all of us.

This does raise other questions about festival food however – why don’t we make these dishes on other days? And why do we only make certain dishes for certain festivals? What is the story behind festival food and prasadams (offerings)? I’m still figuring this out but enjoy eating them whenever they are made, nevertheless:)

Below is the recipe for Nei Appam, a dish made with ghee (Nei) or clarified butter, rice flour and jaggery. This is typically made for Janmashtami (Krishna’s birthday – Janma- on the eighth day of the dark fortnight – ashtami) along with an Aval Payasam (milk dessert made with flattened rice flakes).

I have used an easier method and Amma usually makes this with raw rice instead of rice flour. You can go either route but I liked the way these turned out – crispy on the outside and very soft on the inside. I call these an Indian version of the Danish Ebelskivers as the method is similar and I used the Ebelskiver pan, also called the Paniaram pan in India.

Ingredients:

1 cup brown rice flour ( see picture below). You may alternatively soak some brown rice in water for a half hour then grind to a smooth paste in a blender.

20130829-131906.jpg

1/4 cup all purpose flour

1/4 cup whole wheat flour

3/4 cup jaggery powder (see picture below. You may also grate jaggery if you don’t find jaggery powder but I find this product to be super convenient to dissolve jaggery quickly for dishes)

20130829-131322.jpg

1 ripe banana mashed

1/2 tsp cardamom powder

1/4 cup water

Method:

1. Mix all the flours in a mixing bowl. Add the cardamom powder

20130829-131936.jpg

2. Mash the banana and add to the flours.

20130829-131355.jpg

3. Boil the water in a kettle or in a saucepan. Take about 1/4 cup water and add the jaggery powder in it till it dissolves.

20130829-131334.jpg

20130829-131345.jpg

4. Add this jaggery water mixture to the flour banana mixture. Mix the batter well till lumps dissolve and you get a smooth yet thick and pourable consistency.

5. Set this aside for an hour or so till the batter slightly ferments. You can leave it for 1-2 hours if needed.

6. Add about 1 tsp ghee to each paniaram/ebelskiver mould well and heat it on a low flame.

7. Once the ghee is heated completely and begins to froth a bit, add a tbsp each of the batter in each of the wells. Let it cook for about 3-4 minutes till it begins to rise to the top.

8. Now with the help of a skewer or knitting needle, gently turn the appams over to cook on the other side. (It’s not as oily as it seems in the picture below so let it not scare you:). You don’t need to use that much ghee at all for frying. The ghee tends to froth up as you pour the dough in the wells)

20130829-131411.jpg

9. Cook until both sides are evenly browned. Remove from the ghee and place on a paper towel to drain any excess oil/ghee.

20130829-131928.jpg

A Lebanese feast – Foul Mudamas, Hummus, Baba Ghanouj and Mohalabiya

I have been in that rut again – weeks of travel, adventurous eating, travel bellies – in that particular order – has me battling an ominous backlog of posts and pictures. And just looking at the volume has me wondering where to begin. I’ve had this happen to me before and this is typically how the vicious cycle starts and persists.

I’ve tried a few tactics in the past to get me out of this rut – for one the food events and “We Knead to Bake” deadlines have been an inspiration, but then again, I can’t always use those as crutches – that’s not why I started blogging. The idea was to be more of an daily blog – a somewhat live commentary of my experiments with food. At times I wish I treated this more like a Tumblog, just capturing those key instant moments in time and the food visuals as and when I enjoy them. But somewhere along the way, just like everything else, I get caught up with trying to make it perfect – articulate that story behind that recipe or capture that perfect picture in the right amount of daylight, only to lose sight of the moment and muddle along, getting buried in loads of stories and pictures – somewhat like the mind and the gazillion thoughts that eventually distract me from everything.

And just like that – I feel the need to snap back into the present – time to dust off the baggage and get into more “mindful blogging”. Which does not mean that I will push aside those travelogs and recipes from the past month. It’s just that I will need to learn to start somewhere, catch up and hopefully be more “in the present” with my blogging – and living in general:)

To reminisce the origins of this recipe or this Lebanese feast, flashback to our visit to Bangkok this past May where we visited a popular Lebanese restaurant, Beirut with some friends. This was a mixed bag of sorts – I was meeting a good friend after almost 2 decades, catching up with another relatively new but very good friend and her family and meeting a new acquaintance/friend – all at this dinner:) I have to admit, I was a bit apprehensive on how we would pull this off and ensure that everyone had a good time and was comfortable. Thankfully the food was awesome to break the ice and so was the company. We hit it off like we had known each other for ages.

Thanks M and family – it felt like old times – so happy to reconnect even after all these years, thanks B and family for making it a super fun evening and lastly to our new friends – G & F, great to meet and know you and a big thank you for sharing these cherished and authentic Lebanese recipes from your kitchen.

I tried these recipes as soon as I got home for the next dinner event at our home and they turned out perfect. I had tried hummus and baba ghanouj several times before and the hummus almost always needed something, some oomph:) This was just the right texture, the perfect spice and taste. I made the foul and the mohalabiya for the first time and was quite proud of the results. For those wondering (since this was a mezze platter of sorts), I did try to make the falafels as well and they didn’t turn out just as perfect this time around, so in case you do want to try making falafels along with these dips, you could use this recipe from my previous posts.

Read more…

Raw Almond Milk and Almond Meal recipe — Date Almond Pooran Poli

I did tell you about my fetish for all things juicing didn’t I? It’s become a habit now, starting every single morning breakfast with a fresh squeezed fruit and veggie juice followed by a late morning smoothie. And I pack a mason jar of juice to work as well for that 3pm “juice in leiu of tea” break. It’s working! I don’t feel the need for that cup of chai or joe anymore and the green juice or pomegranate juice does the trick. Fact is, I cannot think of a store bought carton of juice these days…and buying a smoothie at a cafe feels like sacrilege:) The Vitamix and Hurom now occupy a very prime position on my counter in the kitchen. I’m not sure if I can do a 100% raw and vegan diet but I am convinced that eating more raw veggies and fruits gives me that energy boost and keeps me going. So I guess I’m a 50-50 raw vegetarian:)

And so I have tried several juice and smoothie combinations that I hope to post on a more regular basis but something I have been meaning to try with my new juicer was making raw almond milk. Again, thanks to The Rawsome Life, and her inspiring Facebook posts, I finally got around to remembering to soak 1 cup of almonds last week to make fresh almond milk for the next day.

The method was so easy and the Hurom juicer makes it even more effortless. No need to peel the almonds and no need to filter. What you get is creamy, fresh, raw almond milk with powdery, dry almond meal. No mess, no fuss:)

And the best part, it yields almost 3-4 cups of almond milk, not bad for just 1 cup of almonds. And over 1 1/2 cups of almond meal.

As I mentioned earlier I’m also always looking for ideas to deal with juicer pulp. Amma made an amazing carrot, beetroot pulp halwa/barfi dessert the recipe of which I will post soon. With the almond milk, Amma had another brilliant idea. She used some of the almond meal with some dates to make Date Almond Puran Poli (stuffed wheat tortillas or parathas).

Here are the recipes for the above.

Raw Almond Milk:

IMG_0342

Ingredients for almond milk:

1 cup raw almonds (with skin intact)

2-3 cups water.

1 tsp vanilla essence (raw vanilla bean is preferable but I didn’t have that in stock)

1 tsp agave syrup (or any sweetener of your choice. This is optional)

Method:

1. Soak 1 cup of almonds in about 2 cups water overnight.

2. The next morning, discard the water and add another 2 cups of fresh water.

3. Turn the juicer on and pour a ladle of almonds and water into it. Continue till all the almonds are ground.

4. Add the vanilla essence and any sweetener of your choice and stir well. Fresh almond milk is ready to serve!

IMG_0344

Note – You can choose to peel the almonds as well. The skin will peel right off when you soak the almonds overnight. If not, you can also add some warm water in the morning and this will help peel the skin off.

You may also use the Vitamix blender to make fresh almond milk. Again peeling the almonds is preferable here.

You may also choose to filter the almond milk using a cheese cloth or milk strainer. I liked mine just the way it was as it gave a thicker creamier consistency.

Almond Meal Recipe – Date Almond Pooran Poli

IMG_0356


1 cup almond meal

1/2 cup dates

1 tbsp ghee or clarified butter

1/4 cup wheat flour

1/4 cup all purpose flour

Salt to taste

Water 1/2 cup

Oil – 2 tsp

Method:

1. Take the almond meal and dates in a Vitamix jar and blend with Variable speed. use the tamper to mix the ingredients until the mixture resembles a coarse paste. Set this aside.

IMG_0345

2. Now take a heavy bottom vessel and add 1 tbsp ghee to coat the sides of the pan.

2. Add the almond date mixture and heat for a few minutes, keep stirring in the pan until the mixture starts to concentrate in the center, and doesn’t stick much to the sides or the ladle.

IMG_0348

IMG_0349

3. Meanwhile, mix the wheat and all purpose flour in a mixing bowl, add salt and then add water and oil little by little until it forms a dough much like chapathi dough. Doesn’t stick to your fingers and is easy to pinch and form round balls.

4. Pinch of a piece of dough and make round balls about an inch to 1 1/2″ in diameter. This mixture should make about 6-8 pooran polis.

5. If the almond date mixture is cool enough, make small round balls (about 1/2-1″ in diameter depending on how big you want your polis) and keep aside.

6. Take a rolling pin and roll the balls into small flat tortilla shapes or rotis.

7. Place one small round of the almond date ball in the center of the small chapati and close the dough around it to form a roundish shape. Seal the edges.

8. Now take the almond date stuffed dough rounds and using wheat flour to dust the surface and a rolling pin, roll out the dough into circles about 3-4″ in diameter. The chapathis or polis should be thin enough but ensure that the stuffing doesn’t start to seep out too much.

10. Preheat a frying pan, place the poli on it, switch to low heat and cook on one side for 1 -2 minutes. Flip over and cook the other side till lightly browned. Apply a little ghee (optional) on both sides and remove immediately.

Note: If you’d like you may also add about a tbsp of Demerara or brown sugar to the date mixture, if you like your polis sweeter. We opted not to just to keep sugar out of this recipe:)

Creepy Cupcakes for Halloween

As you can see, I’m getting into a cupcake frenzy. My latest challenge was to bake some cupcakes for a Halloween party at school. I’d seen this picture of a Creepy Medusa Cupcake in a magazine and Nikhil promised to help me make them. Of course he helped me pile the sour gummies on the cupcake and in his mouth:)

I needed a recipe for a perfect vanilla cupcake to begin with. Looking around, I found Glorious Treats and realized she was not only good at cupcake making but at search marketing too:) Only someone with that knowledge would title her recipe “Perfect Vanilla Cupcakes” to be found by amateurs like me:). She had tried every version of vanilla cupcakes there were and her story sounded so familiar to my cupcake wars that I had to try this recipe.

And I have to hand it to her. These cupcakes were the perfect-est, moist-est, soft-est I have ever made. Great recipe for a base vanilla cupcake to be used with any frosting.

Savory Sweet Life had this recipe for chocolate butercream frosting that I used for this recipe. I used store bought sour gummies, cut them into thin strips and piled them on top of the frosted cupcakes. I then added a googly eye which was the only non-edible piece of this cupcake. If I’d had a little more time, I would have used black and white edible frosting or edible gum to make shapes for the eyes.

The cupcakes looked creepy enough on the Halloween snack table for the 5th graders to get to try them. It felt so satisfying see them devour the gummies before they wiped off the cupcakes. The best compliment I received was from a cheery 5th grader who told me these were “the best he’d had” and that I should write a book on cupcakes:)

Thank you Cooper for your confidence after just one cupcake. About that book – I’ll get right on it, and you will be my taster. Deal?:)

Ingredients (for 15 cupcakes) – I made 30 of them so just doubled the measures

1 1/4 cups cake flour

1 1/4 teaspoons baking powder

1/2 teaspoon baking soda

1/2 teaspoon salt

2 eggs

3/4 cup sugar

1 1/2 teaspoons pure vanilla extract

1/2 cup oil (vegetable, canola or extra light olive oil)

1/2 cup buttermilk (or 1/2 cup milk plus 1/2 teaspoon white vinegar or lemon juice- add acid to the milk then set aside for 5 minutes before using)

Method:

1. Preheat oven to 350*F.

2. In a medium bowl, add cake flour, baking powder, baking soda and salt.  Stir together with whisk, and set aside.

3. In the bowl of an electric mixer, add eggs and beat 10-20 seconds.  Add sugar and continue to beat on medium speed about 30 seconds.  Add vanilla and oil, beat.

4. Reduce mixer speed to low and slowly add about half of the flour mixture.  Add half of the milk, then the rest of the flour and the rest of the milk.  Beat until just combined.  Scrap down the side of the bowl.

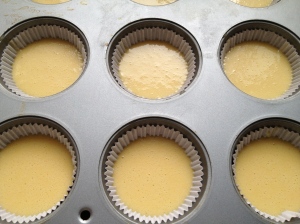
5. The batter will be thin.   Pour batter into a muffin pan prepared with paper liners.  Fill liners about 2/3 full.

6. Bake cupcakes in pre-heated oven for 15 minutes.

7. Cool in pan 1-2 minutes, then remove cupcakes from pan (carefully) and finish cooling on a wire rack.

8. Frost as desired when fully cool.

Recipe for chocolate buttercream frosting : (adapted from Savory Sweet LIfe’s blog)

Ingredients

  • 1 cup unsalted butter (2 sticks or 1/2 pound), softened (but not melted!)
  • 3 1/2 cups confectioners (powdered) sugar
  • 1/2 cup cocoa powder
  • 1/2 teaspoon table salt
  • 2 teaspoons vanilla extract or 1 teaspoon almond extract
  • 4 tablespoons milk or heavy cream
Method:
  1. Cream butter for a few minutes in a mixer with the paddle attachment on medium speed. Turn off the mixer.
  2. Sift 3 cups powdered sugar and cocoa into the mixing bowl. Turn your mixer on the lowest speed (so the dry ingredients do not blow everywhere) until the sugar and cocoa are absorbed by the butter.
  3. Increase mixer speed to medium and add vanilla extract, salt, and milk/cream and beat for 3 minutes.
  4. If your frosting needs a more stiff consistency, add a little more sugar. If your frosting needs to be thinned out, add additional milk 1 tablespoon at a time.

Red Velvet Cupcakes – A special October Birthday.

20121008-180724.jpg

October is a special month. We have quite a few friends and family who are October babies but it is a special month for a very special reason. Eleven years ago, at 11.25pm to be exact, we welcomed our wide eyed, curious, kicking and (not screaming but) sprightly bundle of joy into this world. And eleven years later, he is still our wide eyed, curious, and yes, still kicking (in his sleep:) and very sprightly tween-ager. And of course he is and will always be the brightest moment in our life – our bundle of joy. Happy Birthday Nikhil!!

I made these red velvet cupcakes last night at Nikhil’s request. The original request was a bundt cake which is his all time favorite cake but was modified to cupcakes for ease with doling them out as treats for school. Will have to try these again for the bundt cake. This recipe is adapted from Simply Recipe’s blog. I followed the recipe for the most part except for using buttermilk and used the adapted suggestion for making buttermilk.

Ingredients:

  • 1 1/2 cups of sugar
  • 1/2 cup (1 stick) of butter, room temperature
  • 2 eggs, room temperature
  • 2 1/3 cups of cake flour
  • 2 tablespoons of Dutch-processed cocoa powder
  • 1 teaspoon of baking soda
  • 1 teaspoon of baking powder
  • 1/2 teaspoon of salt
  • 1 cup of milk mixed with 1 tbsp of white vinegar (let it stand for 10 minutes)
  • 1 1/2 tablespoons of red food coloring (I would use upto 2 tbsp, the batter should be quite a brightish red)
  • 1 teaspoon of vanilla extract
  • 1 teaspoon of distilled white vinegar

For the Cream Cheese icing:

  • 1/2 cup of butter (1 stick), room temperature
  • 1/2 packet of Philly cream cheese softened
  • 2 – 3 cups of powdered sugar
  • 1 teaspoon of vanilla extract

Method for the Cupcakes:

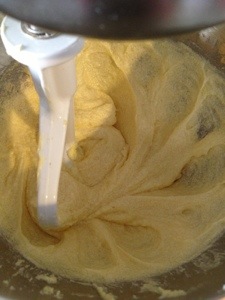
1. Preheat the oven to 350°F or 170C. Beat the butter and sugar in an electric mixer for 3 minutes on medium speed until light and fluffy.

20121008-180633.jpg

2 . Add the eggs, one at a time, beating until fully mixed. Use a spatula to scrape down the sides of the bowl to ensure even mixing.

3. In a large bowl, sift together the cake flour, cocoa powder, baking soda, baking powder, and salt.

4. In another bowl whisk together the milk/vinegar mixture, vinegar, vanilla extract, and red food coloring.

5. Add the dry ingredients to the butter/sugar/egg mixture in the mixer. Use the mixer to stir the ingredients. Now add the red colored wet mixture. Continue adding in a dry, wet, dry pattern, ending with the dry ingredients. You should get a brightish red colored batter as a result.

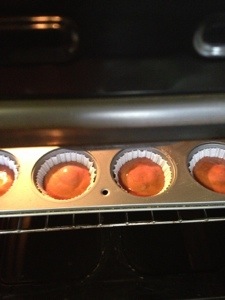
6. Scoop into cupcake papers, about 1/2 to 2/3 of the way full. Bake for 18-22 minutes or until a toothpick comes out clean. Rotate the pan after the first 15 minutes of baking to ensure even baking.

20121008-180657.jpg

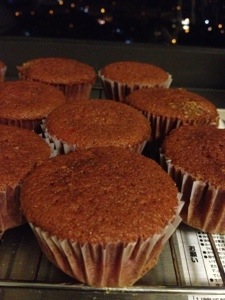
6 Allow to cool for one minute in the pan then transfer to a wire rack to cool completely. (see how the color looks more like chocolate cupcakes rather than red velvet. While some of it is the lighting, they could use more food color.)

20121008-180716.jpg

Method for the Cream Cheese Icing

1 Cream the butter and cream cheese together, about 3 minutes. Use a spatula to scrape down the sides and bottom of the bowl to ensure even mixing.

2 Add the vanilla extract and mix.

3 Add the powdered sugar, continually taste to get to desired sweetness. Pipe onto cooled cupcakes.

Verdict : The foodie/critic that Nikhil is – he had one look at the cupcakes coming out of the oven and told me exactly what may be missing:) The red food color could have been a little more. (reason for my updated notes in the ingredients. Use 2 tbsp instead of 1 1/2). The cupcakes came out very moist and flavorful though, one of the better cupcakes I have made in a while and the taste was perfect. Overall a keeper recipe.

A very Happy Birthday to all other October babies in the family – these cupcakes are for each one of you:)

I would like to know if there is an alternative to using  food color in this recipe. Part of my hesitation to add more color was the aversion to using a dye, especially given this recipe already has enough butter and cream cheese and is not exactly what you would call a healthy recipe:). Any suggestions for a low fat no dye red velvet recipe out there?


Daring Baker’s Challenge – Orange Tian

To be very honest, I had not heard of a “Tian” until now. That’s the beauty of the challenges that are dished out of the Daring Kitchen, I suppose. This is my second month on the challenge, but the first one that I’m actually posting.The first challenge was Tiramisu, that somehow eluded me, or I avoided it, however you want to put it:) These challenges are quite complicated (duh!) , and though I’m glad I finished it this month, I’m not sure I would necessarily make it again, at least not the same complicated steps.

The tian was quite delicious, don’t get me wrong, but I think the same orange cream pie/creamsicle taste could have been achieved via a recipe that took half the time. At least, that was my immediate reaction after I tasted it.

The 2010 March Daring Baker’s challenge was hosted by Jennifer of Chocolate Shavings. She chose Orange Tian as the challenge for this month, a dessert based on a recipe from Alain Ducasse’s Cooking School in Paris. These were the variations/conditions of the challenge-
Variations allowed:
* You can choose to serve the dessert ‘family-style’ and don’t have to make it in individual portions. (This is how I made it)
* You can use your favorite “Pate Sablee” recipe if you have one, but it must be a pate sablee
* You can add any additional flavoring to your whipped cream
* You can play with different citrus in this dessert (grapefruit, blood orange, lemon) at any step in the recipe.
* However, you must make the tart dough, the whipped cream, the caramel sauce, citrus segments and marmalade.

I ended up making everything on the same day which didn’t help. By the time I was done and put the Tian in the freezer, it was close to midnight . I will suggest that you make the marmalade, caramel sauce and the pate sablee a day ahead and the whipped cream the next day, so you can assemble the dessert and leave it in the freezer overnight. Then put it out to thaw in the refrigerator the next day and possibly out at room temperature about 2 hours prior to serving.Mine was probably in the fridge too long as the base was still a little frozen when I served it to my guests. When I ate it the next day, it felt perfect but I’d already made an impression (not the right kind) on my 30 guests who tried to eat it with a fork at first and eventually had to pick it up with their fingers to eat it like a scone with whipped cream on top!

Well, on  a positive note, I learnt how to make marmalade that turned out perfect and I survived my first Daring Baker’s Challenge . April DBC, here I come!

For the Pate Sablee:

Ingredients U.S. Imperial Metric Instructions for Ingredients
2 medium-sized egg yolks at room temperature
6 tablespoons + 1 teaspoon granulated sugar 2.8 oz; 80 grams
½ teaspoon vanilla extract
¼ cup + 3 tablespoons Unsalted butter 3.5 oz; 100 grams ice cold, cubed
1/3 teaspoon Salt 2 grams
1.5 cup + 2 tablespoons All-purpose flour 7 oz; 200 grams
1 teaspoon baking powder 4 grams

Directions:
Put the flour, baking powder, ice cold cubed butter and salt in a food processor fitted with a steel blade.

In a separate bowl, add the eggs yolks, vanilla extract and sugar and beat with a whisk until the mixture is pale. Pour the egg mixture in the food processor.

Process until the dough just comes together. If you find that the dough is still a little too crumbly to come together, add a couple drops of water and process again to form a homogeneous ball of dough. Form into a disc, cover with plastic wrap and leave to rest in the fridge for 30 minutes.
Preheat your oven to 350 degree Fahrenheit.

Roll out the dough onto a lightly floured surface until you obtain a ¼ inch thick circle.

Place a parchment (or silicone) lined baking sheet inside a round cake tin or a springform pan. Place the dough on the paper and bake for 20 minutes or until the edges start to get golden.

For the Marmalade:

Ingredients
Freshly pressed orange juice ¼ cup + 3 tablespoons; 3.5 oz; 100 grams
1 large orange used to make orange slices
cold water to cook the orange slices
pectin 5 grams
granulated sugar: use the same weight as the weight of orange slices once they are cooked

Finely slice the orange. Place the orange slices in a medium-sized pot filled with cold water. Simmer for about 10 minutes, discard the water, re-fill with cold water and blanch the oranges for another 10 minutes.

Blanch the orange slices 3 times. This process removes the bitterness from the orange peel, so it is essential to use a new batch of cold water every time when you blanch the slices.

Once blanched 3 times, drain the slices and let them cool.

Once they are cool enough to handle, finely mince them (using a knife or a food processor).

Weigh the slices and use the same amount of granulated sugar . If you don’t have a scale, you can place the slices in a cup measure and use the same amount of sugar.

In a pot over medium heat, add the minced orange slices, the sugar you just weighed, the orange juice and the pectin. Cook until the mixture reaches a jam consistency (10-15 minutes).

Transfer to a bowl, cover with plastic wrap and put in the fridge.

For the Orange Segments:

For this step you will need 8 oranges.

Cut the oranges into segments over a shallow bowl and make sure to keep the juice. Add the segments to the bowl with the juice.

[See YouTube video in the References section below for additional information on segmenting oranges.]

For the Caramel:

Ingredients :
granulated sugar 1 cup; 7 oz; 200 grams
orange juice 1.5 cups + 2 tablespoons; 14 oz; 400 grams

Place the sugar in a pan on medium heat and begin heating it.

Once the sugar starts to bubble and foam, slowly add the orange juice. As soon as the mixture starts boiling, remove from the heat and pour half of the mixture over the orange segments.

Reserve the other half of the caramel mixture in a small bowl — you will use this later to spoon over the finished dessert. When the dessert is assembled and setting in the freezer, heat the kept caramel sauce in a small saucepan over low heat until it thickens and just coats the back of a spoon (about 10 minutes). You can then spoon it over the orange tians.

[Tip: Be very careful when making the caramel — if you have never made caramel before, I would suggest making this step while you don’t have to worry about anything else. Bubbling sugar is extremely, extremely hot, so make sure you have a bowl of ice cold water in the kitchen in case anyone gets burnt!]

For the Whipped Cream:

Ingredients :
heavy whipping cream 1 cup; 7 oz; 200 grams
3 tablespoons of hot water
1 tsp vegetarian Gelatine (I bought this at Whole Foods and it’s called vegetarian jello. You may also use agar agar)
1 tablespoon of confectioner’s sugar
orange marmalade (see recipe above) 1 tablespoon

In a small bowl, add the gelatine and hot water, stirring well until the gelatine dissolves. Let the gelatine cool to room temperature while you make the whipped cream. Combine the cream in a chilled mixing bowl. Whip the cream using a hand mixer on low speed until the cream starts to thicken for about one minute. Add the confectioner sugar. Increase the speed to medium-high. Whip the cream until the beaters leave visible (but not lasting) trails in the cream, then add the cooled gelatine slowly while beating continuously. Continue whipping until the cream is light and fluffy and forms soft peaks. Transfer the whipped cream to a bowl and fold in the orange marmalade.
[Tip: Use an ice cold bowl to make the whipped cream in. You can do this by putting your mixing bowl, cream and beater in the fridge for 20 minutes prior to whipping the cream.]

Assembling the Dessert:

Make sure you have some room in your freezer. Ideally, you should be able to fit a small baking sheet or tray of desserts to set in the freezer.

Line a small tray or baking sheet with parchment paper or a silicone sheet. Lay out a springform pan onto the parchment paper/silicone.

Drain the orange segments on a kitchen towel.

Have the marmalade, whipped cream and baked circle of dough ready to use.

Arrange the orange segments at the bottom of the springform pan. Make sure the segments all touch either and that there are no gaps. Make sure they fit snugly and look pretty as they will end up being the top of the dessert. Arrange them as you would sliced apples when making an apple tart.

Once you have neatly arranged one layer of orange segments at the bottom of the pan, add a couple spoonfuls of whipped cream and gently spread it so that it fills the cpan in an even layer. Leave about 1/4 inch at the top so there is room for dough circle.

Using a butter knife or small spoon, spread a small even layer of orange marmalade on the circle of dough.

Carefully place the circle of dough over each ring (the side of dough covered in marmalade should be the side touching the whipping cream). Gently press on the circle of dough to make sure the dessert is compact.

Place the dessert to set in the freezer to set for 10 minutes to overnight.

Using a small knife, gently go around the edges of the cookie cutter to make sure the dessert will be easy to unmold. Gently place your serving plate on top of a dessert (on top of the circle of dough) and turn the plate over. Gently remove the cookie cutter, add a spoonful of caramel sauce and serve immediately.

Resources:

http://www.wisegeek.com/what-is-a-tian.htm(An article about the dessert known as tian.)

YouTube link on how to segment an orange: http://www.youtube.com/watch?v=ZG5mcEEBlcI

To learn more about Pectin: http://en.wikipedia.org/wiki/Pectin

What to substitute for Pectin: http://www.gourmetsleuth.com/Dictionary/P/Pectin-6222.aspx
Post Navigation