Roz Ka Khana

A blog about everyday food. Mostly Indian. All vegetarian.

Archive for the category “Comfort Food”

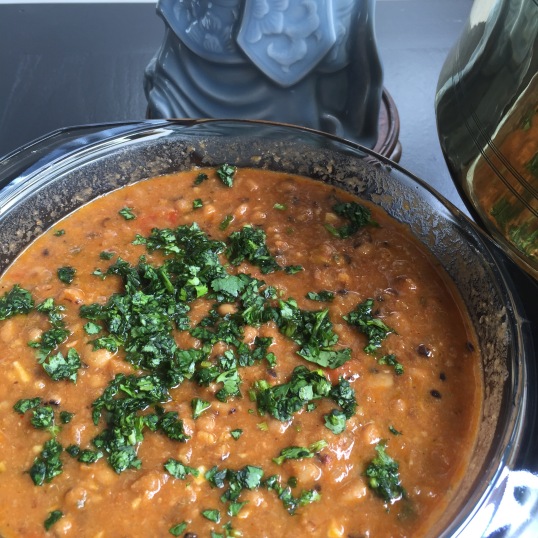
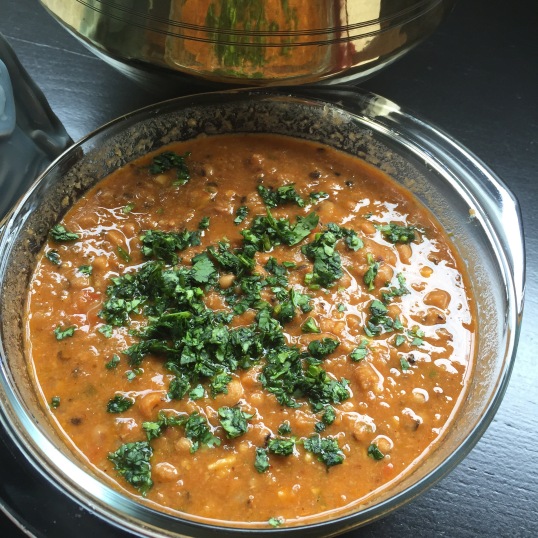
Black-Eyed Beans (Lobhia) with Tomatoes

IMG_1673

This recipe has universal appeal because it blends techniques and tastes that are popular across cuisines. The dish pairs as well with a crusty batard or flat bread as with steamed rice and because it uses so few ingredients, is a breeze to put together.

The only mildly challenging part is cooking the dried black-eyed beans, or lobhia as they are called in Hindi. You’ll have to soak the beans in water first and allow for some generous cooking time. Of course, you could always use canned black-eyed beans, in which case this will be ready in a jiffy.

The dish improves with keeping so it’s a perfect make-ahead if you’re planning to entertain.

You could serve it on its own with tortillas and french bread or you could add some cheese and pop it under a hot grill before bringing it to the table. Alternately, top the dish with some roasted bell peppers or lightly sautéed strips of capsicum.

Ingredients:

Serves 2-3

  • 1 cup dried black eyed beans or two 410g (14 oz) cans of cooked beans
  • Onion – 2 medium, finely chopped
  • Tomato – 4 medium, skinned and finely chopped, or a can of peeled tomatoes, drained and chopped
  • Garlic – 4-5 cloves, finely minced
  • Cumin seeds – 1 tsp
  • Chilli powder or minced fresh green chillies (optional, to taste)
  • Garam masala – ½ tsp (optional)
  • Olive oil
  • Salt as needed
  • Butter (optional)

Method:

  • Soak the beans in water for about four hours.
  • Rinse, cover with plenty of water, and bring to a boil. Lower the flame and let the beans cook, stirring occasionally and adding more water so that there is always an inch of liquid above the beans. This could take about an hour and a half or slightly longer. Alternately, if you have a pressure cooker, cook the beans for about 10 minutes under pressure. Do not discard any excess water. If you are using canned beans, rinse thoroughly under running water and drain.
  • Mash a few cooked beans to thicken the gravy.
  • Heat the olive oil in a wok or pan and when hot add the cumin seeds and let them sizzle for a second or two.
  • Add the finely minced garlic cloves and fry for a few seconds.
  • Add the onion and fry on medium heat for about five minutes until they start to change color.
  • Add the fresh or canned chopped tomatoes and fry until the moisture evaporates and the mixture is homogenous.
  • Add the chilli powder and garam masala, if using, and fry for a few seconds.
  • Add the cooked beans, salt and some water if necessary, cook for about 10-15 minutes until the mixture thickens.
  • Add pats of butter and serve.

IMG_1675

A Week of Rasams – Recipes for Garlic Rasam and Lemon Rasam

After a bustling festive season it’s “Rasam Week” at our home. As I’ve mentioned here in my very first post, Rasam is one of our ultimate comfort foods. It’s the dish we turn to when we crave a home cooked meal, the dish we make when we want to “detox” and the one we cook as an accompaniment for a traditional South Indian occasion. Rasam is quite the ubiquitous and well loved South Indian dish. Typically a clear broth spiced with different flavors, rasam is another word for juice or shall we say the essence of all South Indian food:)

It was Girish’s turn to plan the weekly menu since he is home for a full week after ages. And here’s what his menu looked like.

South Indian style oatmeal for breakfast and Rasam for dinner. Every. Single. Day. 🙂

Yes I am married to someone who can eat the same thing for days – thank heavens. As long as it’s one of his favorite dishes.
Makes it easy for planning and cooking so let’s be immensely grateful for that shall we?:) Here’s to someone who is fuss free when it comes to meal planning. I repeat, as long as it’s one of his choice dishes. He is still quite the food critic so let me just say it’s safest to stick with the requested menu:)

So I thought I would chronicle the types of rasams while I was at it. The garlic rasam is a house favorite and is exactly the way my mother in law (the queen of rasams in the family) makes it. Also one of Nikhil’s favorite dishes and a common request from him when he craves Indian comfort food.

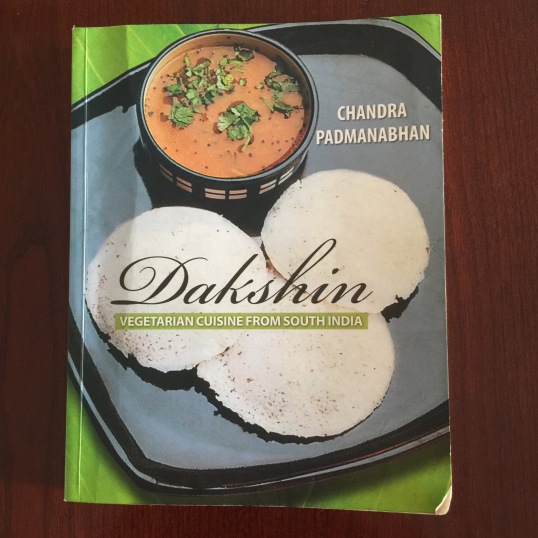
The lemon rasam recipe is adapted from Chandra Padmanabhan’s cookbook “Dakshin“. I have tried making lemon rasam many times before but I found this method to be the best. I suppose the garnish of crushed black pepper and cumin topped with lemon is what adds to this rasam’s burst of flavor. Whatever the type of rasam, it’s best enjoyed with some hot (white or brown) rice, a dollop of fresh ghee and some cooked dry vegetable as a side. We love urulai roast (roasted potato), the way Amma makes it though you could try this one (Chettinad urulai roast) and the cauliflower fry as a yum side too.

Recipe for Garlic Rasam:

IMG_0468

Ingredients: (for 4)

  • Garlic cloves – 3 big or 4-5 small
  • Cilantro – a small bunch plus 1/4 cup chopped leaves
  • Black pepper – 3/4 tsp
  • Cumin seeds – 1 tsp
  • Tamarind – a small line sized ballGarlic rasam powder (store bought) – 1 tsp (you may also use regular rasam powder)

For tempering:

  • Ghee – 2 tsp
  • Mustard seeds – 1 tsp
  • Cumin seeds – 1/2 tsp
  • Curry leaves – a sprig
  • Dry red Arbol chili – 1
  • Garlic – 1 chopped fine.

Method:
1. Soak the tamarind in warm water for about 5 minutes till it softens. Make a pulp of the tamarind, strain out any fibres or seeds and add enough water to make about 1 1/4 cups of tamarind pulp. (more than what you see in the picture.)

IMG_0054

2. Take the garlic pods, the cilantro bunch, black pepper and cumin seeds in a blender, with a tbsp of water and grind to a fine paste.

IMG_0066
3. Take the tamarind water in a heavy vessel (I use a special vessel called Iyya Chombu – made of an alloy of metals- used to make rasams traditionally.)

IMG_0053

4. Add the rasam powder, half of the cilantro and let the mixture come to a slow boil on a medium flame. This will take about 5-7 minutes, till the raw smell of the tamarind and the rasam powder goes away.

5. Now add the garlic pepper cumin paste to the tamarind water. You may add another 1/2 to 3/4 cup of water here. Add salt. I usually taste at this stage to check for salt/sourness etc. Adjust with water, salt accordingly.

6. Let the mixture boil for about 5-7 minutes till the raw garlic smell goes away.

7. Add chopped cilantro, and let simmer for another 2-3 minutes.

8. Heat about 2 tsp ghee (clarified butter or brown butter) in a small pan. Add the mustard seeds when ghee is hot. After they splutter add the cumin seeds, red chili and curry leaves. Add the chopped garlic. Saute for a minute, and then add the tempering to the rasam. Cover the rasam with a lid until you are ready to serve, This keeps the flavors of the tempering (tadka/popu/talithaal/chonk/bagar) intact and lets them infuse in the rasam.

Enjoy with hot rice, a dollop of ghee and the vegetable side dish of your choice. Divine.


Recipe for Lemon Rasam (didn’t click the pictures in time for this one but will add them eventually;)

Ingredients :

  • 1/4 cup toor dal cooked
  • 3/4 cup vine ripe cherry tomatoes chopped (I find cherry tomatoes give the best flavor though you can use vine ripe regular tomatoes as well)
  • Juice of 1 big lemon
  • a small bunch of cilantro, chopped
  • 1 ” piece ginger grated
  • 4 green chilies
  • 1/2 tsp cumin seeds
  • 3/4 tsp black peppercorns
  • salt to taste
  • 1/2 tsp turmeric powder
  • 3/4 tsp rasam powder

For tempering:

  • 2 tsp ghee
  • 1 tsp mustard seeds
  • 1/2 tsp asafetida
  • 1 dry red arbol chile
  • a sprig of curry leaves

Method:

  1. Take the ginger and green chilies in a small blender and blend to a smooth paste.
  2. Powder the cumin seeds and black peppercorn in a coffee grinder or mortal pestle. I prefer this to be a smooth powder too though you may grind it to a coarse powder if you like the texture in the rasam.
  3. Take the cooked dal in the iyya chombu, add about 1 1/2 cups of water, salt, turmeric powder. You may add more water depending on the taste. Adjust salt accrodingly.
  4. Add the tomatoes and the ginger chile paste to the mixture. I also add the rasam powder at this time. Sprinkle some chopped cilantro. Let the mixture come to a slow boil, until the raw smell of the rasam powder and tomatoes are boiled away. (Rasam powder is optional, I add  a small amount just for the flavor, but you can get by without it).
  5. Now heat the ghee in a separate pan, add all the ingredients for the tempering. Add 1 tsp of the powdered cumin-black pepper powder to the ghee and then turn off the heat. Add the tempering to the rasam.
  6. Add the lemon juice to the rasam and mix. Garnish with more chopped cilantro.

IMG_0477.JPG

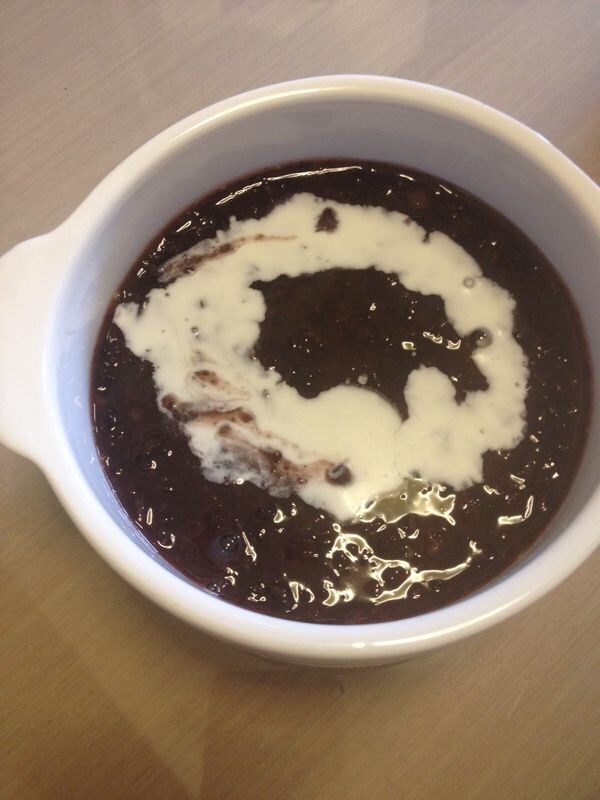
Pulut Hitam – Sticky Black Rice Pudding

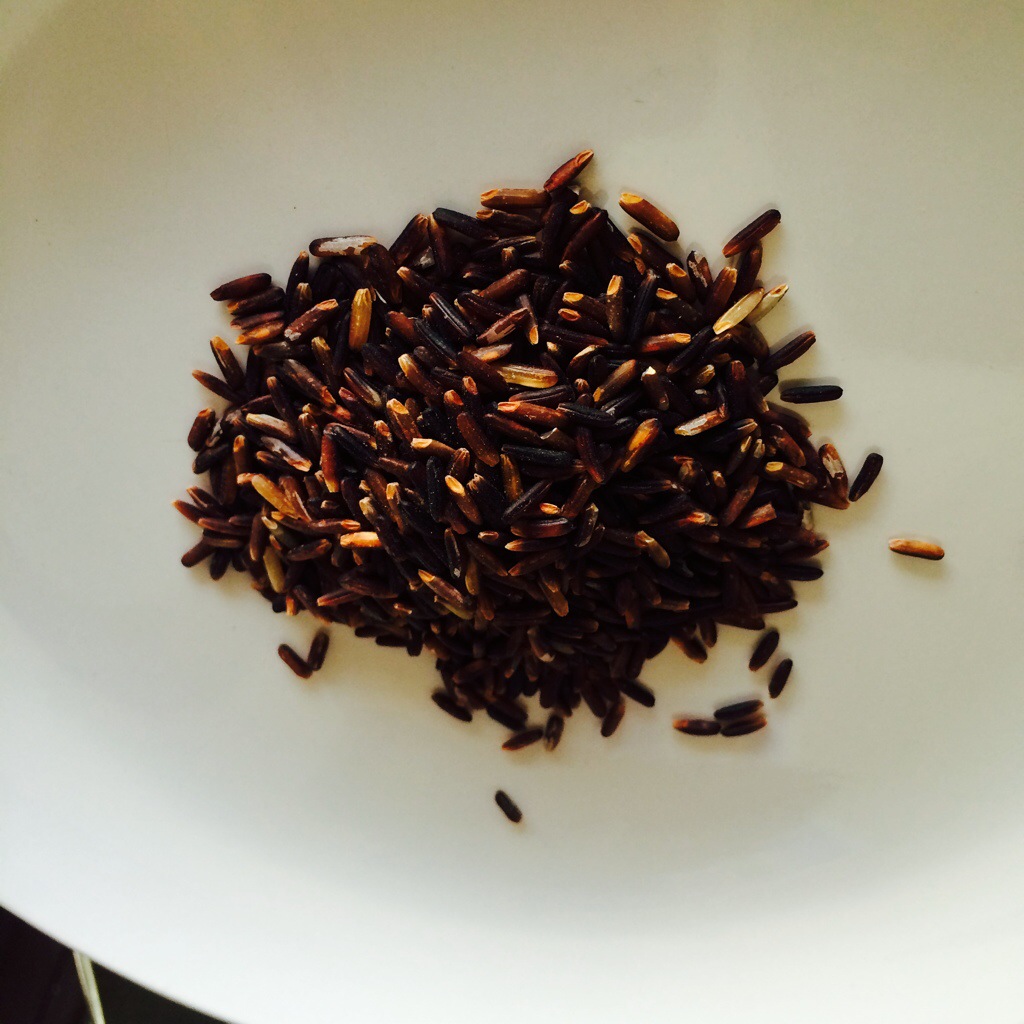
Desserts made with sticky black rice are a specialty of Southeast Asia. This unpolished, short-grain rice is often labeled as glutinous rice, a reference to its consistency when cooked and not to its gluten content. The color isn’t black either, which becomes obvious when you start to wash it. The grains stain the water a deep wine and turn purplish when cooked.

It wasn’t until I started researching black rice that I discovered its health benefits. The pigment comes from anthocyanins, antioxidants found also in purple vegetables and fruits such as beetroot, blackberries, and mangosteen. Besides fiber, black rice is also rich in iron.

I first tasted sweetened black rice as a filling in a dumpling. However, a more popular black rice dessert, especially in Malaysia and Singapore, is pulut hitam (Malay for black glutinous rice), a mélange of the grain, coconut milk, and palm sugar.

This is not your traditional, mushy rice pudding. Black rice is far more assertive – it has a nutty flavor and retains some bite when cooked as the husks are still intact. This also means it requires more water and takes much longer to cook than its polished white counterpart so a bit of planning is necessary. But once you’re done with that stage, the dish requires very little effort.

The other nice thing about pulut hitam is that it allows you to experiment. You can use virtually any type of sugar. I have used the Indian jaggery and brown sugar with equal success. Pandan leaf (screwpine leaf) is the traditional flavoring ingredient but you can add cardamom pods or vanilla. You can also substitute the coconut milk with pouring or whipped cream, fruit puree, or even custard. The dessert pairs well with many fruits. Try mango or banana slices, or lychee for an exotic twist.

Ingredients:

  • 200 g black glutinous rice
  • 200 g palm sugar (gula melaka) or jaggery (unrefined cane sugar), or brown sugar to taste
  • 6-8 cups water
  • Pinch of salt
  • 150 ml coconut milk


Optional

  • Two pandan leaves or three cardamom pods, skinned and crushed
  • Coconut cream and fruits to serve

20140710-094155-34915862.jpg


1. Toast the rice in a frying pan or low oven to bring out the aroma. Wash and soak it for a couple of hours.

2. If you’re cooking the rice on an open fire, cover it with water and bring it to the boil. Add the pandan leaves, turn the heat to low and cook, stirring every now and then and adding more water as necessary until the grains are soft. The process may take 1.5-2 hours. Alternatively, you can use a slow cooker or a pressure cooker, if you have one. I usually let the rice cook overnight in a slow cooker. If you’re using a pressure cooker, allow about 15 minutes.

3. Meanwhile, boil 100 ml water and dissolve the palm sugar or jaggery and a pinch of salt until syrupy. Add the crushed cardamom pods, if using.

4. Stir the syrup into the rice.

4. Add the coconut milk.

5. Swirl some coconut cream on top and serve.

20140710-094155-34915998.jpg


“The Rajma” – Indian Spiced Vegetarian Chili

IMG_1816This is my all time favorite comfort food. Being a Tambrahm family Rajma (red kidney bean curry) wasn’t really a dish we had every other day. My dad would actually make a face and ask “what kind of dish is called Rajammal?”

So I actually only had this dish for the first time when I was 4. And the fact that I remember it says a lot:) We were living in Srinagar back then, yes the Jammu & Kashmir Srinagar which is the farthest back I can remember of my childhood. We were friends with this warm and kind hearted Punjabi family next door and Badi Ma (grandma) would make the best rajma ever. I would live in their home reveling in all the finger licking Punjabi food- kaali dal, kadhi and rajma. So you could say this Tambrahm girl got her loyalties all mixed up – rasam wasn’t so much my comfort food as was rajma. And it still is, to this day. This is one dish I could literally eat every day and not get bored. Well, within reason:).

I call this recipe “The Rajma” as it is the best recipe ever that comes close to the taste of my childhood rajma days. This is a contribution from my sister-in-law, Mathangi, who is an Army wife and who grew up in Jammu, Delhi, lived in Pathankot and who you could say is a Punjabi at heart thanks to all the traveling and living in North India. She is an exceptional cook and this is only one of her many famous recipes. So while you would think this is a cliched dish, her recipe involves some slow cooking which truly brings out all the flavors of the spices and the gravy is absolutely finger-licking. Have it with some hot rice and ghee and you will agree, this is the ultimate comfort food for those lazy Sundays.

Ingredients: (serves 4)

  • Rajma (red kidney beans) – 1 cup. I usually get the lighter red smaller kidney beans also known as Jammu Rajma, though you can make it with any variety. I feel the smaller ones cook faster and when you mash a few it blends well with the gravy, but to each his own.
  • Garlic – 3 small or 2 large pods, crushed
  • Ginger – 1 1/2 inch, grated or crushed
  • Red onion – 2 small or medium sized, chopped roughly
  • Tomatoes – 3 small or 2 large, chopped roughly
  • Cumin seeds (jeera) – 1 tsp
  • Whole coriander seeds (dhaniya) – 1 tsp
  • Turmeric powder – 1/2 tsp
  • Red chili powder – 1 tsp
  • Rajma masala – 1 tsp (available in Indian stores)
  • Salt to taste
  • Olive oil – 1 tbsp

Method:

  • Soak the rajma in about 2-3 cups of water overnight. Alternatively soak it in hot water for about 4-6 hours.
  • Boil the rajma in a pressure cooker or you can add water in a saucepan and boil over a stove till cooked. You may also use a slow cooker to cook the rajma.
  • Make a fine paste of the garlic and jeera with a little water.
  • Grind the onion and ginger separately to a fine paste.
  • Dry roast the dhaniya or coriander seeds in a flat pan without adding any oil. Now grind the roasted dhaniya with the tomatoes in a blender to a fine paste.
  • Keep the 3 pastes separately.
  • Take a heavy bottomed vessel and add about 1 tbsp of olive oil.
  • When the oil gets hot, add the garlic and cumin seed (jeera) paste. Saute for about 2 minutes till the paste becomes light brown and the raw smell goes away.

IMG_1800

  • Now add the onion and ginger paste to this mixture. Saute this mixture on a low to medium flame for about 5-10 minutes, until the raw smell of onions goes away. This step is important as the onion needs to be cooked well. The mixture will become golden brown (more than what you see in the pic below).

IMG_1801

  • Then add the tomato-dhaniya paste. Saute well once again for about 10 more minutes till the mixture blends well together and oil begins to seep out from the sides. This indicates that the onion tomato paste is well cooked.
  • Now add salt, turmeric powder, red chili powder to the mixture.

IMG_1802

  • Saute again for about 5 minutes till the spices get mixed and cooked.
  • Drain the boiled rajma and keep the rajma water aside. You will use this later instead of water for the gravy.
  • Add drained rajma to the onion-tomato-spice mixture in the vessel and mix very well till the beans get coated with the paste. Saute for another 2-3 minutes.

IMG_1804

  • Add the rajma water slowly to this mixture until you get the desired consistency for the gravy. Keep in mind that rajma thickens as it cooks so you can be a bit generous with the water, maybe 2-3 cups or as needed.

IMG_1806

  • Let this mixture come to a boil first and then keep it on a slow flame and let it slow cook for another 15 to 20 minutes. At this stage you may also transfer to a slow cooker and leave it on low for 20-30 minutes.
  • Add rajma masala, mix well and cook again for about 5 minutes.
  • Garnish with chopped cilantro and serve hot with hot rice or jeera rice and a dollop of freshly made ghee. Yum!
  • You can also use this in the Bollywood Burrito recipe:)

IMG_1812

“Best” Brownies from scratch

20131201-110825.jpg

I was looking for a fudgy brownie recipe this weekend. Strangely I’ve never managed to make that perfect brownie – moist, fudgy with that crusty texture on top. The only times I have been successful is when I use boxed mixes but my attempts “from scratch” have always ended up tasting like chocolate cake which as you know is not the same:(.

A brownie is a brownie and a cake is a cake. And a brownie made from a box is not the same as one from scratch – I wouldn’t have said this 5 years ago I know. I’m trying to be more “health conscious”now. No processed foods and mixes. Whatever, you say. These are still quite “sinful” brownies. Okay, I’m not being snooty. But you will agree with me that as you begin to experiment with creations from scratch it is a whole new world out there. It raises the bar. So the perfect brownie from scratch remained an elusive recipe for me.

Until I found this recipe on allrecipes that calls itself “best” brownies. The recipe and video links are easy enough to follow and got me to try them yesterday. These were gone in a day – enough testament that out of 16 brownies I made on Saturday for my son and his friend we had 3 left on Sunday morning with 1 being devoured for breakfast :). “Best brownies” for sure – at least among all the recipes I’ve tried. I modified them a bit to include some organic plain and wholemeal flour, raw cacao powder for cocoa powder and muscavado sugar instead of white sugar and powdered demerara sugar for the icing. I am trying to make them as “healthy”as possible:)

These are not vegan, however and I did use butter and eggs, though I’m sure substituting applesauce instead of butter and flax seed meal for eggs will give you a similar result. I plan to try the vegan version next weekend and will let you know. Note – for the flax seed egg substitute – grind flax seeds to a powder. Use 1 tbsp flax seeds mixed with 3 tbsp water and beat well by hand or in a blender till you get a frothy mixture. This is for 1 egg. and you can double for 2 eggs. Add the frothy mixture instead of the eggs to the batter.

And I also used my own frosting recipe, not the one shown in the link.

Ingredients:

1/2 cup organic unsalted butter

1 cup muscavado sugar (you may also use palm or coconut sugar)

1/2 cup mix of organic all purpose flour and wholemeal flour (you may use 100% of any one flour as well)

2 eggs

1 tsp vanilla extract or 1/2 tsp vanilla bean paste

1/3 cup raw cacao powder (or regular cocoa powder)

1/4 tsp salt

1/4 tsp organic natural baking powder

Frosting:

1/4 cup unsalted butter

3/4 cup confectioner’s sugar or powdered demerara sugar

1/8 cup raw cacao powder

1 tsp vanilla extract

1 tbsp cream or 2 tbsp milk or almond milk

Method:

Here’s the step by step with pictures:

1. Preheat the oven to 175C or 350F. Take the butter in a microwave safe glass bowl. Microwave for 30 seconds till butter completely melts.

20131201-110609.jpg

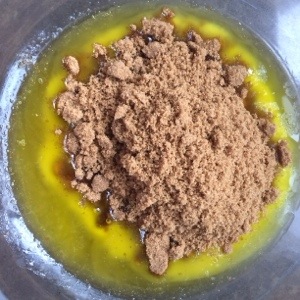
2.Add the muscavado sugar and mix the butter and sugar mixture well with a beater.

20131201-110624.jpg

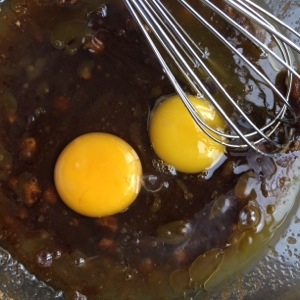
3. Add the 2 eggs. Beat well with the hand beater till you get a homogenous mixture.

20131201-110632.jpg

4. Now add the raw cacao powder. Mix well again.

20131201-110647.jpg

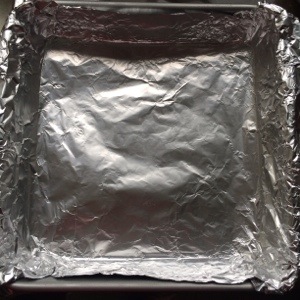
5. Take a 8×8 inch baking pan and line with aluminium foil. Ensure that the foil overhangs from the sides and you can fold over the rim. This step is very helpful when you have to remove the brownies from the pan.

20131201-110655.jpg

6. Pour the prepared brownie batter in the pan.

20131201-110709.jpg

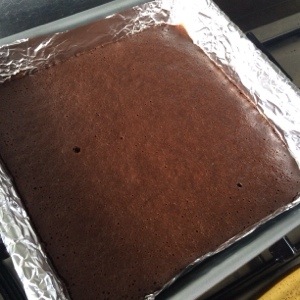
7. Bake at 175C or 350F for 25-30 minutes. Make sure you don’t overcook. You can use the knife test to see if done (should come out clean)

20131201-110722.jpg

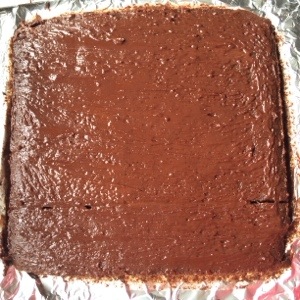
8. Frosting method: In a stand mixer with the paddle attachment or in a food processor or in a large bowl using a hand beater or a wire whisk, cream the butter and stir in the confectioners/powdered sugar and cocoa, mix on low speed and cream again until soft and creamy. Stir in the vanilla extract or other flavouring of choice and beat again for a couple of minutes.This is a flexible recipe and if your icing is stiff add a little more milk, a tablespoon at a time and if your icing is thin, stir in more powdered sugar.

Spread the frosting over the warm brownie with a spoon or spatula.

20131201-110733.jpg

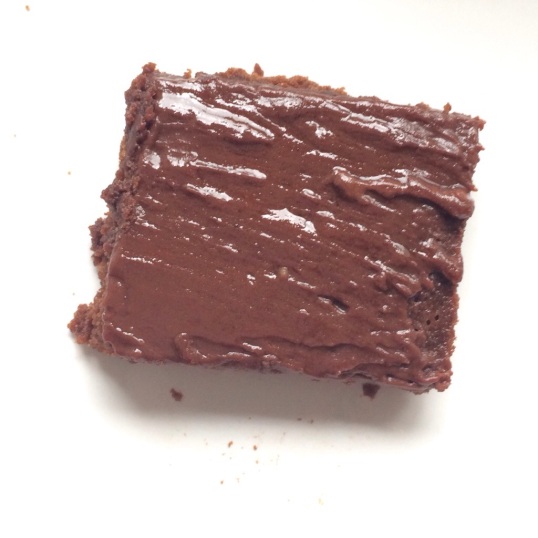
9.Cut into equal squares. Enjoy warm.

20131201-110742.jpg

Makes you want to lick the batter and frosting , doesn’t it? Here’s another picture just to add to the food porn:)

20131201-110804.jpg

Sumathi’s Medley – Easy Gulab Jamuns

IMG_1126

I was introduced to this recipe more than 30 years ago by some good friends in Lagos, Nigeria. These ladies were not only formidable cooks, they were also masters of substitution – they had to be since dinner parties were the chief mode of entertainment and while the markets had plenty of locally grown vegetables and fruit, food stores were rare and supplies, basic. In the eight years we lived in Lagos, I don’t think I ever saw a packet of potato chips. If you craved chips, of any kind, you made your own.

From the vantage point of today, it seems we had an amazingly healthy – and sustainable – diet but back then the difficulty in finding many common food items only increased the determination to find a way to recreate the dishes we could no longer get so easily. I learned many tips, tricks, and shortcuts during those years – my friends were generous with their knowledge and enormously patient – but if I had to pick the one recipe that has worked every time and everywhere, it would have to be the gulab jamun. The traditional way of making these spongy, syrup-soaked balls of fried dough is daunting what with first having to boil milk down to its solid form (khoya).

There is a reason why I call these “easy”. Here, milk powder replaces the milk solids. Give this recipe a try and you’ll be amazed at how incredibly simple the process is – you need no more than 30-40 minutes from start to finish. Do watch the frying though – the oil shouldn’t be too hot or the jamuns won’t cook inside.

The end product is lighter than the traditional jamun but tastes just as good.

Serve the jamuns warm. If you’re not fussed about the calories, add a scoop of ice cream!

Makes 8-10
Syrup:
2 cups sugar
2 ½ cups water
Crushed cardamom seeds (optional)
A pinch of saffron, soaked in a tablespoon of warm water (optional)

Ingredients:
8 tablespoons full-fat milk powder
3 tablespoons self raising flour
¼ tsp baking soda
2-3 tbsps plain yogurt or full-fat milk
1-2 tsps butter or oil or ghee

Method:
1. Boil sugar and water until the mixture reduces a bit and the colour deepens to a pale caramel.
2. Add the crushed cardamom pods and saffron mix, if using.
3. Take the syrup off the flame but make sure it is warm when you add the fried balls to it.
4. Sieve the milk powder, self-raising flour, and baking soda.
5. Add the butter and then the yoghurt, a little at a time, and work the mixture with your hands until it forms a ball. Don’t overmix or you’ll end up with tough jamuns.
6. Heat the oil. If it starts to smoke, switch off the fire to let the temperature drop a bit – the oil should be hot enough so that a piece of bread rises to the top but not so hot that it browns immediately.
7. Break off small lime-sized pieces of dough and roll each between your hands to a smooth, crack-free ball. If the dough feels a bit dry, moisten your hands with some milk before rolling the balls.
IMG_1106
8. Drop the balls in the oil. Turn them often so that they brown evenly.
9. Drain the balls and add them to the warm syrup. Wait for an hour or more for the balls to absorb the syrup and swell.

Pachai Milagu Kuzhambu (Spicy Green Peppercorn Soup)


DSC01822

After a bout of crazy baking (yes, crazy is the right word when you are waiting for the bread dough to rise at midnight:), it was good to get Girish in the kitchen for some traditional fare.

You can tell by his previous recipes that he is kind of a “Kuzhambu King”  – Karuveppalai Kuzhambu, Vetha Kuzhambu, Kaara Kuzhambu are all his staple recipes. The names may be a tongue twister to the unorthodox ear but as any lover of Indian cuisine knows, they are distinctly different and unique to different regions of the South.

Pachai Milagu Kuzhambu is similar to the Karuveppalai Kuzhambu (curry leaves tamarind soup), but the green peppercorns give it a different kind of “burn”. That wasn’t meant to sound scary to newbies to Kuzhambu, but if you don’t know our recipes already, Kuzhambus are meant to have that tangy spice, which provide the perfect antidote to white rice and clarified butter (ghee) or the most famous combination of yoghurt rice and Kuzhambu, very lovingly known as “Thachi Mammu” in our home:)

As I have said this earlier, Singapore is a veggie and fruit haven and fresh green peppercorns, though seasonal are available (something I wouldn’t have dreamed of finding easily in the US). A trip to the local vegetable market (Tekka) and a 10 minute hunt to find a speacialty Thai store was all it took to find green peppercorns by the kilos! Of course we picked up about 300 grams which will probably last us a month or two. Green peppercorns have an extra bite to it and taste tangier than their black counterparts, which makes it a perfect accompaniment for Kuzhambu. Amma is already in the process of pickling the remaining peppercorns in brine the recipe of which I will share later.

Recipe for Pachai Milagu Kuzhambu:

Ingredients:

  • Green Peppercorns – 125 grams or about 1 1/2 cups
  • Curry leaves – 1/2 cup
  • Dry red chilies – 4-5
  • Cumin seeds – 1 tbsp
  • Tamarind, a lemon sized ball soaked in warm water
  • Salt to taste
  • Asafetida (hing) – a pinch
  • Gingelly oil – 2 tbsp

DSC_0214

Method:

1. Take a kadai or heavy bottom vessel and add half the green peppercorns, add red chilies and cumin seeds and dry roast for about 3-4 minutes. The peppercorns will begin to pop. Turn off the heat.

DSC01824

2. Now take this mixture and put it in the blender container. Add the remaining peppercorns (minus about 2 tbsp), tamarind and curry leaves to the blender container. Blend these to a smooth paste adding some water little by little so the consistency is that of a thick sauce.
DSC_0215

3. Now heat another heavy bottom vessel (or kachitti, a stoneware vessel), add about 2 tbsp of gingelly oil. Add asfetida to the oil. Heat for about 2-3 minutes till oil begins to smoke a bit.

DSC_0213

4. Now add the paste and stir to mix.

DSC_0219

Add about 1/2 cup water (to 1 cup, depending on consistency needed) and stir again. Now add the remaining 2 tbsp of fresh green peppercorns to this mixture.

5. Bring this mixture to a boil and let it simmer for 5 minutes till you get an aroma of the peppercorn curry leaves mixture.

6. Serve hot with rice and pappadums or with Thachi Mammu:).

DSC_0222

Chettinad Recipes – Kaara Kuzhambu (Spicy Tamarind Soup) and Urulai (Potato) Roast

Inspiration hits in the strangest ways. This one was good enough to get Girish to get back in the kitchen after months. The source was a bottle of the famous Grand Sweets Kaara Kuzhambu paste or pickle that we picked up last Sunday at the local Indian store in Singapore.

Those who are familiar with Grand Sweets in Chennai will swear by their sweets and savories, and I only discovered the new line of pickles and pastes on my last Chennai visit.

We were quite blown away by the authentic taste of the Kaara Kuzhambu pickle from Grand Sweets accompanied by a quip from Amma (my mother) that she had a recipe tucked away somewhere in her recipe stash. So Girish was challenged enough to try it this past Sunday and the best part was that the whole family ended up in the kitchen. Amma didn’t find her recipe but we did find this one from the Spicy Tasty blog that sounded quite authentic. Appa (my father) peeled the shallots, Nikhil peeled and chopped the potatoes for the Urulai roast (adapted from Kurry Leaves‘ blog) and Amma and I helped prep for both the recipes with the powders and spices, while Girish “directed” it all by actually cooking the dishes and added his finishing touches. So in essence it was the four of us crowded around in the kitchen to make two dishes and I have to say, we debunked the myth about too many cooks:)

The dishes turned out perfect and quite true to the Chettinad taste. Chettinad recipes have the distinct flavor of fennel, pepper and chilies in their spices and both these recipes pack that spicy punch. Note to those who don’t eat their food very spicy – you can tone down on the pepper and red chilies/chili powder, but keep in mind that the beads of sweat and the clearing of your sinuses that accompany the eating of Chettinad dishes only add to the flavor so you may be missing out on that experience:)

Recipe for Kaara Kuzhambu:

Ingredients: (for 5-6 servings)

  • Shallots – 2 cups
  • Tomatoes – 2
  • Ginger Garlic paste – 2 tbsp
  • Green chilies – 3-5 (depending on spice level)
  • Sesame oil – 4 tbsp
  • Cumin seeds –  1tsp
  • Curry leaves – a small bunch or 10 to 15 leaves
  • Red chili powder – 1 tsp
  • Garam masala – 1/2 tsp
  • Sambar powder – 2 tbsp
  • Tamarind water –  2 cups

For grinding:

  • Coriander powder – 1 tsp
  • Shredded coconut – 1/4 cup
  • Fennel seeds – 1 tsp
  • Poppy seeds – 1 tbsp (optional – I don’t get this in Singapore so didn’t use it. Turned out just as good)

Method of Preparation:

  1. Peel the shallots and cut both ends. Cut them in half if needed.
  2. Heat 2 tbsp of oil in a deep bottomed thick pan or kadai
  3. Add cumin seeds, curry leaves and shallots and fry till shallots are translucent.
  4. Add ginger garlic paste and fry for a couple of minutes followed by green chilies and chopped tomatoes.
  5. Saute till the tomatoes are well cooked and you don’t get the raw smell of tomatoes any more, or you see some oil leave the sides.
  6. Add red chili powder, sambar powder, garam masala and salt.
  7. Mix well and let it cook for 5 minutes.
  8. While it’s cooking, make a paste by grinding the coconut, fennel seeds, poppy seeds and coriander powder in a blender by adding a little water.
  9. Add the tamarind juice to the mixture in the pan and let it boil and become a thick gravy.
  10. Add the remaining 2 tbsp of oil and leave it for a minute.
  11. Now add the ground paste and  let it cook for 5 to 8 minutes at medium heat. You may need to cook a bit more or less depending on the consistency and the taste.
  12. Make sure you cook till the raw smell of sambar powder and tamarind goes away.
  13. Serve hot with steamed rice and urulai roast.

Recipe for Urulai (Potato) Roast:

Ingredients-
  • Potatoes (half boiled and diced)- 4
  • Mustard seeds – 1 tsp
  • Asafetida – 1 pinch
  • Garlic – crushed- 1/2 tsp
  • Onion chopped finely – 1 small
  • Turmeric powder – 1/4 tsp
  • Curry leaves – 1 sprig
  • Oil
To roast and grind

  • Split urad dal- 2 tsp
  • Dry red chillies-3-5
  • Whole black pepper corns-5 to 6

Method:

  • Heat a pan and dry roast the urad dal until it changes color to a light brown.
  • Now add dry red chillies and pepper corns.  Roast until urud dal turns golden brown.
  • Allow this to cool and grind to form a coarse powder.
  • Heat oil in the same pan – add mustard seeds and let it splutter. Now add asafoetida and curry leaves.
  • Add garlic, onion and turmeric powder. Saute till the onion turns golden brown .
  • Add the boiled potato and stir carefully. Add salt to taste and saute for 5 minutes.
  • Now add the spice powder and mix well.

Note – Do not stir the potatoes too frequently. You can lift the pan with the potatoes and just shake it a bit so the potatoes mix well with the spices and oil. Let it simmer on low heat for about 5-7 minutes. This will ensure an even roast.

Healthy Paneer Butter Masala (Indian Cottage Cheese in Tomato-Cashew Gravy)

Panneer Butter Masala conjures up this image of a rich butter based gravy with equally rich chunks of paneer or Indian cottage cheese and heavy whipping cream as garnish. Healthy paneer butter masala does sound like an oxymoron.

I use the word healthy to describe this recipe  from Girish as it doen’t call for an ounce of butter or ghee (clarified butter). It uses cashew paste as  the base for the gravy and, yes, more importantly, does not use any whipping cream. The best part is that you don’t compromise on the taste at all. You still get a creamy, yummy paneer “butter” masala, without the butter. Girish made this over the last long weekend and it was the perfect accompaniment to hot chapathis and stuffed bitter melon (bharwan karela). This recipe is inspired from the Sanjeev Kapoor version though it has been tweaked enough to call it an original Girish version:)

Ingredients:

Cottage cheese (paneer), cut into cup – 2 cups
Oil – 3 tbsp
Cloves – 3
Cinnamon – 1 stick
Dried red chillies – 5 (if you want it to be less spicy, use fewer)
Coriander seeds, crushed – 4 tablespoons
Green cardamom seeds – 1/2 tsp
Onion , sliced – 1 medium
Fresh Ginger sliced into 1″ strips – 3-5
Garlic – 4 pods
Tomatoes, chopped – 5-6 medium
Cashews – 1 cup
Salt to taste
Kasoori methi , crushed (dried fenugreek)- 2 teaspoon

METHOD:
1. Grind the cardamom seeds, red chilies and coriander seeds to a fine dry powder.
2. Take 2 tbsp oil in a heavy bottom vessel (kadai), add cloves, cinnamon stick. When this gets heated and gives out an aroma, add garlic and ginger strips.
3. When this cooks, add sliced onions, and saute till the raw smell goes away, and it becomes light pink in color.
4. Add the chopped tomatoes and cook well till the oil separates.
5. In the meanwhile, take the cashews in a blender and blend it to fine paste with some water. If you have a powerful blender (like a Vitamix), you may not need to add water.
6. Cool the onion tomato mixture a little and transfer this mixture to the blender containing the cashew paste. Make a fine puree of the tomatoes, onions and cashews.
7. Take the remaining oil in a kadai again, add some of the kasuri methi and add the paneer pieces. Fry till the paneer is slightly golden brown, not too fried.


8. Take out the paneer and keep it separately.
9. Add the tomato taste and cook while stirring, till the paste begins to boil, and the raw taste of cashews goes away. Add the red chili, coriander, cardamom powder here, and mix well.
10. Heat for a few minutes more, add the paneer and continue to cook for 3-5 minutes.


Oatmeal South Indian Style

A creative method to making this breakfast staple, this South Indian style oatmeal comes from Anusuya’s kitchen. It’s popularly known as “Thachi Mammu” (yogurt rice) oatmeal in my home and not surprisingly a favorite breakfast item. You can find us making this almost every weekend, and Amma adds her own personal touch when she makes it, which adds to the taste. If you have a taste for yogurt rice and all its varieties, this is a must try recipe.

Ingredients:

2 cups quick cooking oats

1- 1 1/2 cup hot water

1/2 cup diluted yogurt or buttermilk

1/2 tsp crushed green chilies

1/2″ ginger

1 tbsp chopped cilantro

For tadka or popu or garnish:

1 tsp mustard seeds

a pinch asafetida or hing

1/2 tsp oil

Method:

Take the oatmeal in a microwave safe bowl. Make sure the bowl is not too shallow and is deep enough to allow for proper cooking in the microwave. Add 1 cup of boiling hot water, and let it stand for about 3-5 minutes. Now cook this in the microwave for about 2 minutes on high. The oatmeal should be completely cooked by now. If not, cook it for another 45 seconds.

Now add the diluted yogurt, ginger, green chilies, asafetida and salt to taste.

For the tadka: Heat the oil in a small pan, add the mustard seeds. When the seeds begin to splutter, turn off the stove and pour this on the yogurt oatmeal mixture. Garnish with chopped cilantro leaves and enjoy.

Post Navigation