Roz Ka Khana

A blog about everyday food. Mostly Indian. All vegetarian.

Archive for the category “Traditional South Indian dishes”

Eating in the Raw — Rasam week – Pachi Pulusu (Raw Spiced Tamarind broth)

IMG_0479.JPG

In keeping with Rasam week, I wanted to try something I had been meaning to try for ages, since I tasted it for the first time in my friend Harini’s home almost 10 years ago. This is a typical Telangana dish that Harini made for us for dinner one evening and the dish was so flavorful it stuck. Simple to make yet I somehow never got to really try it in my own kitchen until this week. This pulusu or broth is fully raw and needs no heating or boiling. It’s the tadka or popu or tempering that gives it its unique kick and flavor. The tartness of the tamarind and spice of the red chili with garlic along with a hint of jaggery and a secret ingredient to finish is what makes this dish different from any rasam/pulusu you may have tasted . Eat it with hot rice, ghee and mudda pappu or thick spiced tuvar dal and it is a combination that will live on your taste buds for a long long time.Like it did for me for over a decade:). This recipe is Harini’s contribution to Roz Ka Khana and though I’m sure it doesn’t come close to the way she or her in laws make it in their home, it hopefully is a decent first attempt. .

Ingredients for Pachi Pulusu:

Serves 4. Prep time : 15 minutes. Cooking time: 10 minutes

  • Tamarind – 1 small lemon sized ball, soaked in warm water.
  • Jaggery – 1/2 tsp
  • Fore tempering:
  • Mustard seeds- 2 tsp
  • Cumin seeds (jeera) – 1 tsp
  • Dry red chilies – 3-4
  • Green chili – 3-4 sliced thin
  • Red onion, chopped fine – 1/4
  • Garlic, crushed or chopped fine – 3 small or 2 big
  • Curry leaves – a sprig
  • Roasted sesame seed powder – 1 tsp
  • Cilantro, chopped – 1 bunch
  • Cream or whole milk – 1 tsp (optional)
  • Oil- 2 tsp
  • Salt to taste

Method:

  1. Squeeze the juice from the soaked tamarind and add enough water to it to make about 2 cups. Add salt to taste and the jaggery and mix well.
  2. Heat oil in a small pan, when hot add the mustard seeds. When they splutter, add the jeera, red chilies and curry leaves. Add garlic, green chilies. Saute for 1 minute.
  3. Pour the tempering over the tamarind water. Add chopped onions and cilantro for garnish.
  4. Add the roasted sesame powder.
  5. As a final touch, add 1 tsp of cream or whole milk and give it a quick mix before you serve. (The cream compensates for the tartness of the tamarind. You can avoid this step if you don’t like the idea of adding milk to the pulusu or are vegan).

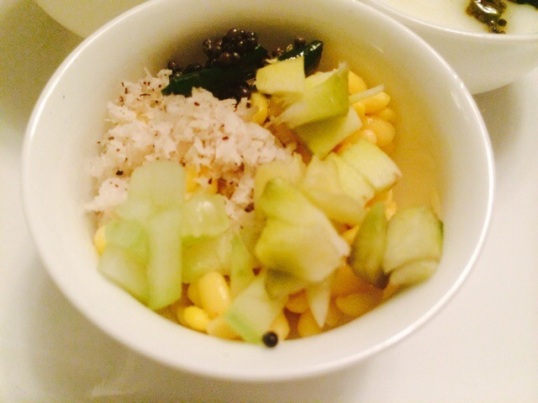
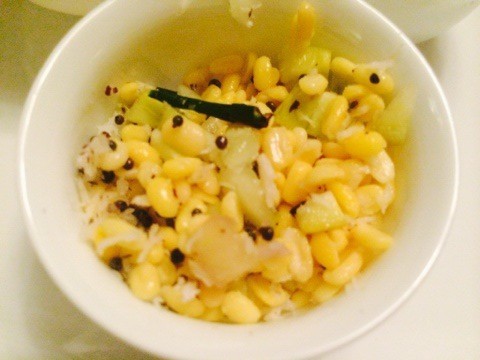
Serve with rice, ghee and pappu (yellow tuvar dal tempered with mustard seeds, jeera and curry leaves). It’s called “mudda pappu” as it is meant to be thick when mixed with rice so the pulusu is a runny and tangy accompaniment. According to Harini, spinach dal (paalak pappu) and moong dal spiced are also great accompaniments for pachi pulusu. Will try that next and let you know:)

Coming up next for Rasam week is Inji (Ginger) Rasam.


A Week of Rasams – Recipes for Garlic Rasam and Lemon Rasam

After a bustling festive season it’s “Rasam Week” at our home. As I’ve mentioned here in my very first post, Rasam is one of our ultimate comfort foods. It’s the dish we turn to when we crave a home cooked meal, the dish we make when we want to “detox” and the one we cook as an accompaniment for a traditional South Indian occasion. Rasam is quite the ubiquitous and well loved South Indian dish. Typically a clear broth spiced with different flavors, rasam is another word for juice or shall we say the essence of all South Indian food:)

It was Girish’s turn to plan the weekly menu since he is home for a full week after ages. And here’s what his menu looked like.

South Indian style oatmeal for breakfast and Rasam for dinner. Every. Single. Day. 🙂

Yes I am married to someone who can eat the same thing for days – thank heavens. As long as it’s one of his favorite dishes.
Makes it easy for planning and cooking so let’s be immensely grateful for that shall we?:) Here’s to someone who is fuss free when it comes to meal planning. I repeat, as long as it’s one of his choice dishes. He is still quite the food critic so let me just say it’s safest to stick with the requested menu:)

So I thought I would chronicle the types of rasams while I was at it. The garlic rasam is a house favorite and is exactly the way my mother in law (the queen of rasams in the family) makes it. Also one of Nikhil’s favorite dishes and a common request from him when he craves Indian comfort food.

The lemon rasam recipe is adapted from Chandra Padmanabhan’s cookbook “Dakshin“. I have tried making lemon rasam many times before but I found this method to be the best. I suppose the garnish of crushed black pepper and cumin topped with lemon is what adds to this rasam’s burst of flavor. Whatever the type of rasam, it’s best enjoyed with some hot (white or brown) rice, a dollop of fresh ghee and some cooked dry vegetable as a side. We love urulai roast (roasted potato), the way Amma makes it though you could try this one (Chettinad urulai roast) and the cauliflower fry as a yum side too.

Recipe for Garlic Rasam:

IMG_0468

Ingredients: (for 4)

  • Garlic cloves – 3 big or 4-5 small
  • Cilantro – a small bunch plus 1/4 cup chopped leaves
  • Black pepper – 3/4 tsp
  • Cumin seeds – 1 tsp
  • Tamarind – a small line sized ballGarlic rasam powder (store bought) – 1 tsp (you may also use regular rasam powder)

For tempering:

  • Ghee – 2 tsp
  • Mustard seeds – 1 tsp
  • Cumin seeds – 1/2 tsp
  • Curry leaves – a sprig
  • Dry red Arbol chili – 1
  • Garlic – 1 chopped fine.

Method:
1. Soak the tamarind in warm water for about 5 minutes till it softens. Make a pulp of the tamarind, strain out any fibres or seeds and add enough water to make about 1 1/4 cups of tamarind pulp. (more than what you see in the picture.)

IMG_0054

2. Take the garlic pods, the cilantro bunch, black pepper and cumin seeds in a blender, with a tbsp of water and grind to a fine paste.

IMG_0066
3. Take the tamarind water in a heavy vessel (I use a special vessel called Iyya Chombu – made of an alloy of metals- used to make rasams traditionally.)

IMG_0053

4. Add the rasam powder, half of the cilantro and let the mixture come to a slow boil on a medium flame. This will take about 5-7 minutes, till the raw smell of the tamarind and the rasam powder goes away.

5. Now add the garlic pepper cumin paste to the tamarind water. You may add another 1/2 to 3/4 cup of water here. Add salt. I usually taste at this stage to check for salt/sourness etc. Adjust with water, salt accordingly.

6. Let the mixture boil for about 5-7 minutes till the raw garlic smell goes away.

7. Add chopped cilantro, and let simmer for another 2-3 minutes.

8. Heat about 2 tsp ghee (clarified butter or brown butter) in a small pan. Add the mustard seeds when ghee is hot. After they splutter add the cumin seeds, red chili and curry leaves. Add the chopped garlic. Saute for a minute, and then add the tempering to the rasam. Cover the rasam with a lid until you are ready to serve, This keeps the flavors of the tempering (tadka/popu/talithaal/chonk/bagar) intact and lets them infuse in the rasam.

Enjoy with hot rice, a dollop of ghee and the vegetable side dish of your choice. Divine.


Recipe for Lemon Rasam (didn’t click the pictures in time for this one but will add them eventually;)

Ingredients :

  • 1/4 cup toor dal cooked
  • 3/4 cup vine ripe cherry tomatoes chopped (I find cherry tomatoes give the best flavor though you can use vine ripe regular tomatoes as well)
  • Juice of 1 big lemon
  • a small bunch of cilantro, chopped
  • 1 ” piece ginger grated
  • 4 green chilies
  • 1/2 tsp cumin seeds
  • 3/4 tsp black peppercorns
  • salt to taste
  • 1/2 tsp turmeric powder
  • 3/4 tsp rasam powder

For tempering:

  • 2 tsp ghee
  • 1 tsp mustard seeds
  • 1/2 tsp asafetida
  • 1 dry red arbol chile
  • a sprig of curry leaves

Method:

  1. Take the ginger and green chilies in a small blender and blend to a smooth paste.
  2. Powder the cumin seeds and black peppercorn in a coffee grinder or mortal pestle. I prefer this to be a smooth powder too though you may grind it to a coarse powder if you like the texture in the rasam.
  3. Take the cooked dal in the iyya chombu, add about 1 1/2 cups of water, salt, turmeric powder. You may add more water depending on the taste. Adjust salt accrodingly.
  4. Add the tomatoes and the ginger chile paste to the mixture. I also add the rasam powder at this time. Sprinkle some chopped cilantro. Let the mixture come to a slow boil, until the raw smell of the rasam powder and tomatoes are boiled away. (Rasam powder is optional, I add  a small amount just for the flavor, but you can get by without it).
  5. Now heat the ghee in a separate pan, add all the ingredients for the tempering. Add 1 tsp of the powdered cumin-black pepper powder to the ghee and then turn off the heat. Add the tempering to the rasam.
  6. Add the lemon juice to the rasam and mix. Garnish with more chopped cilantro.

IMG_0477.JPG

Easy Tomato Gothsu (Tomato Stew) – without onion or garlic

It’s the season of Navaratri (festival of Nine Nights) and besides the daily offerings of jaggery laden sweets and protein packed sundals (savory dish made with legumes) to the Goddess, I have to get creative with the daily menu. As with most temple offerings the food cooked during these 9 days is meant to be “saatwik” or strong in the sattwa guna or purity, leading to clarity and equanimity of the mind.

It can be debated as to how the list even originated as it dates back to Ayurveda and food that ancient Yogis consumed. The list we know of includes fresh leafy vegetables, fruits, nuts, seeds and grains, legumes, interestingly diary (raw milk from happy cows:), ghee (clarified butter), raw honey etc. Meat and its by products, some pungent vegetables including onion and garlic were avoided as they were meant to stimulate the tamasik qualities leading to dullness of the mind and body. For the Yogis this was meant to be detrimental to their spiritual aspirations.

As I mentioned before I didn’t really fully understand (and still have some q’s) why some vegetables scientifically considered  healthy (like onion and garlic) were excluded from this diet. I do get the meat exclusion to some extent as it follows the doctrine of “you are what you eat” and the relationship between food and the mind. I suppose you could use the same logic to the other foods too?

Oh well. As for me, I tend to consider these 9 days as an excuse to undergo a detox of the body and mind. If you look at that explanation scientifically too Navaratri falls at the juncture of two seasons, when the fall season recedes and and winter season sets in (in the Northern hemisphere). There is a shift in pattern with nature too, the plants shed their leaves, fruits fall and go into a non productive mode, grains are being harvested and so on. The body (and mind) needs to undergo a periodic cleanse to get stronger for sustaining the bleak winter months. Hence the detox during this season which conveniently aligns with the festival too. Traditionally Navaratri is meant to be a time to fast and/or eat sparingly to allow the body to detox.

Isn’t it ironical that detoxes are becoming so popular in today’s times and when you really “peel the onion” (no pun intended;) they are manifestations of what the ancient Sutras and Ayurveda dictated eons ago? Suddenly Yogic practices, Ayurveda are becoming fashionable, a fad and fasting and detox diets once originally done for spiritual reasons are becoming a sought after lifestyle. We have come a full circle and the goal interestingly is the same. To be healthy and strong in body and mind.

So the many offerings to the Goddesses are made as saatwik as possible and for the same spiritual and possibly convenient reasons it trickles down into the daily menu as well.

Today’s prasadam (offering) was Venn Pongal, a traditional South Indian porridge made during festivals but also a filling breakfast or lunch dish. Made with rice and yellow mung beans, it packs enough fibre and protein to balance out the carbs. And garnished with dollops of ghee (clarified butter), another nutritious good fat packed with Vitamins A, D and K.

As an accompaniment for the Venn Pongal I made a Thakkali Gothsu or Spicy Tomato Stew. Super easy to make and quite a tasty accompaniment to the venn pongal, this is a recipe I learned from Amma (my mom). This dish can be made with onions too but for today I made it without them for all the reasons mentioned above:)

IMG_0371.JPG

Ingredients:

Medium sized tomatoes on the vine – 4, finely chopped

Green chilies – 4-5, slit

Curry leaves – a sprig

Jeera or cumin seeds – 1 tsp

Asafetida – a pinch

Mustard seeds – 1 tsp

Sambar powder – 2 -3 tsp (depending on spice level)

Turmeric powder – 1/2 tsp

Cinatro – 1 small bunch chopped

Oil – 1 tsp

Salt to taste

Method:

1. Heat oil in a pan. When hot add the mustard seeds. After they begin to splutter add the jeera and asafetida.

2. Add the slit green chilies and curry leaves.

IMG_0363.JPG

3. Add the chopped tomatoes, salt, turmeric powder. Mix well and sauté for 2 minutes.

IMG_0364.JPG

4. Add the sambar powder, mix, add let cook for about 2-3 minutes.

IMG_0365.JPG

5. Add about 1/4 cup of warm water and cook again for 5-7 minutes till it all begins to come together in a thin chutney like consistency.

IMG_0366.JPG

6. Garnish with chopped cilantro and serve hot.

Note: If you’re adding onions, add one medium sliced onion finely chopped, and add it right after the step where you sauté the green chilies and curry leaves. Sauté well till they turn translucent before you add the tomatoes.

IMG_0368.JPG

Ginger and palm sugar punch (Panakam), Spiced Buttermilk (Neer Mor) and Lentil green mango salad (Kosumalli)

20140411-103815.jpg


This is a bit late for posting a Rama Navami recipe but as with all festival recipes, I record them here for posterity. I’m sure this will come handy in the years to come to me or to another reader so it’s better late than never. As always with all the festival recipes here, these are Amma’s recipes.

Panakam, Neer Mor are not just Rama Navami recipes by the way. While legend goes that this was served during Sita and Rama’s (Hindu mythological God and Goddess for the uninitiated) wedding and during Rama’s birth, the tradition seems to have stuck as these are the post celebration drinks served to this day during most traditional South Indian Hindu weddings and birthdays.

The best part – they are probably some of the easiest festival recipes to make. And they are all raw which means no stove top needed and no messy clean ups so as you can guess this is my favorite festival recipe as well:) (Not counting the tadka/seasoning to the buttermilk of course where there is some stove top heating involved, but that step can be skipped if you’d like it to be completely raw. I recommend adding the seasoning as that adds the real traditional South Indian taste)

The panakam can easily pass off as a summer cooler punch the next time you have a summer lunch  get together. Its sweet but the ginger and lemon give it the apple lemon tea kind of zing and tart taste, perfect for a hot day.

And the neer mor (moar) or light buttermilk spiced with ginger and curry leaves is the perfect coolant for a hot summer outing in the sun. “Buttermilk cools the system” as my Appa (dad) says- this is still his go to drink when he returns home from his trips to the vegetable market. And according to him the secret to his “zen”:)

Recipe for Panakam:

  • 1/2 cup palm sugar or jaggery
  • 1 tsp dry ginger pd
  • 2 cardamom crushed (you may add the skin as well for flavor but we used only the crushed seeds)
  • 1 tbsp lemon juice (optional)
Method: Powder the jaggery in a bowl, add about 1 1/2 to 2 cups of water. You can add or reduce the water depending on how sweet you like the punch. Strain the water to remove any sediments from the jaggery mixture.
Add dry ginger pd, and cardamom pd .Mix well. Add lemon juice. Serve cold or at room temperature.
Recipe for Neer Mor :
20140411-103825.jpg
  • Yogurt -1/2 cup.
  • Water 1 1/2 cups 
  • Asafoetida -1/4 tsp
  • 1-green chili crushed,
  • few curry leaves
  • salt to taste
  • seasoning -1 tsp mustard seeds , 1/2 chopped green chilli.
Beat the yogurt in a bowl and mix with water. Mix the asafoetida & salt with little water separately. Add this to the beaten yoghurt. Crush the curry leaves and add.
For seasoning the buttermilk, heat 1/2 tsp oil in a small kadhai or heavy bottomed vessel, When the oil is hot, add the mustard seeds. Wait till it splutters then add the crushed green chili (optional). Pour this onto the buttermilk. Mix well.
20140411-103932.jpg
Recipe for Kosumalli or Kosambri (Raw moong dal, green mango salad)
  • 1/2 cup Indian yellow moong dal (skinned and split green gram)
  • 2 green chillies
  • 3 tbsp grated coconut
  • 1/2 raw mango grated
  • /1/2 cucumber cut in to very small pieces
  • salt to taste
For seasoning – 1/2 tsp mustard; 1 green chili crushed (optional)1 tsp oil, asfoetida – a pinch, a handful chopped cilantro
20140411-103843.jpg
Wash & soak the moong dal for about 1/2 hr till it gets a bit soft. Drain the water, add salt, add the chopped cucumber and grated mango and coconut.
For seasoning, heat the oil, add mustard seeds. When they splutter add the crushed green chili, asafoetida. Add this to the moong dal salad. Garnish with cilantro. You may also add 1 tsp of lemon juice if needed.
20140411-103912.jpg

Anusuya’s Kitchen – Kuzhi Paniyaram

20140119-115744.jpg

This one comes from Anusuya’s kitchen…remotely that is. I have missed visiting and posting from her kitchen for the last two years since our move, but this winter visit to Dallas was a good reminder to bring this series back, and savor this amazing cook’s simple and yum recipes. This recipe was one I wrote down in 2010, when she was in the mood to share some quick and easy snack favorites. I’m not even sure if she remembers having shared this gem but this recipe came very handy this week as I was out of lunchbox ideas for Nikhil. Mix some left over idli batter, chilies, cilantro and sambar/vethalkuzhambu powder powder and you have a new savory “appam” dish that is quite healthy too. You may add grated carrot or beans or any vegetable of your choice though I left that out in this recipe. I did add some chopped onions but that is optional too. You don’t need to use oil at all if you use a non stick “appa-karal” or the ebelskiver pan. I barely used one to one a half tsp oil for making about 15-20 paniyarams.

They make a great breakfast or snack recipe and if your child or you like it enough even if cold can be a good lunchbox staple too. I have to thank my good friend Maha for suggesting this as a lunchbox recipe.

Enjoy with any chutney of your choice – coconut or peanut or tomato or anything spicy:)

Ingredients:

  • Left over idli batter – 2 cups
  • 1 tsp sambar powder
  • 1 tsp vethal kuzhambu powder (you may use 2 tsp sambar powder if you don’t have this one. You can find this occasionally in Indian stores abroad but I usually get mine from Grand Sweets in Chennai)
  • Ground ginger and chili paste (1 inch ginger plus 2-3 chilies or more if you like it very spicy)
  • Chopped cilanto 2 tbsp
  • Chopped curry leaves 1 tbsp
  • 1/4 tsp asafetida
  • Salt to taste
  • Olive oil or rice bran oil – 2 tsp
  • Optional – chopped onions and grated veggies like carrots or beans (1/4 cup each)

Method:

Take the idli batter in a mixing bowl and add all the other ingredients. Mix well.

Heat the appa karal or ebelskiver pan with about 1- 1 1/2 tsp of the oil. Just pour 1 tsp oil across all the cups in the pan so each cup gets a little to grease it a bit.

When the oil is hot, add one tbsp each of the batter. Cook till the batter is about golden brown and using a spoon or skewer or a chopstick turn the appam/paniyaram over to cook on the other side.

20140121-104220.jpg

When golden and puffy on both sides, the paniyarams are ready to eat.


Navaratri Recipes – Cous Cous Payasam, Easy Sundals, and Quick Ladoos

This is exactly a week late so let’s say this is more of a post Navarathri round up. But you could use these recipes for most festivals so I am classifying these as  Tambrahm (Tamil Brahmin) festival recipes:).

Between the green smoothie frenzy, golu (dolls) exhibits and a real Navarathri schedule, things weren’t just busy – they were chaotic. This was my first year actually celebrating Navarathri traditionally and to be perfectly honest I didn’t know where to begin.

For the uninitiated, Navaratri literally means nine nights and represents a celebration of the Goddess Amba, (the Power). Over the nine days and nights, nine forms of Shakti (the sublime, ultimate, absolute creative energy) are worshipped.

In South India, prayers are offered for the 10 days in honor of the Goddesses Durga, Lakshmi and Saraswathi. There is also the tradition of keeping a “golu”  – an exhibition of various dolls and figurines predominantly of Gods and Goddesses in Indian mythology, placed on odd (usually 3,5, 7, 9, or 11) steps (padis). Girls and married women are usually invited to homes to view the exhibits, and are given vermillion and gifts and a token of the offerings made during the 10 days. This festival symbolizes what I would call a true expression of “girl/woman” power in the Hindu tradition.

As you can tell, a celebration for 9 days and nights needs quite a bit of organization and planning to make it a stress free festival. This year, I was also starting a new job the same week so you can see why I was beginning to obsess about it weeks before it began:)

One phone call to my mother-in law was the antidote. She is by far the most resourceful person I know when it comes to planning for festivals and events. She has always been the  “cook it and leave (the kitchen)” type of person and her secret has been her inimitable way of organizing and planning her schedule. I say “inimitable” as there is no exact science to it – it’s all in her head and still quite well planned:)  She has a simple rule –

  • Start the day before – make a few easy desserts that will last you the 10 days.
  • Keep these desserts for those rushed mornings when you don’t have the time to make neivedyam (offering) from scratch
  • Create a schedule of payasams and quick desserts for the slightly relaxed mornings.

I felt so much better when I spoke to her. But I realized this was going to be an annual routine and I needed to record these somewhere to actually remember the tips. So I created a time table or menu of sorts for Navarathri.  Again, this is probably too late but am sharing it for posterity and for referring back to this next year. Plus these recipes are pretty standard Tamil festival fare, use them for Diwali, Varalakshmi puja,you get the gist:)

Day before Navarathri :

I made these simple rava and Maa laddos. Recipe courtesy – Indra V, my mother-in-law:).

Simple, ghee laden delicacies.The best part, they don’t need any cooking really and last through the 10 days, well refrigerated of course.

Rava and Maa Ladoos:

For Rava Laadoos:

20131018-212452.jpg

  • 1 cup semolina or rava
  • 3/4 cup sugar (I used raw sugar which may make the laadoos light brownish)
  • 1/4 cup ghee or clarified butter
  • 1/2 tsp cardamom powder
  • 1/4 cup broken cashews

Method:

  • In a pan add 1 tsp ghee and roast the cashews till golden brown.
  • Remove the cashews and in the same pan, add the rava and roast till you get a nice aroma. Do not let it change color so ensure you keep stirring for about 5 minutes or so.
  • Let this cool completely.
  • Grind the rava to a fine powder.
  • Grind the sugar to a fine powder.
  • Mix the two in a bowl and add the cardamom powder. Mix well.
  • Transfer this mixture to a wide bowl. Add the remaining melted ghee slowly to this and mix well.
  • The mixture will begin to get a bit sticky like when you add water to sand. Take fistfuls of this mixture and make round balls. If there is enough ghee you will find it easy to make the balls. If not you may add a bit of milk to the mixture to ensure the balls hold together.
  • Allow the ladoos to cool and store in air tight containers.

For Maa Ladoos: (the exact same procedure only the ingredients are slightly different)

Ingredients:

  • Roasted gram dal or pottu kadalai – 1 cup
  • Raw sugar – 1 cup
  • Ghee – 1/4 cup to 1 cup
  • Cardamom powder – 1.2 tsp
  • Cashews, broken – 1/4 cup

20131018-212217.jpg

20131018-212238.jpg

20131018-212252.jpg

20131018-212302.jpg

20131018-212315.jpg

20131018-212330.jpg

You can also make Date Almond Pooran Polis and/or Carrot Coconut Squares the day before.

Day 2 and Day 5:

Cous Cous Payasam

I had never made payasam with cous cous before though the method was the same as any other jaggery based payasam recipes. This one is adapted from Biny’s recipes. Result was a creamy payasam with the right texture and just the right amount of sweetness. You may substitute the cous cous with broken wheat as well to make on another of the days.

Ingredients:

  • Couscous-1cup
  • Jaggery-1cup
  • Coconut milk-1cup
  • Hot boiling water11/2cup
  • Cumin seeds1/2tsp,roasted and crushed
  • Cardamom pods-3,crushed
  • Nuts and raisins-3tbsps
  • Ghee/Butter-2tbsp

Method:

  • 1. Heat about 1 tbsp ghee in a small kadai and when hot add the broken nuts and raisins. Fry till golden brown and keep aside.
  • 2. Take the cous cous in a bowl. Pour some boiling water (1- 1 1/2 cup) on the couscous and close the lid.
  • 3. Take the jaggery in another bowl, add some boiling water (2 tbsp) and heat it on a low flame till the jaggery melts,

20131018-212405.jpg

  • 4. Add the jaggery to the cous cous. Also add the cardamom powder.
  • 5. Heat this mixture on a medium flame. until the cous cous and the jaggery are well mixed and the mixture becomes thick.
  • 6. Turn off the heat. Slowly mix in the coconut milk and mix well.
  • 7. Add the nuts and raisins.

20131018-212435.jpg

You can serve warm or chill in the refrigerator before serving.

Sundal Varieties: 

Sweet Corn Sundal Recipe

20131018-212544.jpg

Ingredients :

  • Sweet corn kernels- 1 cup
  • Grated coconut – 2 tbsp
  • Salt to taste

For the seasoning

  • Oil – 1 tsp
  • Mustard seeds – 1/2 tsp
  • Urad dal  -1/2 tsp
  • Red chilli – 2-3
  • Hing – a pinch
  • Green chilli – 3
  • Curry leaves – a sprig

Method:

  • 1. Microwave or steam the corn with some salt till it is cooked.
  • 2. Heat some oil in a heavy bottom vessel, add mustard seeds. When it begins to splutter, add the urad dal, red chili and asafetida.
  • 3. Now add slit or crushed green chilies and curry leaves.
  • 4. Add the corn and season with salt. Mix well. Garnish with grated coconut, cilantro chopped and some lemon juice if needed.

Peanut sundal:

Ingredients:

  • 1 cup 
Grated Coconut
  • 3-4 thai green chilies
  • 1/2 cup cilantro
  • 2 sprigs curry leaves.
  • 1 inch ginger

For seasoning

  • 1 tsp 
Mustard Seeds
  • 1/2 tsp
 Urad Dhal
  • 2 Dry Red Chilly
  • Curry Leaves – a sprig
  • Asafetida – a pinch
  • Oil – 1 tsp

Method:

  • Pressure cook the nuts with some salt.
  • Grind the coconut, green chili, cilantro, ginger and curry leaves in a blender to a coarse powder.
  • Heat the oil and add the mustard seeds, urad dhal and asafetida.
  • Add the curry leaves, red chili and stir for a minute.
  • Mix in the boiled peanuts and salt and stir well for a few minutes.
  • Add the ground chili coconut powder/paste and mix well. Garnish with cilantro and serve hot.

You can also make black bean sundal the same way as above (use either the corn recipe or the peanut sundal recipe, just substitute the corn with the black beans.

20131018-212508.jpg

Spicy Andhra Tomato Pachadi (Chutney)

20130917-171038.jpg

This is a quick post and a contribution from my dear friend Neeraja. Pachadis or chutneys in Telugu are a favorite in our home especially the spicy kind. Well spicy is synonymous to Andhra food so I’m always looking for traditional pachadi recipes as mentioned here and here.

This recipe goes very well with rice (white or brown) and with hot dosas (savory crepes) and uthappams (Savory pancakes with spicy topping). Here is the recipe in Neeraja’s words. Her recipes are typically authentic Srikakulam (North eastern Andhra Pradesh) recipes which is where her family is from. There are several ways to make this popular pachadi and this one gives it a very traditional tart and spicy slightly smoky taste. Delish!

Thanks Neeraja for this keeper recipe.

Ingredients:

5 round tomatoes
5 green chillies
5 red chillies
5 garlic cloves
1/2 ” ginger
1 1/2 tsp urad dal (split black lentils)
1 1/2 tsp chana dal (split pigeon peas)
1 tsp mustard seeds
1 1/2 tsp jeera (cumin seeds)
1/2 tsp methi powder (fenugreek)
1 tsp salt and more as per taste
1 1/2 tsp cooking oil
7-10 curry leaves
1/4th tsp hing (asafetida)
1 tsp dhaniya powder (coriander powder)
tamarind small lemon sized if using the sweeter variety of tomatoes OR 1/2 lemon sized tamarind if round tomatoes

 Method:

1. Heat oil in a pan. Add mustard seeds. Wait till they crackle. Add cumin seeds, urad dal, chana dal, garlic cloves, ginger, red chillies, slit green chillies, curry leaves and asafetida. Saute till the dals and red chilies turn reddish brown, then transfer to a bowl and keep aside.

20130917-215453.jpg
2. Add chopped tomatoes to the remaining oil in the pan. Fry the tomatoes along with the tamarind.

20130917-215501.jpgCover with a lid and let cook until you see the tomatoes become mushy and oil begins to leave the sides of the pan.

3. Now take the dal and other seasoning ingredients you have set aside and add salt and coriander powder and fenugreek powder to the mixture. Grind the ingredients in a blender to a coarse powder. Ensure the dals are still grainy and that it doesn’t become a fine powder

4. Add the fried tomato mixture to it and pulse a few times till the mixture combines well. You can add red chilly powder if needed, if you like the chutney to be fiery hot.

20130917-215508.jpg

Once you’ve transferred the chutney to a bowl, you can garnish again by heating mustard seeds, curry leaves and asafetida in hot oil and pouring over the chutney (optional).

Enjoy with hot rice and ghee or with hot dosas.

20130917-171047.jpg

In honor of Krishna’s Birthday – Nei Appam – An Indian Ebleskiver

20130829-131921.jpgYes I’m talking about the lovable lotus eyed little Krishna or Kutti Krishna, (the Hindu God-child, prankster, divine hero and various other roles he adorns in Indian mythology) whose birthday was celebrated yesterday/today around the world. As I said earlier in this post, I haven’t been one to make elaborate dishes for festivals. Festivals were almost always synonymous to good food, new clothes and most importantly a day off from school. This was when I was growing up, a child, a teenager, a college-goer. While I associated festivals with food it wasn’t about making the dishes- I was always at the receiving end – Amma would make the amazing dishes, arrange for the puja (worship) and I almost always behaved like a guest – in my own home – helping out a bit here and there. Amma would ensure that everything was perfect while I would enjoy the fruits of the perfection. Was something wrong with this picture? Everything possibly.

So for the past year I have been getting more conscious about trying to get a bit more “independent” with festivals and festival creations – more to relive what Amma would typically do or make and to get Nikhil to experience and taste dishes that he wouldn’t get to try on other days of the year.

There is this other deeper probably more meaningful reason that I have begun to explore which is which is the whys of celebrating a Krishna Janmashtami or a Ganesh Chaturthi or a Varalakshmi Vratham (or any religious festival for that matter). I won’t get into each one of them but I do believe that the ultimate goal of all the festivals is the same – they are all reminders to awaken and celebrate the divinity within each one of us. I suppose we all need dedicated days of the year as reminders to look inward and recognize the Krishnas, the Ganesha, the Buddha, Jesus, Allah and (insert religious figure)/the Higher Power in all of us. The ultimate goal is to make everyday a festival – and hopefully by the time we are done celebrating all the festivals over the years, the concept of knowing and celebrating our own divinity will become second nature to all of us.

This does raise other questions about festival food however – why don’t we make these dishes on other days? And why do we only make certain dishes for certain festivals? What is the story behind festival food and prasadams (offerings)? I’m still figuring this out but enjoy eating them whenever they are made, nevertheless:)

Below is the recipe for Nei Appam, a dish made with ghee (Nei) or clarified butter, rice flour and jaggery. This is typically made for Janmashtami (Krishna’s birthday – Janma- on the eighth day of the dark fortnight – ashtami) along with an Aval Payasam (milk dessert made with flattened rice flakes).

I have used an easier method and Amma usually makes this with raw rice instead of rice flour. You can go either route but I liked the way these turned out – crispy on the outside and very soft on the inside. I call these an Indian version of the Danish Ebelskivers as the method is similar and I used the Ebelskiver pan, also called the Paniaram pan in India.

Ingredients:

1 cup brown rice flour ( see picture below). You may alternatively soak some brown rice in water for a half hour then grind to a smooth paste in a blender.

20130829-131906.jpg

1/4 cup all purpose flour

1/4 cup whole wheat flour

3/4 cup jaggery powder (see picture below. You may also grate jaggery if you don’t find jaggery powder but I find this product to be super convenient to dissolve jaggery quickly for dishes)

20130829-131322.jpg

1 ripe banana mashed

1/2 tsp cardamom powder

1/4 cup water

Method:

1. Mix all the flours in a mixing bowl. Add the cardamom powder

20130829-131936.jpg

2. Mash the banana and add to the flours.

20130829-131355.jpg

3. Boil the water in a kettle or in a saucepan. Take about 1/4 cup water and add the jaggery powder in it till it dissolves.

20130829-131334.jpg

20130829-131345.jpg

4. Add this jaggery water mixture to the flour banana mixture. Mix the batter well till lumps dissolve and you get a smooth yet thick and pourable consistency.

5. Set this aside for an hour or so till the batter slightly ferments. You can leave it for 1-2 hours if needed.

6. Add about 1 tsp ghee to each paniaram/ebelskiver mould well and heat it on a low flame.

7. Once the ghee is heated completely and begins to froth a bit, add a tbsp each of the batter in each of the wells. Let it cook for about 3-4 minutes till it begins to rise to the top.

8. Now with the help of a skewer or knitting needle, gently turn the appams over to cook on the other side. (It’s not as oily as it seems in the picture below so let it not scare you:). You don’t need to use that much ghee at all for frying. The ghee tends to froth up as you pour the dough in the wells)

20130829-131411.jpg

9. Cook until both sides are evenly browned. Remove from the ghee and place on a paper towel to drain any excess oil/ghee.

20130829-131928.jpg

A different curry – Mango Pulissery

This is a different curry for sure but there’s more to this post than the food. Roz Ka Khana has a new contributor – that’s what’s refreshingly different. Introducing Sumathi Vaidyanathan – a veteran journalist and editor who’s worked for some high profile publications and most importantly an amazing cook. Years of travel and experiments with various global cuisines have led to some choice creations in her kitchen, and I have been lucky to taste many of them. Did I mention she also happens to be my aunt?

RKK presents “Sumathi’s Medley”, a special collection of recipes chosen, created and written by Sumathi. Here’s the first from her collection – Mango Pullisery.

——————————————————————————————————————————————————-

It’s the tail end of the South Asian mango season and I’m loading up on the fruit, using it every way I know how.

And so the other day I ended up making a pulissery, a sweet, hot, sour concoction that I first tasted as a young girl in India, at the home of a friend from Kerala.

“Puli” is sour in Malayalam and pulissery loosely translates as “sour curry.”

Pulissery can also be made with ripe plantains and pineapple but in my view, ripe mangoes are the best.  Their velvety sweetness coated in a tangy yoghurt sauce flecked with chilli and coconut is bliss on the tongue.

You can use any firm fleshed mango to make this dish. In Kerala, the mango of choice is the Chandrakaran. A friend of mine prefers to use the smallest mangoes she can find – she peels the fruit and cooks it whole, seed and all. The end result is delicious but only if you are used to eating the mango South Asian style, with your hands.  If this is asking too much of your family and/or your guests, go the genteel way and cube the mangoes.

I used the Chaunsa and the Anwar Ratol from Pakistan, which shows up in the Singapore markets in the latter half of July. I love the Anwar Ratol; it is one of my favourites along with the Alphonso but the flesh does tend to be a bit spongy so if you’re cooking with it, expect the pieces to lose some of their shape.

The traditional pulissery is a hearty dish with lots of coconut and is meant to be eaten with rice. The version below is lighter and is a good addition to a buffet spread. I like to serve it in small individual bowls so it is easier to eat on its own.

Mango Pulissery

img_0987

Serves 4 to 6

Ingredients:

2 ripe mangoes

A pinch of turmeric powder

½-1 tsp salt

3 green chillies

4-5 tbsps plain sour yogurt

1 tablespoon grated coconut

1 teaspoon cumin seeds

For tempering

1 tbsp oil

1 tsp mustard seeds

3 red chillies

3-4 curry leaves

img_0981-e1376798067896

Method:

Wash, peel, and cube the mangoes.  You should end up with about a cup of cubed mangoes.

img_09771

Soak the mango seeds and skin in a cup of hot water for about 10 minutes. Use your hands to strip the flesh off both until seeds and skin are clean and discard them.  If you have a lot of mango fibers in the water, run the liquid through a blender or strain it.

Put the mango cubes and water in a saucepan with the salt, green chillies, and turmeric. Bring to a boil and simmer for about 10 minutes until the mango pieces are just soft. If the mango isn’t sweet enough, add a teaspoon or two of sugar.

Make a paste of the green chillies, coconut, and cumin seeds in a blender or in a mortar and pestle.

Whisk the yoghurt until it is smooth and add the paste to it. Mix thoroughly.

img_0983-e1376796739481

Add the yoghurt-coconut mixture to the mangoes in the saucepan, stirring constantly. It is important to lower the flame while you do this so that the yoghurt does not curdle. Bring the curry to a near boil and switch off the flame.

Heat the oil to smoking point in a small frying pan. Add the mustard seeds and allow them to pop.
Add the dry red chillies and the curry leaves and switch off the flame.
Pour the oil mixture on top of the curry and serve.

IMG_1026


Pachai Milagu Kuzhambu (Spicy Green Peppercorn Soup)


DSC01822

After a bout of crazy baking (yes, crazy is the right word when you are waiting for the bread dough to rise at midnight:), it was good to get Girish in the kitchen for some traditional fare.

You can tell by his previous recipes that he is kind of a “Kuzhambu King”  – Karuveppalai Kuzhambu, Vetha Kuzhambu, Kaara Kuzhambu are all his staple recipes. The names may be a tongue twister to the unorthodox ear but as any lover of Indian cuisine knows, they are distinctly different and unique to different regions of the South.

Pachai Milagu Kuzhambu is similar to the Karuveppalai Kuzhambu (curry leaves tamarind soup), but the green peppercorns give it a different kind of “burn”. That wasn’t meant to sound scary to newbies to Kuzhambu, but if you don’t know our recipes already, Kuzhambus are meant to have that tangy spice, which provide the perfect antidote to white rice and clarified butter (ghee) or the most famous combination of yoghurt rice and Kuzhambu, very lovingly known as “Thachi Mammu” in our home:)

As I have said this earlier, Singapore is a veggie and fruit haven and fresh green peppercorns, though seasonal are available (something I wouldn’t have dreamed of finding easily in the US). A trip to the local vegetable market (Tekka) and a 10 minute hunt to find a speacialty Thai store was all it took to find green peppercorns by the kilos! Of course we picked up about 300 grams which will probably last us a month or two. Green peppercorns have an extra bite to it and taste tangier than their black counterparts, which makes it a perfect accompaniment for Kuzhambu. Amma is already in the process of pickling the remaining peppercorns in brine the recipe of which I will share later.

Recipe for Pachai Milagu Kuzhambu:

Ingredients:

  • Green Peppercorns – 125 grams or about 1 1/2 cups
  • Curry leaves – 1/2 cup
  • Dry red chilies – 4-5
  • Cumin seeds – 1 tbsp
  • Tamarind, a lemon sized ball soaked in warm water
  • Salt to taste
  • Asafetida (hing) – a pinch
  • Gingelly oil – 2 tbsp

DSC_0214

Method:

1. Take a kadai or heavy bottom vessel and add half the green peppercorns, add red chilies and cumin seeds and dry roast for about 3-4 minutes. The peppercorns will begin to pop. Turn off the heat.

DSC01824

2. Now take this mixture and put it in the blender container. Add the remaining peppercorns (minus about 2 tbsp), tamarind and curry leaves to the blender container. Blend these to a smooth paste adding some water little by little so the consistency is that of a thick sauce.
DSC_0215

3. Now heat another heavy bottom vessel (or kachitti, a stoneware vessel), add about 2 tbsp of gingelly oil. Add asfetida to the oil. Heat for about 2-3 minutes till oil begins to smoke a bit.

DSC_0213

4. Now add the paste and stir to mix.

DSC_0219

Add about 1/2 cup water (to 1 cup, depending on consistency needed) and stir again. Now add the remaining 2 tbsp of fresh green peppercorns to this mixture.

5. Bring this mixture to a boil and let it simmer for 5 minutes till you get an aroma of the peppercorn curry leaves mixture.

6. Serve hot with rice and pappadums or with Thachi Mammu:).

DSC_0222

Post Navigation