Roz Ka Khana

A blog about everyday food. Mostly Indian. All vegetarian.

Archive for the category “Vitamix recipes”

Snappy Salads – Taco Salad in a Jar

Salads in a Jar is probably another Pinterest favorite but it was actually a Huffington Post article that caught my fancy this week. The article was about colorful salads and fruits to make for a not so sad desk lunch. Couldn’tbe more timely as I was on a gluten-free/clean eating binge this week again after all the “junk” devoured over the past week and weekend.

My hurried clicks with my Iphone camera while I was making this salad didn’t come close to the vibrant colors in the original article, but it was a decent first attempt to inspire me to eat healthy at work and stop my binges in Singapore “dhaba” type eateries and food courts. I have to admit, this is by far the most convenient method to tote a salad to work, greens stay fresh, its healthy, compact and the dressing gets evenly mixed when its time to eat. All you need to do is turn the mason jar upside down and shake it a few times and you have a wholesome green colorful meal. And yes its snappy too!

After my smoothie obsession (that continues), salads may come a close second to slowly becoming an everyday habit.  Both smoothies and salads use my favorite kitchen utensil…the versatile mason jar. Not that ubiquitous in Singapore, you can find mason jars at wholesale Chinese kitchen stores in Chinatown or at Japanese dollar stores (Daiso). I do miss the “Ball” mason jars I used to collect at Walmart and Amazon but these aren’t too bad. Of course there’s always the pasta sauce/pickle jars that can be reused so it’s not hard to get started. You can also make the dressing and the fresh salsa ahead of time and keep it handy to whip up other tasteful mason jar salads.

20140619-114804-42484780.jpg

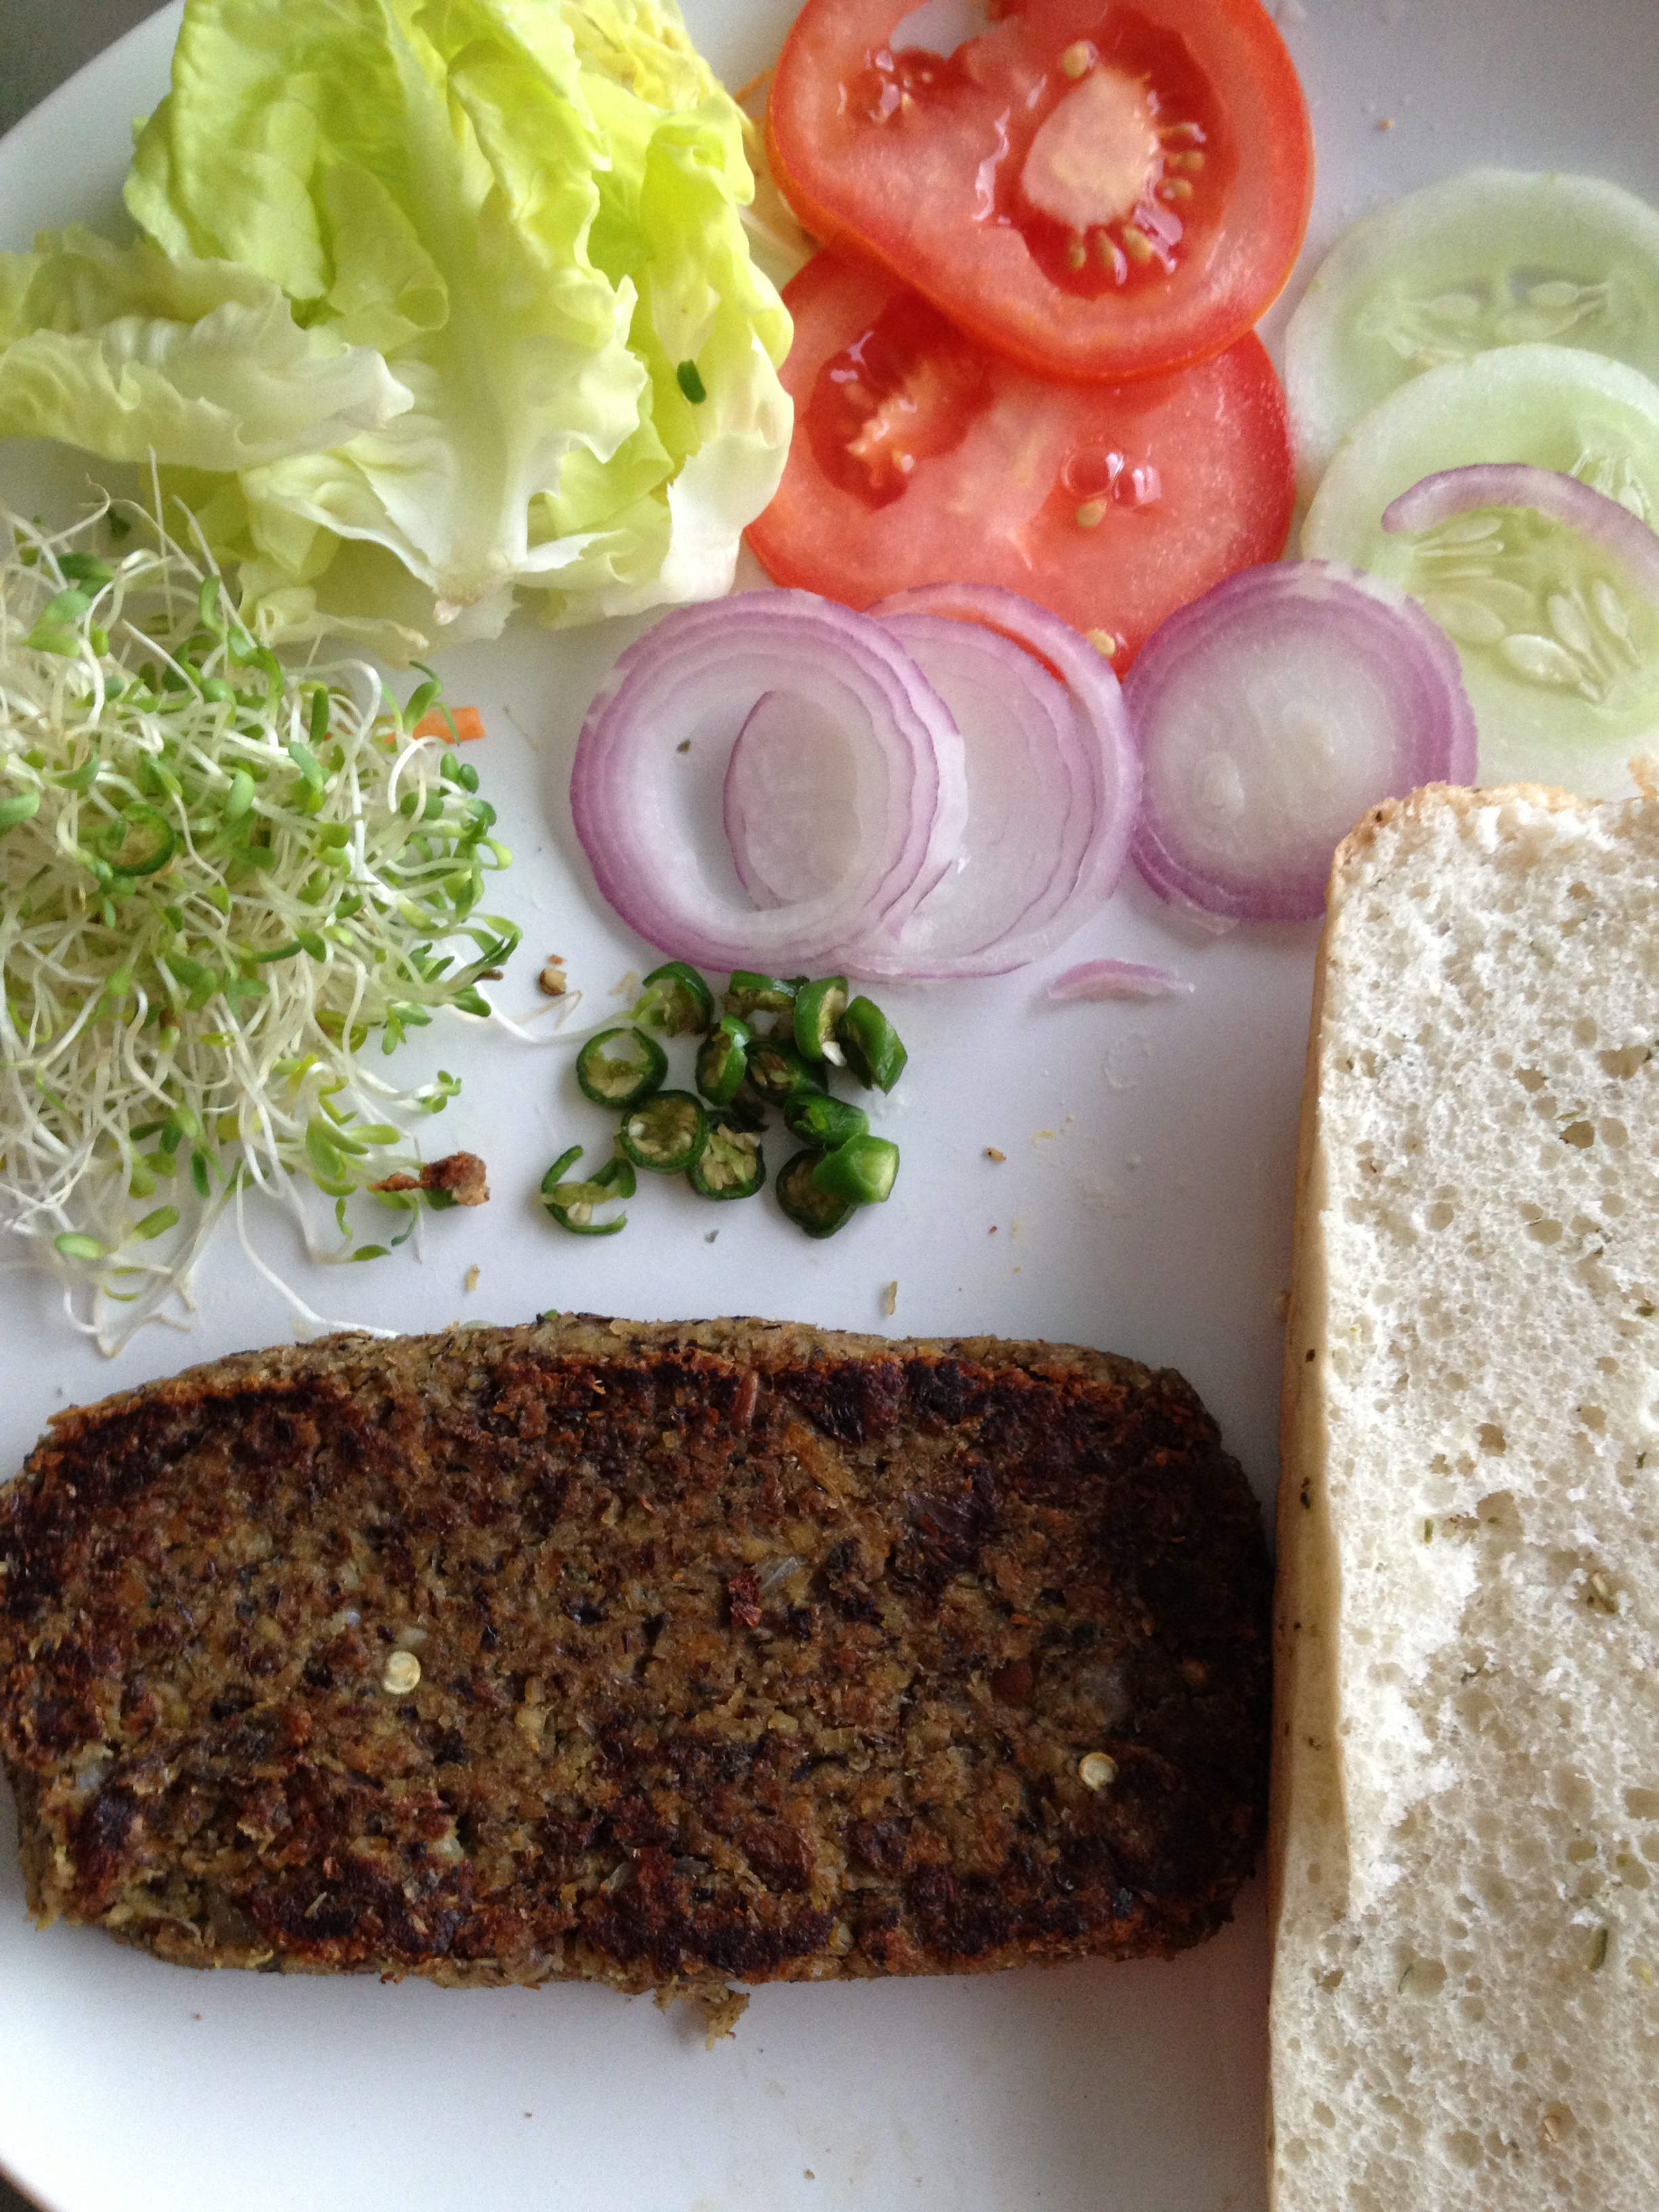
Taco salad in a mason jar

Couple of points to note when making salads in a jar:

  • Use mason jars that have a wider mouth than those you use for smoothies. Helps to mix and eat out of the jar if necessary.
  • Put the dressing in first and then add in other ingredients, Beans, harder veggies or fruits at the bottom and the softer ones on top. The salad leaves should be top most so they stay fresh.
  • Experiment with different veggies, fruits, beans and dressing.
  • Use homemade dressings as much as you can. Store bought ones not only have processed ingredients but are also calorie laden so nothing like blending some fresh dressing with fruits, veggies, olive oil or other on your own. I will share some dressing recipes frequently in this section as well so keep a look out.
20140619-114804-42484094.jpg

Taco salad prep

Ingredients:

For salad:

  • 1/2 cup boiled and drained black beans (soak black beans overnight in water and then cook it the next day in water over a stove or a pressure cooker)
  • 1/4 cup diced green or red bell pepper,or both
  • 1/4 cup sliced green onions or regular sweet Vidalia onions
  • 1/2 cup cooked quinoa or brown rice (I mixed the quinoa with some lemon juiceand cilantro beforehand)
  • 1 small avocado, diced (toss with a little lime juice to prevent browning)
  • 2 Tablespoons fresh Mexican salsa (recipe below)
  • small handful chopped cilantro
  • shredded or sliced lettuce or any leafy greens

For dressing: (can be made 1-2 days ahead) 

  • juice of 1 lemon or lime (or about 2 tbsp)
  • 1/2 tsp cumin powder
  • 1 tbsp olive oil
  • Sea Salt to taste

Mix all the above with a whisk and set aside.

For fresh Mexican salsa: (in the Vitamix)– from Vitamix recipes. Can be made a day or even a week ahead)

  • 2 cloves of peeled garlic
  • 5 baby carrots
  • 3 or 4 slices of fresh serrano peppers pending your desired heat level
  • fresh cilantro ( 3 finger pinch)

Turn the Vitamix to variable speed 7 and drop the garlic, serrano peppers, cilantro, and carrots in through the hole in the lid while the machine is running. Next, add the following to the container and put the lid back on:

  • 3 roma tomatoes (cutting in 1/2 or 1/4’s will make it easier for the blades to grab the tomatoes)
  • 1/4 inch slice of sweet yellow onion (larger onion) or a 1/2 inch on a smaller union
  • 1 thin slice of green bell pepper
  • Season Salt (2 or 3 shakes)
  • Pepper (2 or 3 shakes)
  • Garlic Salt (4 or 5 shakes)
  • Ground Cumin (2 or 3 shakes)
  • Squirt of lime juice

Now, turn the machine on variable 1 or 2 range. The less ripe the harder the tomato and the higher the speed needed to chop), and then use the tamper to push everything down in to the blades! When you can no longer see or feel large chunks of food, then your salsa is ready to devour:)

Method for layering the salad:

Layer ingredients in jar in the order listed- Lemon cumin dressing, black beans, diced pepper, green onions, salsa, quinoa, avocado and end with the lettuce. Top with lid and refrigerate until ready to eat. Can be made 1-2 days in advance.
To eat – turn jar over to let dressing/salsa coat the salad ingredients. You can eat out of the jar or empty it on to a plate. Salad leaves stay fresh and dressing is all evenly coated. Perfection!


20140619-114805-42485616.jpg


The 30 Day Green Smoothie Challenge begins October 1!

20130930-091521.jpg

I mentioned earlier that green smoothies have been quite life changing for me. I’ve noticed some remarkable changes in my health even since I started to juice and blend every day. The Vitamix blender and the Hurom juicer are a countertop staple in my kitchen despite limited counter space. I have realized that having them at eye level keeps it top of mind – I now use them both every single day, sometimes more than once a day.

I’ve had several sources of inspiration as I mentioned earlier – the movie and site of Joe Cross’s reboot, Pushita’s The Rawsome Life, Kimberly Snyder’s Beauty Detox and more recently Simple Green Smoothies. The last one has been a go-to for all things smoothies, especially the green kind. I tried their first 30 day challenge a few months ago and am now hooked. I start my morning with a daily glass of warm water with lemon, and then it’s usually a green smoothie for breakfast. I may or may not have additional toast or oatmeal – it depends on how full I feel after the smoothie and they are usually quite filling. Of course I’m hungry in about two hours for a mid morning snack so while I’m eating more frequently it’s actually helped with my energy levels.

This ritual has helped in more ways than one:

  • My energy levels have increased significantly – I don’t feel the need for caffeine any more in the morning – I have cut out morning tea or coffee except for an occasional afternoon cup of green tea or herbal tea
  • My skin has noticeably improved – what used to be very acne prone is now relatively smooth and on weeks I eat right it actually does have a sheen, not due to oil but a brightness to it:)
  • My eyesight has improved –  this took me a few validations from 2 different eye exams – but in my opinion the juicing of carrots has actually helped. My prescription has dropped a full 0.5 points.
  • Has helped with more than  my daily intake of fruits and veggies.
  • Has helped with toning and losing a few pounds – small but noticeable.
  • Has helped with immune support – my sinus issues have cleared up.

And so when Simple Green Smoothies announced they would start their next 30 day challenge – I was of course all set. Only this time I wanted to share my progress so hopefully we can do this together:)

If you are interested in joining and supporting me on this challenge please follow me on my Tumbl-og, FB and on Instagram to get daily updates, weekly shopping lists and recipes. Of course go ahead and sign up with Simple Green Smoothies too, the creators of this challenge.

Feel free to share your experiences and any green smoothie recipes that have worked for you as well.

Getting Started with the Challenge: (adapted from Simple Green Smoothies)

The goal is to help you drink at least one green smoothie a day for the next 30 days…and you can keep it flexible as long as you can make it happen.
 #1: Drink at least one green smoothie per day (1 green smoothie = 16 ounces). The recipes make 2 servings— so you can share with a friend,  save the other half for a snack or half the recipe.
#2: Keep eating regular meals. If you’re trying to shed some pounds, you can substitute a green smoothie for a meal. In general maintain a healthy diet – no heavy fats, fried stuff, avoid sugary stuff, hydrogenated fats etc. if you want to see a difference in your weight and in your overall health.
#3: Read the weekly shopping list and daily recipes on either of those sources mentioned above.
#4: Be adventurous! Buy those mustard or collard greens at the farmer’s market! Throw in some coconut oil! Sprinkle the top with chia seeds! You can be flexible with your smoothies.
#5: Buy fresh veggies and organic as much as you can. Be sure to wash the greens and fruits well especially if they are non organic to wash off the pesticides.
#6: The green smoothie general recipe is greens (1-2) + fruits (1-2) + herbs (1-2) + liquid base (coconut water or almond milk or water) + superfood (optional – chia, flax, spirulina etc)
#5: Blend your heart out! Any blender will do as long as you are consistent and use it a lot.

Happy smoothi-eing. You will notice that one green smoothie a day will transform your life as well, and hopefully help you drop a few pounds if you need to.

Here is the shopping list for the 1st week that I will share here and in all the other places of course. The things you will need other than the list are a good blender (I find the best ones to be Vitamix or the Blendtec if you are looking for suggestions but have found any blender to do the basic trick).

Note that this list makes about 4-5 cups or 2 servings of smoothies a day for 2 people so feel free to halve if you want to make less. Also note that you may use any greens (if you don’t have kale available for example use any local greens and any liquid base.

Shopping list for week 1:

FRUITS:
  • 6 bananas
  • 6 oranges
  • 1 pineapple, fresh or frozen
  • 2 apples
  • 4 pears
  • 1 avocado
  • 1 package mixed berries
  •    (strawberries, blueberries, raspberries)
  • 1 lemon
  • 1 small bag grapes 
VEGGIES: 
  • 1 small bag spinach, fresh (10-16 ounces)
  • 1 small bunch kale, fresh
  • 1 bunch basil, fresh

OTHER (LIQUID BASE):

  • Almond milk, unsweetened
  • Ginger root
  •  Coconut water
OPTIONAL (yet recommended!):
  • Chia, flax seeds
  • Elderberry extract
  • Probiotics
  • Spirulina powder

You may substitute the fruits as you like but try to keep it within the same family of stone fruits, melons, berries etc. For instance you can substitute oranges with grapefruit or clementines. Pears with green apples or maybe even guavas etc.

Also those are frozen berries in the picture – you may use fresh or frozen.

Stay open minded, flexible and watch that transformation happen!

Mango Coco Loco Smoothie

20130506-170115.jpgThis is a quick post and a quick way to use up all those juicy Alphonso mangoes filling up in my kitchen (and our tummies) this season. There are a gazillion mango dessert recipes out there that I’m dying to try, but what better way to use up some overripe mangoes than in a hearty and nutritious smoothie. Made with the goodness of coconut water and avocados and oranges , this one has a chock full of electrolytes, healthy fats, Vitamin C and is a filling smoothie and great breakfast by itself.

Of course if you’re like me, don’t bother chopping the mangoes – just squeeze the heck out of them with your fingers into the blender – then enjoy savoring the sweet goodness of the seed with bits of the pulp and juice trickling down your fingers:). That is by far my favorite way to enjoy a mango.

Ingredients: (makes 6 cups)

  • Aphonso mangoes (or you can use any sweet ripe mango) – peeled and chopped into chunks – 2
  • Avocado – 2
  • Oranges – peeled and cut into big chunks – 2
  • Coconut water from one tender coconut – 1 to 1 1/2 cups
  • Coconut meat – 1/4 – 12/ cup (optional)
  • Whey protein powder (optional) – 1 tbsp
  • Ice cubes – 1 cup
  • Water as needed
  • Vanilla paste or pod or essence – 1/2 tsp

Method:

Add all the ingredients in the order listed into a Vitamix or other high powered blender and blend first at a low speed then on high for 1-2 minutes. Add the water as needed to reach the desired consistency.

Lunchbox Series – Vegetarian Black Bean Burger

IMG_0268
This is another Vitamix recipe, though you can make this burger mix in any food processor as well. It’s just that I love to talk about the Vitamix’s versatility and of course put it to all sorts of tests. And it almost always wins me over. I know I’m gushing and it’s silly.  Yes, pity that the Vitamix cannot actually make the patties and sauté them as well, as a friend jokingly asked me:). Well, those are the few things it can’t do (yet) but if Vitamix is truly listening, we may just about have another innovation to make this a true all round kitchen machine.

I sent this for Nikhil’s lunch and let me just say that I now make a batch of beans and freeze them regularly (black or garbanzo or any bean variety soaked and boiled), as this is another lunch box staple and a keeper recipe.

Ingredients:

Small red onion – 1 (cut in half)

Green chili (Thai or serrano) – 1 -2 depending on spice level

Cilantro  with some stem– a small bunch

Soaked and boiled black beans – ¾-1 cup (You may also use 1 can of black beans)

Cumin powder – ¾  tsp or to taste

Garlic – 1 pod

Ginger – 1/2 – 1 inch

Garam masala (available in Indian grocery stores) – ½ tsp

1 tsp olive oil

Corn flour or rice flour – 1tbsp (you may also use 1 tbsp flax seed meal whisked in ½ cup water. The idea is to have some sort of a binding agent and flax seed meal is a good substitute for eggs)

Method:

  1. Start the blender on variable speed 1, then add the red onion, green chili, a fistful of cilantro, ginger and garlic and blend till the onions are very finely chopped.
  2. Add the boiled beans and continue to blend on variable speed 3-5. Use the tamper to mix the ingredients well.
  3. Now add a dash of cumin powder, salt and garam masala.
  4. Add the binding agent (corn flour or flax seed meal). Blend again on variable speed. The mix should resemble a coarse yet blended paste. You can keep this in the refrigerator for a while to help bind the ingredients.
  5. IMG_0266
  6. Shape into patties and cook on a skillet until brown on all sides. You may use 1 tsp olive oil to cook it till it browns well.
  7. IMG_0267
  8. Add your favorite burger condiments and the patty to wheat or multigrain sub bread. Wrap in plastic wrap or foil and pack it away for a healthy lunch:). You can see a green apple, goldfish and a cupcake in this lunch box which is yeah, still quite healthy (depends on the type of cupcake:)
  9. IMG_0264

Raw Almond Milk and Almond Meal recipe — Date Almond Pooran Poli

I did tell you about my fetish for all things juicing didn’t I? It’s become a habit now, starting every single morning breakfast with a fresh squeezed fruit and veggie juice followed by a late morning smoothie. And I pack a mason jar of juice to work as well for that 3pm “juice in leiu of tea” break. It’s working! I don’t feel the need for that cup of chai or joe anymore and the green juice or pomegranate juice does the trick. Fact is, I cannot think of a store bought carton of juice these days…and buying a smoothie at a cafe feels like sacrilege:) The Vitamix and Hurom now occupy a very prime position on my counter in the kitchen. I’m not sure if I can do a 100% raw and vegan diet but I am convinced that eating more raw veggies and fruits gives me that energy boost and keeps me going. So I guess I’m a 50-50 raw vegetarian:)

And so I have tried several juice and smoothie combinations that I hope to post on a more regular basis but something I have been meaning to try with my new juicer was making raw almond milk. Again, thanks to The Rawsome Life, and her inspiring Facebook posts, I finally got around to remembering to soak 1 cup of almonds last week to make fresh almond milk for the next day.

The method was so easy and the Hurom juicer makes it even more effortless. No need to peel the almonds and no need to filter. What you get is creamy, fresh, raw almond milk with powdery, dry almond meal. No mess, no fuss:)

And the best part, it yields almost 3-4 cups of almond milk, not bad for just 1 cup of almonds. And over 1 1/2 cups of almond meal.

As I mentioned earlier I’m also always looking for ideas to deal with juicer pulp. Amma made an amazing carrot, beetroot pulp halwa/barfi dessert the recipe of which I will post soon. With the almond milk, Amma had another brilliant idea. She used some of the almond meal with some dates to make Date Almond Puran Poli (stuffed wheat tortillas or parathas).

Here are the recipes for the above.

Raw Almond Milk:

IMG_0342

Ingredients for almond milk:

1 cup raw almonds (with skin intact)

2-3 cups water.

1 tsp vanilla essence (raw vanilla bean is preferable but I didn’t have that in stock)

1 tsp agave syrup (or any sweetener of your choice. This is optional)

Method:

1. Soak 1 cup of almonds in about 2 cups water overnight.

2. The next morning, discard the water and add another 2 cups of fresh water.

3. Turn the juicer on and pour a ladle of almonds and water into it. Continue till all the almonds are ground.

4. Add the vanilla essence and any sweetener of your choice and stir well. Fresh almond milk is ready to serve!

IMG_0344

Note – You can choose to peel the almonds as well. The skin will peel right off when you soak the almonds overnight. If not, you can also add some warm water in the morning and this will help peel the skin off.

You may also use the Vitamix blender to make fresh almond milk. Again peeling the almonds is preferable here.

You may also choose to filter the almond milk using a cheese cloth or milk strainer. I liked mine just the way it was as it gave a thicker creamier consistency.

Almond Meal Recipe – Date Almond Pooran Poli

IMG_0356


1 cup almond meal

1/2 cup dates

1 tbsp ghee or clarified butter

1/4 cup wheat flour

1/4 cup all purpose flour

Salt to taste

Water 1/2 cup

Oil – 2 tsp

Method:

1. Take the almond meal and dates in a Vitamix jar and blend with Variable speed. use the tamper to mix the ingredients until the mixture resembles a coarse paste. Set this aside.

IMG_0345

2. Now take a heavy bottom vessel and add 1 tbsp ghee to coat the sides of the pan.

2. Add the almond date mixture and heat for a few minutes, keep stirring in the pan until the mixture starts to concentrate in the center, and doesn’t stick much to the sides or the ladle.

IMG_0348

IMG_0349

3. Meanwhile, mix the wheat and all purpose flour in a mixing bowl, add salt and then add water and oil little by little until it forms a dough much like chapathi dough. Doesn’t stick to your fingers and is easy to pinch and form round balls.

4. Pinch of a piece of dough and make round balls about an inch to 1 1/2″ in diameter. This mixture should make about 6-8 pooran polis.

5. If the almond date mixture is cool enough, make small round balls (about 1/2-1″ in diameter depending on how big you want your polis) and keep aside.

6. Take a rolling pin and roll the balls into small flat tortilla shapes or rotis.

7. Place one small round of the almond date ball in the center of the small chapati and close the dough around it to form a roundish shape. Seal the edges.

8. Now take the almond date stuffed dough rounds and using wheat flour to dust the surface and a rolling pin, roll out the dough into circles about 3-4″ in diameter. The chapathis or polis should be thin enough but ensure that the stuffing doesn’t start to seep out too much.

10. Preheat a frying pan, place the poli on it, switch to low heat and cook on one side for 1 -2 minutes. Flip over and cook the other side till lightly browned. Apply a little ghee (optional) on both sides and remove immediately.

Note: If you’d like you may also add about a tbsp of Demerara or brown sugar to the date mixture, if you like your polis sweeter. We opted not to just to keep sugar out of this recipe:)

Juicing my way into the New Year

Yeah I know it’s probably too late to be saying “in the new year”. It’s almost the end of the first month into the the new year and I have been slacking. No, I didn’t make any great resolutions, I don’t really believe in making any, as they would’ve lasted all of 1 month anyway, if that.

The year started off quiet after a fun-filled family filled reunion at the end of the year. For the first time in many years, we actually spent a quiet evening on New Year’s eve. I think we deserved it and maybe even owed it to ourselves:)

It has been quite an eventful 2012 – a big move to Asia, change of schools, change of homes, change of jobs – our entire world had suddenly turned almost a full circle, as we moved closer to India, where we started! With all that, it didn’t really feel out of place to take a breather and brace ourselves for whatever is  coming in 2013.

So as we look ahead, 27 days already into the new year, I keep my fingers crossed that we make the best of this adventure, taking life one day at a time – discovering and evolving  in our journey. If anything, this move has taught me that – we have no idea what or when the next adventure is – so let’s take it slow and live in the present:)

I know one discovery I have made after moving here – it must be the change of pace – I have become more conscious of eating healthy, more veggies, more fruits, more grains, and more juices – not to forget, eating small meals every 2-3 hours.

Juicing and smoothie-ing (if that was a word) is slowly becoming a way of life. I was first inspired by the film, Fat, Sick and Nearly Dead and resolved to buy a juicer when I moved to Singapore. I bought a Philips centrifugal juicer which worked great until I discovered this world of centrifugal vs masticating vs slow juicers. Thanks to my dear friend Pushita, who is a health and wellness counselor (check out her page on Facebook for health tips and recipes), I was introduced to the technicalities of juicing. What types of juices heal, provide energy, and give the body the alkalinity it needs to stay healthy. And so researching juicers became a new found passion. I became a “juicer geek” from a handheld geek:). Um there are many apps and FB pages for juicing as well, in case you were wondering.

My new year’s gift to myself and the family was the investment (it literally is one, given the price) of the Hurom Slow Juicer. I’ll let you read the differences between the centrifugal and slow juicers here. But in a nutshell, the slow juicer produces more juice, less pulp and doesn’t lead to oxidation of the juice. So the juice stays fresher longer – as long as you store in glass bottles in the refrigerator. And they taste as fresh as can be:)

IMG_0149

I am now hooked – a juice or a smoothie is a staple in our home  and I make it a point to either make vegetable juices or introduce some veggie in the fruit juices. You don’t really want to do 100% fruit juices everyday with the high amount of sugar it has. Adding in celery, spinach or kale seems to work wonders and doesn’t really interfere with the taste much.

So here’s the first of possibly a series in juices and smoothies – pomegranate, celery juice on day 1 of buying the juicer.

-Seeds of 2 pomegranates, 2 sticks celery on Day 1

-Orange, carrot , celery, tomato, ginger and lemon on Day 2.

IMG_0233

– Carrot, passion fruit, celery on Day 3.

IMG_0550

Pretty soon I was on a roll. But there was a small catch. I was beginning to collect a lot of pulp. Now this was different from the Philips juicer pulp of course, the Hurom juicer extracts all or most of the juice so you get very dry pulp. But I didn’t have the heart to throw away the carrot or the apple pulp. Here are some tips to use the fruit pulp after juicing-

  1. Use as compost for your plants
  2. Make sure you save the pulp separately in plastic containers or Ziploc bags and keep them in the freezer.
  3. Use the celery, carrot, spinach, kale pulp for making vegetable stock. Boil the pulp in twice or three times the amount of water, add a pinch of salt and pepper and let it boil till the pulp begins to float on top. Strain and use the liquid in soups, gravies, sauces etc.  You can also freeze the stock in ice trays and use for later.
  4. Use the fruit pulp for cakes, muffins
  5. Add some of the pulp to smoothies.

With the carrot and green apple that I had left over, I made a carrot, apple cake. The best part- it was eggless and vegan. I used flax seed meal as the egg substitute added some dry fruits and the 2 cups of pulp and it was the moistest cake I had ever had. Recipe adapted from the Joy of Vegan Baking by Colleen Patrick-Goudreau.

Carrot Apple Vegan Cake:

IMG_0157

Ingredients for one 9 inch cake:

3 tbsp ground flaxseed

1/2 cup water

2/3 cup olive oil

1 cup carrot pulp

3/4 to 1 cup apple pulp

1 cup chopped walnuts

1/4 cup raisins

1 1/3 cups all purpose flour (you may also substitute this with 1/2 cup wheat flour)

1 cup demerara sugar

1 1/2 tsp baking soda

1 tsp baking powder

1 tsp ground cinnamon

1/2 tsp ground cloves

1/2 tsp grate nutmeg

1/2 tsp allspice ground

1/2 tsp salt

You may use cream cheese frosting for this cake but I didn’t have any cream cheese and didn’t want to add any more sugar so opted not to.

Method:

1. Preheat the oven to 350F or 180C.

2. Grease a 9×9 inch square cake pan.

3. Whip together the ground flaxseed and water until its frothy and creamy, for about 2 minutes.

4. Take this mixture in a stand mixer or hand blender or food processor with the paddle attachment, add the olive oil and beat at low speed till combined.

5. Add the carrot, pulp, apple pulp, walnuts and raisins and stit to combine.

6. In a separate bowl, mix all the dry ingredients together.

7. Add the dry mixture to the wet mixture and stor again to combine.

8. Transfer the contents to the greased pan and spread evenly.

9. Bake until a toothpick inserted into the center comes out clean, for about 30-35 minutes. Let cool for about 15 minutes. Invert the cake, let cool and then cut into squares.

Persimmon Orange Creamsicle Smoothie with Homemade “Kind” Bars

20121206-124102.jpg

The best part about living in Singapore is the abundance of fresh fruits and veggies, and some exotic ones too, readily available and mostly imported from the rest of the neighboring world . Persimmons are native to Asia specifically Japan and China, and seem to be “in season” here as the local wholesale fruits and veggie market had the non-astringent Fuyu persimmons on sale this past week.  So of course I grabbed them, without a clue of what I was going to do with them:)

I’d had persimmons in the US mostly in salads and didn’t think they had a distinct flavor except for a slight tanginess to them. Which is probably what makes these versatile enough to add in salads, juices and smoothies, so they add to the texture but don’t necessarily mask any flavors. A quick look at my Pinterest board collections gave me this interesting smoothie recipe (probably the first time I’m really trying something from Pinterest – I usually just hoard my boards). I added all orange fruits and veggies to this – carrot, orange and persimmon with a dash of the usual smoothie ingredients and the result was this creamy, quite flavorful smoothie with enough Vit C to keep colds at bay this Singapore rainy season:)

I have also been trying extra hard to stay healthy with Nikhil’s snacks – and I cannot say this enough times – but Whole Foods and Sprouts and yeah, maybe Trader Joes (now that you are in Dallas too) – you seriously need to think about opening shop in SE Asia, yes Singapore specifically. With the number of American expats living here, you will give the local Marketplace and Supernature a run for their money. While fresh fruits and veggies are in abundance and relatively easy on the wallet, organic dry goods (grains, cereals) are frightfully expensive at local grocery stores. And so, I’ve been trying to make some things from scratch that previously I would buy from those huge bins of goodness  at WF and Sprouts.  I suppose that’s all for good reason if you really think about it.

This recipe was one I chanced upon from this interesting blog called Iowa Girl Eats and I adapted the recipe for the most part and changed some ingredients and measures a bit to call it the homemade “Kind” bar recipe. Kind bars have always been my most favorite bars not just for their taste but for what they stand for. (Do the Kind thing for your body, your taste buds and the World). This is a recipe for Almond-Cashew-Cranberry-Apricot bars all held together with a touch of coconut and honey. All I could say is YUM!

Persimmon Orange Creamsicle Smoothie 

Ingredients: (for 3 6 oz. cups)

2 Persimmons – peeled and quartered

1/2 carrot

1 orange, peeled

1 1/2 tbsp non fat dry milk powder or almond milk

1 tsp vanilla essence

1/2 cup water or skim milk (or almond milk)

2 cups ice

1 – 1 1/2 tsp honey or agave syrup

Put all the ingredients in the order listed in a high speed blender ( I use Vitamix) and run the blender from slow to high speed for about 2-3 minutes. Enjoy cold.

Almond-Cashew-Cranberry-Apricot Bars Recipe

20121206-124121.jpg

Ingredients:

3/4 cup Almonds and Cashews mixed

1/4 cup dried cranberries

1/4 cup chopped dried apricots

1/2 cup of rolled oats

2 tbsp coconut oil

4 tbsp honey or agave syrup or a mix of the two

Method:

1. Add the oats, 1/2 cup each of the almonds and cashews to a blender or food processor and pulse till you get a coarse powder.

20121206-123404.jpg

2. Now take the remaining nuts and very coarsely chop them. Add this to the above mixture

20121206-123411.jpg

3. Chop the dried cranberries and apricots as well and add to the above .

20121206-123417.jpg

4. Take a mixture of the coconut oil and honey/agave in a small saucepan and heat it on a low flame. Keep stirring till the mixture starts to foam and get cooked.

20121206-123422.jpg

5. Now pour the oil/honey over the oat-fruit and nut mixture. Mix well till the dry ingredients get well coated with the wet ingredients.

6. Line a 8×8 inch baking tray or a loaf pan (depending on how thick you want your bars) with a cling wrap or parchment paper sheet. Make sure the sheet hangs over the ends of the pan. Spread the mixture onto the bottom of the pan.

7. Wrap the sheet over the poured mixture and press the mixture with the bottom of a steel or glass container so it gets evenly flat.

20121206-123428.jpg

8. Place the pan in the fridge for a few hours till the mixture hardens.

9. Cut into bars while its still in the pan, cover with parchment paper and store in airtight containers.

Notes – You can modify the coconut oil and honey quantities as needed for taste and consistency. I initially used  a bit more than needed and the bars got quite sticky when I left them out of the fridge. I have modified the amount used in the ingredients above which resulted in just the right consistency for me but if you like your bars chewy, feel free to modify the measures slightly.

Apple Raisin Bread

I suppose I have an expensive hobby. Cooking and blog writing isn’t really expensive I know but in my case, I seem to fall into a lull often. This time my new Vita-Mix got me inspired. Ha, for how long do I hear you all say? Well, let’s not get too cynical . Instead, allow me to share my enthusiasm and the recipe for this apple raisin bread that I baked this Thanksgiving weekend. Happy Thanksgiving everyone! Oh also I’m trying to use my wordpress app on my iPhone as I try to churn recipes and blog entries quickly. So this one comes to you straight from my phone. I know, two new gizmos to get me to get back into RKK mode…this IS an expensive hobby, don’t you think?
One neat and very healthy aspect of this recipe is that it has zero oil, zero butter and uses the natural juices from apples and dry fruits to moisten the batter making this a wholesome and nutritious bread. I’m sure you can make it without a Vita-Mix as well and it must have similar results. Do let me know if you do.

Ingredients:
1 cup whole wheat flour
1/4 cup uncooked rolled oats
1 medium apple quartered
1 thin slice lemon peeled and sliced
2 tbsp water
1 thin slice orange with peel
1/2 cup honey
1/2 tsp ground cinnamon
1/4 tsp salt
1 tsp baking soda
1/4 tsp allspice
1 cup raisins, dates or other dried fruit

Method:
1. Preheat oven to 350F. Spray an 8×8 inch baking pan with cooking spray.
2. Add the wheat flour and oats into the Vita-Mix container and secure the lid.
3. Turn machine on and increase speed to high till the mixture becomes a fine powder.
4. Remove lid and add rest of the ingredients.
5. Turn speed to variable and then to high.
6. Blend for 30 seconds until batter is smooth. Pour into greased pan.

7. Bake for 20-30 mins or until knife inserted comes out clean.

Verdict: The bread turned out quite soft and moist, with just the right amount of sweetness to it. The only thing I would consider adding are some nuts, walnuts or almonds to get the right crunch to it.

Sweet Corn Soup

Corn soup


I do realize I haven’t populated the comfort food section in a while. Well, I haven’t blogged in a while , if you could call 12 days ” a while” that is. I suppose it is a long time, for something that warrants “everyday” cooking.

We had our 9 year old nephew visit from India, and while that meant two boisterous boys (including mine),  running around the house, it also meant having to come up with some creative ways to feed them both and fuel all that energy. As with most kids, vegetables were challenging, and I was looking for ways to dot the daily menu with some, while sneaking some in other dishes.

Anusuya’s kitchen had the perfect answer, as always. It’s quite obvious from her previous recipes, that she somehow has that perfect balance between scrumptious and healthy. Whole wheat, low fat, low oil are some key words in her kitchen. Of course, there are always “treats” in store, with her desserts and other signature dishes, and I will try to share them all, as and when she chooses to share them with me.

Here’s a sweet corn soup recipe that’s a favorite of her family, and this is what I “tried” on the kids one evening. May sound cliched, but as with all her recipes so far, it was a hit! The kids downed the corn soup with french bread and actually asked for more. What more could I ask for?

Ingredients:

1 pack frozen corn or 3-4 fresh corn, kernels removed and steamed

2 Jalapenos (I retained the seeds, but if you like it less spicy, de-seed them)

1/2 Vidalia onion (chopped into chunks)

1 tbsp soy sauce

1/2 cup milk

1/2 tbsp butter

1/2 tbsp oil

Salt to taste

1. Take a heavy bottomed saucepan and melt the butter and oil.

2. When the oil is hot, add the onions along with the jalapenos. Saute for 2-3 minutes.

3. Add the corn kernels. You may want to reserve a few kernels for later to add some chunky texture to the soup, but that’s optional.

4. Add 2 cups of water to this mixture and let it boil. Remove from the stove and cool.

5. Now take the mixture in a blender and puree it to a paste like consistency.

6. Take the puree in another heavy vessel or a dutch oven. Add the reserved corn, milk, soy sauce and salt to taste. Simmer for about 10 minutes.

7. Serve hot, garnished with scallion leaves (I was out of the leaves, as you can tell from the picture), and with a side of toasted french bread. I added some garlic butter on the bread as well. Or you could just use store bought garlic bread. Enjoy!

Post Navigation