Roz Ka Khana

A blog about everyday food. Mostly Indian. All vegetarian.

Archive for the category “Rasam, Kuzhambu and Sambar”

Eating in the Raw — Rasam week – Pachi Pulusu (Raw Spiced Tamarind broth)

IMG_0479.JPG

In keeping with Rasam week, I wanted to try something I had been meaning to try for ages, since I tasted it for the first time in my friend Harini’s home almost 10 years ago. This is a typical Telangana dish that Harini made for us for dinner one evening and the dish was so flavorful it stuck. Simple to make yet I somehow never got to really try it in my own kitchen until this week. This pulusu or broth is fully raw and needs no heating or boiling. It’s the tadka or popu or tempering that gives it its unique kick and flavor. The tartness of the tamarind and spice of the red chili with garlic along with a hint of jaggery and a secret ingredient to finish is what makes this dish different from any rasam/pulusu you may have tasted . Eat it with hot rice, ghee and mudda pappu or thick spiced tuvar dal and it is a combination that will live on your taste buds for a long long time.Like it did for me for over a decade:). This recipe is Harini’s contribution to Roz Ka Khana and though I’m sure it doesn’t come close to the way she or her in laws make it in their home, it hopefully is a decent first attempt. .

Ingredients for Pachi Pulusu:

Serves 4. Prep time : 15 minutes. Cooking time: 10 minutes

  • Tamarind – 1 small lemon sized ball, soaked in warm water.
  • Jaggery – 1/2 tsp
  • Fore tempering:
  • Mustard seeds- 2 tsp
  • Cumin seeds (jeera) – 1 tsp
  • Dry red chilies – 3-4
  • Green chili – 3-4 sliced thin
  • Red onion, chopped fine – 1/4
  • Garlic, crushed or chopped fine – 3 small or 2 big
  • Curry leaves – a sprig
  • Roasted sesame seed powder – 1 tsp
  • Cilantro, chopped – 1 bunch
  • Cream or whole milk – 1 tsp (optional)
  • Oil- 2 tsp
  • Salt to taste

Method:

  1. Squeeze the juice from the soaked tamarind and add enough water to it to make about 2 cups. Add salt to taste and the jaggery and mix well.
  2. Heat oil in a small pan, when hot add the mustard seeds. When they splutter, add the jeera, red chilies and curry leaves. Add garlic, green chilies. Saute for 1 minute.
  3. Pour the tempering over the tamarind water. Add chopped onions and cilantro for garnish.
  4. Add the roasted sesame powder.
  5. As a final touch, add 1 tsp of cream or whole milk and give it a quick mix before you serve. (The cream compensates for the tartness of the tamarind. You can avoid this step if you don’t like the idea of adding milk to the pulusu or are vegan).

Serve with rice, ghee and pappu (yellow tuvar dal tempered with mustard seeds, jeera and curry leaves). It’s called “mudda pappu” as it is meant to be thick when mixed with rice so the pulusu is a runny and tangy accompaniment. According to Harini, spinach dal (paalak pappu) and moong dal spiced are also great accompaniments for pachi pulusu. Will try that next and let you know:)

Coming up next for Rasam week is Inji (Ginger) Rasam.


A Week of Rasams – Recipes for Garlic Rasam and Lemon Rasam

After a bustling festive season it’s “Rasam Week” at our home. As I’ve mentioned here in my very first post, Rasam is one of our ultimate comfort foods. It’s the dish we turn to when we crave a home cooked meal, the dish we make when we want to “detox” and the one we cook as an accompaniment for a traditional South Indian occasion. Rasam is quite the ubiquitous and well loved South Indian dish. Typically a clear broth spiced with different flavors, rasam is another word for juice or shall we say the essence of all South Indian food:)

It was Girish’s turn to plan the weekly menu since he is home for a full week after ages. And here’s what his menu looked like.

South Indian style oatmeal for breakfast and Rasam for dinner. Every. Single. Day. 🙂

Yes I am married to someone who can eat the same thing for days – thank heavens. As long as it’s one of his favorite dishes.
Makes it easy for planning and cooking so let’s be immensely grateful for that shall we?:) Here’s to someone who is fuss free when it comes to meal planning. I repeat, as long as it’s one of his choice dishes. He is still quite the food critic so let me just say it’s safest to stick with the requested menu:)

So I thought I would chronicle the types of rasams while I was at it. The garlic rasam is a house favorite and is exactly the way my mother in law (the queen of rasams in the family) makes it. Also one of Nikhil’s favorite dishes and a common request from him when he craves Indian comfort food.

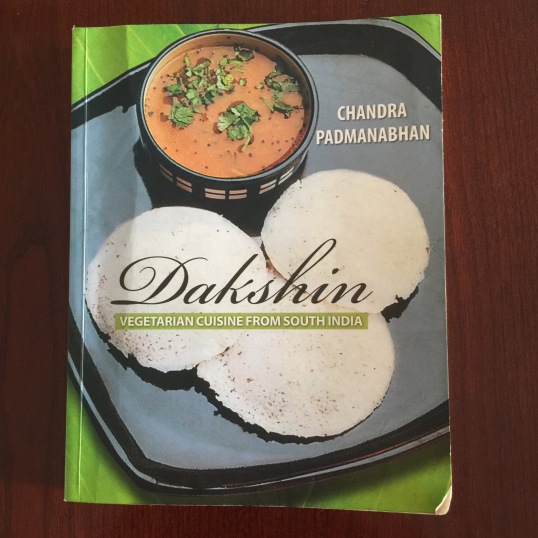
The lemon rasam recipe is adapted from Chandra Padmanabhan’s cookbook “Dakshin“. I have tried making lemon rasam many times before but I found this method to be the best. I suppose the garnish of crushed black pepper and cumin topped with lemon is what adds to this rasam’s burst of flavor. Whatever the type of rasam, it’s best enjoyed with some hot (white or brown) rice, a dollop of fresh ghee and some cooked dry vegetable as a side. We love urulai roast (roasted potato), the way Amma makes it though you could try this one (Chettinad urulai roast) and the cauliflower fry as a yum side too.

Recipe for Garlic Rasam:

IMG_0468

Ingredients: (for 4)

  • Garlic cloves – 3 big or 4-5 small
  • Cilantro – a small bunch plus 1/4 cup chopped leaves
  • Black pepper – 3/4 tsp
  • Cumin seeds – 1 tsp
  • Tamarind – a small line sized ballGarlic rasam powder (store bought) – 1 tsp (you may also use regular rasam powder)

For tempering:

  • Ghee – 2 tsp
  • Mustard seeds – 1 tsp
  • Cumin seeds – 1/2 tsp
  • Curry leaves – a sprig
  • Dry red Arbol chili – 1
  • Garlic – 1 chopped fine.

Method:
1. Soak the tamarind in warm water for about 5 minutes till it softens. Make a pulp of the tamarind, strain out any fibres or seeds and add enough water to make about 1 1/4 cups of tamarind pulp. (more than what you see in the picture.)

IMG_0054

2. Take the garlic pods, the cilantro bunch, black pepper and cumin seeds in a blender, with a tbsp of water and grind to a fine paste.

IMG_0066
3. Take the tamarind water in a heavy vessel (I use a special vessel called Iyya Chombu – made of an alloy of metals- used to make rasams traditionally.)

IMG_0053

4. Add the rasam powder, half of the cilantro and let the mixture come to a slow boil on a medium flame. This will take about 5-7 minutes, till the raw smell of the tamarind and the rasam powder goes away.

5. Now add the garlic pepper cumin paste to the tamarind water. You may add another 1/2 to 3/4 cup of water here. Add salt. I usually taste at this stage to check for salt/sourness etc. Adjust with water, salt accordingly.

6. Let the mixture boil for about 5-7 minutes till the raw garlic smell goes away.

7. Add chopped cilantro, and let simmer for another 2-3 minutes.

8. Heat about 2 tsp ghee (clarified butter or brown butter) in a small pan. Add the mustard seeds when ghee is hot. After they splutter add the cumin seeds, red chili and curry leaves. Add the chopped garlic. Saute for a minute, and then add the tempering to the rasam. Cover the rasam with a lid until you are ready to serve, This keeps the flavors of the tempering (tadka/popu/talithaal/chonk/bagar) intact and lets them infuse in the rasam.

Enjoy with hot rice, a dollop of ghee and the vegetable side dish of your choice. Divine.


Recipe for Lemon Rasam (didn’t click the pictures in time for this one but will add them eventually;)

Ingredients :

  • 1/4 cup toor dal cooked
  • 3/4 cup vine ripe cherry tomatoes chopped (I find cherry tomatoes give the best flavor though you can use vine ripe regular tomatoes as well)
  • Juice of 1 big lemon
  • a small bunch of cilantro, chopped
  • 1 ” piece ginger grated
  • 4 green chilies
  • 1/2 tsp cumin seeds
  • 3/4 tsp black peppercorns
  • salt to taste
  • 1/2 tsp turmeric powder
  • 3/4 tsp rasam powder

For tempering:

  • 2 tsp ghee
  • 1 tsp mustard seeds
  • 1/2 tsp asafetida
  • 1 dry red arbol chile
  • a sprig of curry leaves

Method:

  1. Take the ginger and green chilies in a small blender and blend to a smooth paste.
  2. Powder the cumin seeds and black peppercorn in a coffee grinder or mortal pestle. I prefer this to be a smooth powder too though you may grind it to a coarse powder if you like the texture in the rasam.
  3. Take the cooked dal in the iyya chombu, add about 1 1/2 cups of water, salt, turmeric powder. You may add more water depending on the taste. Adjust salt accrodingly.
  4. Add the tomatoes and the ginger chile paste to the mixture. I also add the rasam powder at this time. Sprinkle some chopped cilantro. Let the mixture come to a slow boil, until the raw smell of the rasam powder and tomatoes are boiled away. (Rasam powder is optional, I add  a small amount just for the flavor, but you can get by without it).
  5. Now heat the ghee in a separate pan, add all the ingredients for the tempering. Add 1 tsp of the powdered cumin-black pepper powder to the ghee and then turn off the heat. Add the tempering to the rasam.
  6. Add the lemon juice to the rasam and mix. Garnish with more chopped cilantro.

IMG_0477.JPG

Pachai Milagu Kuzhambu (Spicy Green Peppercorn Soup)


DSC01822

After a bout of crazy baking (yes, crazy is the right word when you are waiting for the bread dough to rise at midnight:), it was good to get Girish in the kitchen for some traditional fare.

You can tell by his previous recipes that he is kind of a “Kuzhambu King”  – Karuveppalai Kuzhambu, Vetha Kuzhambu, Kaara Kuzhambu are all his staple recipes. The names may be a tongue twister to the unorthodox ear but as any lover of Indian cuisine knows, they are distinctly different and unique to different regions of the South.

Pachai Milagu Kuzhambu is similar to the Karuveppalai Kuzhambu (curry leaves tamarind soup), but the green peppercorns give it a different kind of “burn”. That wasn’t meant to sound scary to newbies to Kuzhambu, but if you don’t know our recipes already, Kuzhambus are meant to have that tangy spice, which provide the perfect antidote to white rice and clarified butter (ghee) or the most famous combination of yoghurt rice and Kuzhambu, very lovingly known as “Thachi Mammu” in our home:)

As I have said this earlier, Singapore is a veggie and fruit haven and fresh green peppercorns, though seasonal are available (something I wouldn’t have dreamed of finding easily in the US). A trip to the local vegetable market (Tekka) and a 10 minute hunt to find a speacialty Thai store was all it took to find green peppercorns by the kilos! Of course we picked up about 300 grams which will probably last us a month or two. Green peppercorns have an extra bite to it and taste tangier than their black counterparts, which makes it a perfect accompaniment for Kuzhambu. Amma is already in the process of pickling the remaining peppercorns in brine the recipe of which I will share later.

Recipe for Pachai Milagu Kuzhambu:

Ingredients:

  • Green Peppercorns – 125 grams or about 1 1/2 cups
  • Curry leaves – 1/2 cup
  • Dry red chilies – 4-5
  • Cumin seeds – 1 tbsp
  • Tamarind, a lemon sized ball soaked in warm water
  • Salt to taste
  • Asafetida (hing) – a pinch
  • Gingelly oil – 2 tbsp

DSC_0214

Method:

1. Take a kadai or heavy bottom vessel and add half the green peppercorns, add red chilies and cumin seeds and dry roast for about 3-4 minutes. The peppercorns will begin to pop. Turn off the heat.

DSC01824

2. Now take this mixture and put it in the blender container. Add the remaining peppercorns (minus about 2 tbsp), tamarind and curry leaves to the blender container. Blend these to a smooth paste adding some water little by little so the consistency is that of a thick sauce.
DSC_0215

3. Now heat another heavy bottom vessel (or kachitti, a stoneware vessel), add about 2 tbsp of gingelly oil. Add asfetida to the oil. Heat for about 2-3 minutes till oil begins to smoke a bit.

DSC_0213

4. Now add the paste and stir to mix.

DSC_0219

Add about 1/2 cup water (to 1 cup, depending on consistency needed) and stir again. Now add the remaining 2 tbsp of fresh green peppercorns to this mixture.

5. Bring this mixture to a boil and let it simmer for 5 minutes till you get an aroma of the peppercorn curry leaves mixture.

6. Serve hot with rice and pappadums or with Thachi Mammu:).

DSC_0222

Chettinad Recipes – Kaara Kuzhambu (Spicy Tamarind Soup) and Urulai (Potato) Roast

Inspiration hits in the strangest ways. This one was good enough to get Girish to get back in the kitchen after months. The source was a bottle of the famous Grand Sweets Kaara Kuzhambu paste or pickle that we picked up last Sunday at the local Indian store in Singapore.

Those who are familiar with Grand Sweets in Chennai will swear by their sweets and savories, and I only discovered the new line of pickles and pastes on my last Chennai visit.

We were quite blown away by the authentic taste of the Kaara Kuzhambu pickle from Grand Sweets accompanied by a quip from Amma (my mother) that she had a recipe tucked away somewhere in her recipe stash. So Girish was challenged enough to try it this past Sunday and the best part was that the whole family ended up in the kitchen. Amma didn’t find her recipe but we did find this one from the Spicy Tasty blog that sounded quite authentic. Appa (my father) peeled the shallots, Nikhil peeled and chopped the potatoes for the Urulai roast (adapted from Kurry Leaves‘ blog) and Amma and I helped prep for both the recipes with the powders and spices, while Girish “directed” it all by actually cooking the dishes and added his finishing touches. So in essence it was the four of us crowded around in the kitchen to make two dishes and I have to say, we debunked the myth about too many cooks:)

The dishes turned out perfect and quite true to the Chettinad taste. Chettinad recipes have the distinct flavor of fennel, pepper and chilies in their spices and both these recipes pack that spicy punch. Note to those who don’t eat their food very spicy – you can tone down on the pepper and red chilies/chili powder, but keep in mind that the beads of sweat and the clearing of your sinuses that accompany the eating of Chettinad dishes only add to the flavor so you may be missing out on that experience:)

Recipe for Kaara Kuzhambu:

Ingredients: (for 5-6 servings)

  • Shallots – 2 cups
  • Tomatoes – 2
  • Ginger Garlic paste – 2 tbsp
  • Green chilies – 3-5 (depending on spice level)
  • Sesame oil – 4 tbsp
  • Cumin seeds –  1tsp
  • Curry leaves – a small bunch or 10 to 15 leaves
  • Red chili powder – 1 tsp
  • Garam masala – 1/2 tsp
  • Sambar powder – 2 tbsp
  • Tamarind water –  2 cups

For grinding:

  • Coriander powder – 1 tsp
  • Shredded coconut – 1/4 cup
  • Fennel seeds – 1 tsp
  • Poppy seeds – 1 tbsp (optional – I don’t get this in Singapore so didn’t use it. Turned out just as good)

Method of Preparation:

  1. Peel the shallots and cut both ends. Cut them in half if needed.
  2. Heat 2 tbsp of oil in a deep bottomed thick pan or kadai
  3. Add cumin seeds, curry leaves and shallots and fry till shallots are translucent.
  4. Add ginger garlic paste and fry for a couple of minutes followed by green chilies and chopped tomatoes.
  5. Saute till the tomatoes are well cooked and you don’t get the raw smell of tomatoes any more, or you see some oil leave the sides.
  6. Add red chili powder, sambar powder, garam masala and salt.
  7. Mix well and let it cook for 5 minutes.
  8. While it’s cooking, make a paste by grinding the coconut, fennel seeds, poppy seeds and coriander powder in a blender by adding a little water.
  9. Add the tamarind juice to the mixture in the pan and let it boil and become a thick gravy.
  10. Add the remaining 2 tbsp of oil and leave it for a minute.
  11. Now add the ground paste and  let it cook for 5 to 8 minutes at medium heat. You may need to cook a bit more or less depending on the consistency and the taste.
  12. Make sure you cook till the raw smell of sambar powder and tamarind goes away.
  13. Serve hot with steamed rice and urulai roast.

Recipe for Urulai (Potato) Roast:

Ingredients-
  • Potatoes (half boiled and diced)- 4
  • Mustard seeds – 1 tsp
  • Asafetida – 1 pinch
  • Garlic – crushed- 1/2 tsp
  • Onion chopped finely – 1 small
  • Turmeric powder – 1/4 tsp
  • Curry leaves – 1 sprig
  • Oil
To roast and grind

  • Split urad dal- 2 tsp
  • Dry red chillies-3-5
  • Whole black pepper corns-5 to 6

Method:

  • Heat a pan and dry roast the urad dal until it changes color to a light brown.
  • Now add dry red chillies and pepper corns.  Roast until urud dal turns golden brown.
  • Allow this to cool and grind to form a coarse powder.
  • Heat oil in the same pan – add mustard seeds and let it splutter. Now add asafoetida and curry leaves.
  • Add garlic, onion and turmeric powder. Saute till the onion turns golden brown .
  • Add the boiled potato and stir carefully. Add salt to taste and saute for 5 minutes.
  • Now add the spice powder and mix well.

Note – Do not stir the potatoes too frequently. You can lift the pan with the potatoes and just shake it a bit so the potatoes mix well with the spices and oil. Let it simmer on low heat for about 5-7 minutes. This will ensure an even roast.

Vatral Kuzhambu (Tamarind Stew/Soup with sundried vegetables)

This one is a toughie to translate into plain English. Once again, an authentic Tamil dish, Kuzhambu, which means a kind of stew or soup, and Vatral which refers to sun-dried vegetables, is a comfort food in my home.

But before I write about this recipe, let me back up. I almost forgot , but today marks the 1 year anniversary of Roz ka Khana! I am actually a little embarrassed to say that I almost forgot that it was our birthday. I mean, yes it was February last when I penned the Paruppu Rasam recipe, but I had to go back into the archives to look up the actual date. And maybe I am a little overwhelmed too thanks to my dear friends and readers who reminded me to go look up that date! Sheela, thank you for being such a sweetie and shaking me out of my doldrums with your cheery note.  Thanks for being such an ardent follower among everything else.

And I should also thank Anu of AnEmily’s Vegan Adventures for requesting this recipe. Anu, this was the perfect recipe for RKK’s one year anniversary. I don’t think I’m really a Tamil purist when it comes to recipes, but Tomato Paruppu Rasam (lentil and tomato soup) and Vatral Kuzhambu are the staple, comfort foods in my home, so what better way to pay my tribute to RKK than to post another favorite comfort food? While the Rasam is my staple recipe, this one is Girish’s. As I wrote earlier in the 2 month anniversary of this blog with Girish’s Curry leaves Soup (Karuvepillai Kuzhambu) recipe , he is the inspiration behind this blog. So here’s to Girish again for your love and support, and to all of you family and friends who have been contributing and following this food chatter so far….thank you.

Vatral Kuzhambu recipe (Tamarind Soup)

This is also called Pulusu in Andhra/Telugu lingo. As I mentioned in the Curry Leaves soup recipe, this tastes best in a kachitti or a stone vessel, especially when it’s a day old. If you don’t have this vessel, it can also be made in a regular pot or pan, but make sure to save some for the next day so it has had all the time to let the flavors of the sesame oil, the fenugreek and the vegetables sink in. Also, this recipe is not really true to its name as we did not add the sun-dried vegetables or vatral. The sun-dried vegetables are available as is in Indian stores. We did not add it here since the onions have such a strong flavor that you can make this soup without the vatral. The real reason also was that we didn’t have enough vatral handy:). You can also call this recipe Vengaya Vatral Kuzhambu (Tamarind Soup with baby Onions)

Ingredients:

(I don’t have too many pictures to post for this one. I inadvertently erased some of the colorful ingredient pictures that I took  as I was transferring the pictures to my computer. As soon as I’m done poring through the 2500 photos on my hard drive in a desperate attempt to find them, I will try to update this post with better pictures.)

A large lemon sized ball of tamarind (enough to make about 2 cups of tamarind juice)

1/2 cup pink baby onions or shallots

2 tbsp fenugreek seeds

2 tbsp sesame oil

2 tsp vatral kuzhambu podi (I get this from India, but you can also use Sambar powder that is available in Indian grocery stores – MTR Madras Sambar powder). Alternatively you can find the recipe here.

2 sprigs of curry leaves

6-7 green chilies (the Thai variety)

a pinch asafetida ( we use a brand called SSP that we have only found in India but you can use any brand. SSP is in the granule form instead of powder and we use about 3-4 granules for a good strong aroma )

1. Heat the sesame oil in the kachitti or the stone vessel.

2. When it starts to smoke a little, add the fenugreek seeds, lower the flame and let the seeds get dark brown and oil starts to smoke again.

3. Add the asafetida. Add the kozhambu powder (podi).

4. Add the shallots, curry leaves, green chilies and the sun-dried vegetables (vatral) if available here. Fry till medium brown.

5. Add the tamarind juice and salt.

6. Let the mixture boil on a low flame for 10-15 minutes until the soup starts to thicken a little. You can also add a small amount (half a tsp)of jaggery (crystallized brown sugar) here for an added taste. If the soup is too watery, you can add a little rice flour and water made into a paste to thicken it. But if you let it boil enough, you may not need this step at all.

7. Serve with hot white or brown rice and ghee (clarified butter) with a side of paruppu (boiled and mashed lentils).

dscn0750

Karuvepilai Kozhambu (Curry Leaves Soup)

It’s true that people who have a taste for good food are also great cooks themselves. Or is it vice versa?  If you think I’m trying to toot my own horn.. well..maybe I am in a subtle kind of way;). I like to think that it’s all in the family, so I may be guilty of bragging a bit here.

It’s my husband I’m talking about, who is a big foodie himself. He’s a road warrior so one may think that all the travelling would have killed his taste buds, but I think it’s only helped grow his taste for all things food. He tends to have this sense for “sniffing” down the best eateries wherever he travels. Though I have to add that he is a little partial to Indian food, so a lot of his travel favorites tend to be Indian eateries. He has quite a database of favorites, which gives me an idea to to start a section on this blog of his restaurant reviews , to aid travellers looking for great eats. Coming soon..

Well, the good news is that Girish doesn’t just have a taste for good food, he is a great cook too…(notice the too there…didn’t I say I was bragging just a little bit)! All kidding aside, he has excelled at making some choice dishes which I will try to share here. Of course, that would mean he would need to cook more often so I think these mentions are a great incentive that will mutually benefit us.

I do have to add on a more serious note that he is the true inspiration behind this food journal. His drive and enthusiasm has been the force in getting this site up and running and to get me to do something I enjoy. Girish, this one is for all your love and support! Couldn’t have been better timing to include one of your entries in this blog. Roz ka Khana turned 2 months this week. Small achievement I know compared to some biggies out there, but thank you for coming along this far.

Here’s Girish’s recipe for Karuvepilai Kuzhambu, a Kuzhambu (soup or stew) variety that is a popular dish in Tamil Nadu. I have seen various versions of this recipe online, but here’s Girish’s original recipe that I think is the best;)

I do have to add a comment on the vessel that he used to make this dish. A kachitti as it is called in Tamil is a stone vessel, and is popular in Tamil Nadu to make all kozhambus. Like the eeyya chombu or the amalgamated metal vessel used for making rasam in my previous post, cooking kozhambu in a kachitti adds to the taste. It’s also said that a day old kuzhambu in the kachitti tastes even better. Let’s just say we’ve been there, done that and coudn’t agree more!


Ingredients:

15-20 curry leaves

20-30 Peppercorns

3 tsp jeera

Asafoetida (a pinch)

3 tsp sesame oil (Til Oil)

Tamarind pulp (Lemon size tamarind soaked in water and made into a pulp)

Salt to taste

Jaggery – a small piece

1. Take the curry leaves, jeera, peppercorns and some of the tamarind pulp and grind to a smooth paste.

2. Add some water to the remaining tamarind pulp (about 1- 1 1/2 cup water to 1 cup of tamarind pulp). The result should be a soup like consistency, not too watery, not too thick.

3. Take a heavy bottomed vessel or kachitti if you own one. Add the sesame oil to it and heat it on a low flame. After the oil gets hot, add the asafoetida first. Wait till it starts to smoke a little (make sure it doesn’t burn just enough to get an aroma), then add the jeera or cumin seeds.

4. After about 2 minutes, add the tamarind water, then add the jeera-peppercorn paste. Add salt to taste. Turn the flame to low and cook for about 10 minutes. The mixture will start to boil and thicken a little.

5. Add the piece of jaggery and boil for another 5 minutes. The kuzhambu should now resemble a thickened soup.

Enjoy with hot white rice and some dry vegetable and vadam(vadiyalu/ or chips.

THE Sambar (Lentil Soup)

Yes. I know this is quite an unusual title for something as commonplace as sambar, but I have a reason for naming this recipe the way I did. This is THE contribution from Anusuya’s kitchen. I will not be exaggerating when I say that this is her signature dish. Well, I had the good fortune of jotting down the recipe verbatim as told by her and also tried it not once, but twice, and the result was amazing. I say that because sambar has never been my forte, at least the way I have always made it, and this was not only easy but dosai-licking good! As you can tell, we had it with hot dosai and it was a hit! Here goes the recipe…

Ingredients:

Please note that this recipe is for a 2 quart container and should serve about 4 people.

Toor dal (yellow lentils) – 1/2 cup, pressure cooked till soft

Ghee – 1 tsp

Oil – 1 tsp

Shallots – 7-8 (peeled)

Saragawa (Murungakkai in Tamil also commonly known as “drumsticks”- not the chicken kind) – 7-8. I used frozen ones.

Tamarind paste – 2 tsp (You can also use a lemon size ball of fresh tamarind soaked in water to make a paste)

Sambar powder – 2 tsp (I used MTR Madras sambar powder. Make sure its the Madras kind and not the regular Sambar powder)

Tomatoes – 2, diced (You can also use half can of diced tomatoes for this.)

Cilantro – half bunch

Asafoetida – a pinch

Grind to a paste the following: 2 tbsp dhania seeds (coriander), 2-3 red chillies, 1/2 tsp methi seeds (fenugreek). Fry the above till the dhania starts to crackle. Add 2 tbsp of dessicated coconut. Medium fry all the above till you get a coconutt-y aroma. Now grind all the above in a blender. You can also use 2-3 tbsp of coconut milk while grinding to enhance the taste of the coconut.

For the sambar, heat the ghee and oil in a 2 quart vessel. Add mustard seeds. When it starts to crackle, add the onions and saragawa and fry well till cooked.

Sambar 1

Add about 1 quart of water to this, add the tamarind paste, the sambar powder, cilantro, diced tomatoes. Add salt to taste and boil well till the raw smell of the sambar powder goes away.  Add the boiled toor dal to this mixture and boil for a few more minutes. Now add the ground coconut/dhania paste to this and boil again for 5-10 minutes. The Sambar is ready!

Sambar4

A tip from Anusuya is to simmer the sambar in a crock pot on low for 1-2 hours to get the most out of its taste. I didn’t try this myself but can attest to the taste from having tried it at her home!

THE Sambar Version 2

Here’s another variation of the recipe from Anusuya which I have found to be equally good.

Ingredients:

Masoor dal (red lentils) – 1 cup
Sambar powder – 4 tbsp
Capsicum – 1 , chopped into medium sized pieces
Tamarind paste – 3 tsp
Canned diced tomatoes – 1
Cilantro, chopped – 1/2 cup
Curry leaves, chopped – 1/2 cup

For sambar powder – Coriander seeds – 4 tbsp, Desiccated coconut – 3 tbsp, Fenugreek – 1tsp, Dry red chilies – 5-6, Coconut milk – 1 tbsp.

For tadka or garnish – Mustard seeds – 2 tsp, Dry red chilies – 4-5, Asafetida – a pinch, Curry leaves – 5-6

Method:

1. Boil the masoor dal in about 1  1/2 quarts water (in a 4 quart saucepan)
2. When the dal is cooked, add the sambar powder.
3. Add the chopped vegetables to the water and dal mixture and let cook for about 5-7 minutes.
4. When the vegetables are more than half cooked, add 3 tsp tamarind paste and mix well.
5. Add the can of diced tomatoes.
6. Boil this mixture for about 7-10 minutes till the raw smell of the canned tomatoes goes away.
7. Add the chopped cilantro and curry leaves.
8. Meanwhile grind all the ingredients for the sambar powder. You can add the coconut milk to this while grinding so it becomes more of a paste consistency.
9. Add this ground paste to the sambar and boil for another 5-7 minutes
10. You can transfer this to a crock pot and continue to cook under low heat or in the “keep warm” mode.
11. Before serving, heat oil in a kadai, and add the ingredients for the tadka or popu. Pour the tadka over the sambar and mix well.

Tomato Paruppu Rasam (Tomato and Lentil Soup)

It’s like I pay my obeisance to this dish….as an almost “auspicious” start to this blog about all things food. This was the first dish I experimented on my husband as a newly married novice in the kitchen. He, on the other hand was amazed that I could cook up a concoction at all that looked edible. I have to say that was a great start to my culinary experiments, when there were such low expectations to begin with.

I can only add that it’s been a decade now and he is still “hooked”…also to the rasam, which is a good enough reason to dedicate the beginning of this blog to this dish.


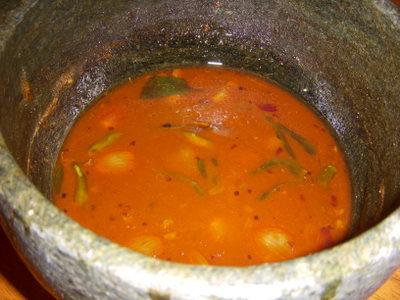
I’m sure there are numerous sites and blogs out there that have a rasam recipe, but here’s my version of traditional “paruppu (dal) rasam” made in an eeyya chombu or a vessel made of an alloy of different metals, tin being the main component. The metals are supposed to have various health benefits but I use more for the wonderful taste it imparts. It is also said that a day old rasam in this eeyya chombu tastes even better, and I can confidently attest to that.

The important thing to remember is to maintain a certain level of liquid in this chombu as the alloy can melt if the vessel is placed on a flame without anything in it. Thankfully, I have not had that happen to me personally; though have heard some funny stories of my mother’s adventures with it.


Here’s the recipe of our household’s comfort food:


Tomato Paruppu Rasam


Paruppu or dal is a Tamil word and refers to tuvar dal or pigeon peas. Tomato Paruppu rasam is a tomato dal rasam (soup), also referred to as charu in other Indian languages.


Ingredients:

1 medium roma tomato, or 5 cherry tomatoes, crushed

1 cup boiled and mashed tuvar dal

1 lemon size ball of tamarind, made into pulp

½ cup chopped cilantro

2 heaped tsp of rasam powder (I typically use store bought Madras rasam powder, MTR or 777, but you can also make your own.)

Ingredients for tempering:

1 tsp ghee (clarified butter)

1 tsp mustard seeds

1 tsp cumin seeds or jeera

A pinch of asafetida


  1. Add about 2 cups of water to the tamarind pulp.
  2. Put the tamarind juice, half of the cilantro, and the crushed tomatoes in a vessel, and place over fire
  3. Add the rasam powder to this tamarind-tomato mix and let it boil, till the smell of the rasam powder goes away.
  4. Now add the dal and about 1-1 ½ cups water. Add salt to taste. Let this boil for about 5 minutes. Add the remaining cilantro. Boil for another 1-2 minutes and turn off the stove.
  5. Heat the ghee in another small pan. Add the mustard seeds, jeera and asafetida. When the mustard seeds start spluttering, add the entire contents of the pan to the hot rasam. Cover the rasam with a lid to contain the aroma.


Variation: Occasionally, I also add some dried neem leaves or “vepambu” to the ingredients for tempering. Besides having a great medicinal value, neem leaves add a distinct flavor to the rasam.


There are different ways to enjoy this rasam. Since it has dal in it, mixing the rasam while serving gives it a thicker consistency that is typically enjoyed with hot rice and ghee. Many true rasam connoisseurs also like to wait for the dal to settle down at the bottom of the vessel and decant the top liquid while serving, which can also be enjoyed like a soup.


As for my husband, he likes it not too thick, not too thin, but just right! One ladle of the top liquid, then one ladle of the mixed dal, to give it the “just right” consistency!


Post Navigation