Roz Ka Khana

A blog about everyday food. Mostly Indian. All vegetarian.

Archive for the category “Baking”

“Best” Brownies from scratch

20131201-110825.jpg

I was looking for a fudgy brownie recipe this weekend. Strangely I’ve never managed to make that perfect brownie – moist, fudgy with that crusty texture on top. The only times I have been successful is when I use boxed mixes but my attempts “from scratch” have always ended up tasting like chocolate cake which as you know is not the same:(.

A brownie is a brownie and a cake is a cake. And a brownie made from a box is not the same as one from scratch – I wouldn’t have said this 5 years ago I know. I’m trying to be more “health conscious”now. No processed foods and mixes. Whatever, you say. These are still quite “sinful” brownies. Okay, I’m not being snooty. But you will agree with me that as you begin to experiment with creations from scratch it is a whole new world out there. It raises the bar. So the perfect brownie from scratch remained an elusive recipe for me.

Until I found this recipe on allrecipes that calls itself “best” brownies. The recipe and video links are easy enough to follow and got me to try them yesterday. These were gone in a day – enough testament that out of 16 brownies I made on Saturday for my son and his friend we had 3 left on Sunday morning with 1 being devoured for breakfast :). “Best brownies” for sure – at least among all the recipes I’ve tried. I modified them a bit to include some organic plain and wholemeal flour, raw cacao powder for cocoa powder and muscavado sugar instead of white sugar and powdered demerara sugar for the icing. I am trying to make them as “healthy”as possible:)

These are not vegan, however and I did use butter and eggs, though I’m sure substituting applesauce instead of butter and flax seed meal for eggs will give you a similar result. I plan to try the vegan version next weekend and will let you know. Note – for the flax seed egg substitute – grind flax seeds to a powder. Use 1 tbsp flax seeds mixed with 3 tbsp water and beat well by hand or in a blender till you get a frothy mixture. This is for 1 egg. and you can double for 2 eggs. Add the frothy mixture instead of the eggs to the batter.

And I also used my own frosting recipe, not the one shown in the link.

Ingredients:

1/2 cup organic unsalted butter

1 cup muscavado sugar (you may also use palm or coconut sugar)

1/2 cup mix of organic all purpose flour and wholemeal flour (you may use 100% of any one flour as well)

2 eggs

1 tsp vanilla extract or 1/2 tsp vanilla bean paste

1/3 cup raw cacao powder (or regular cocoa powder)

1/4 tsp salt

1/4 tsp organic natural baking powder

Frosting:

1/4 cup unsalted butter

3/4 cup confectioner’s sugar or powdered demerara sugar

1/8 cup raw cacao powder

1 tsp vanilla extract

1 tbsp cream or 2 tbsp milk or almond milk

Method:

Here’s the step by step with pictures:

1. Preheat the oven to 175C or 350F. Take the butter in a microwave safe glass bowl. Microwave for 30 seconds till butter completely melts.

20131201-110609.jpg

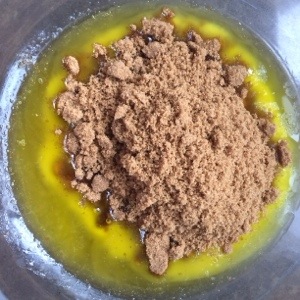
2.Add the muscavado sugar and mix the butter and sugar mixture well with a beater.

20131201-110624.jpg

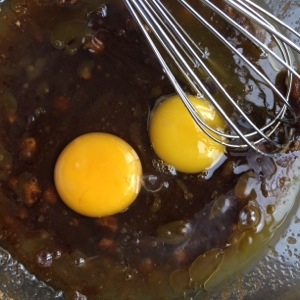
3. Add the 2 eggs. Beat well with the hand beater till you get a homogenous mixture.

20131201-110632.jpg

4. Now add the raw cacao powder. Mix well again.

20131201-110647.jpg

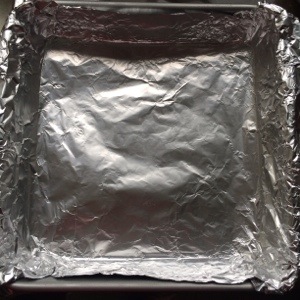
5. Take a 8×8 inch baking pan and line with aluminium foil. Ensure that the foil overhangs from the sides and you can fold over the rim. This step is very helpful when you have to remove the brownies from the pan.

20131201-110655.jpg

6. Pour the prepared brownie batter in the pan.

20131201-110709.jpg

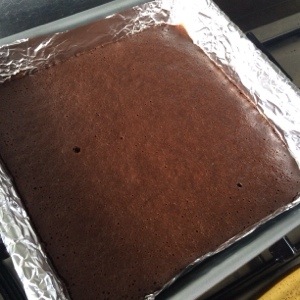
7. Bake at 175C or 350F for 25-30 minutes. Make sure you don’t overcook. You can use the knife test to see if done (should come out clean)

20131201-110722.jpg

8. Frosting method: In a stand mixer with the paddle attachment or in a food processor or in a large bowl using a hand beater or a wire whisk, cream the butter and stir in the confectioners/powdered sugar and cocoa, mix on low speed and cream again until soft and creamy. Stir in the vanilla extract or other flavouring of choice and beat again for a couple of minutes.This is a flexible recipe and if your icing is stiff add a little more milk, a tablespoon at a time and if your icing is thin, stir in more powdered sugar.

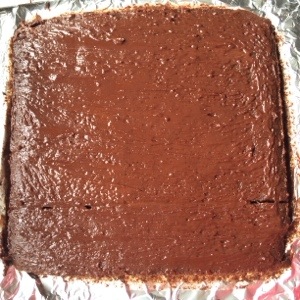
Spread the frosting over the warm brownie with a spoon or spatula.

20131201-110733.jpg

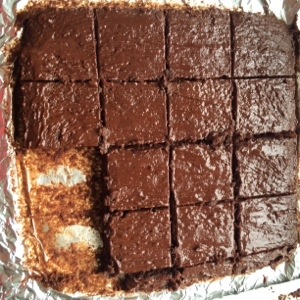
9.Cut into equal squares. Enjoy warm.

20131201-110742.jpg

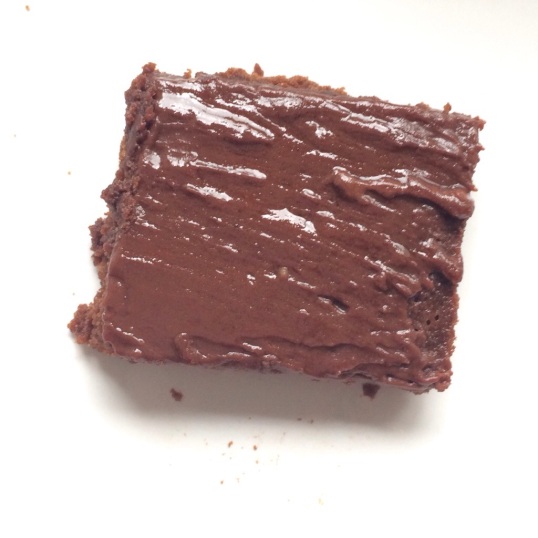
Makes you want to lick the batter and frosting , doesn’t it? Here’s another picture just to add to the food porn:)

20131201-110804.jpg

Eggless Snickerdoodles – for an October birthday

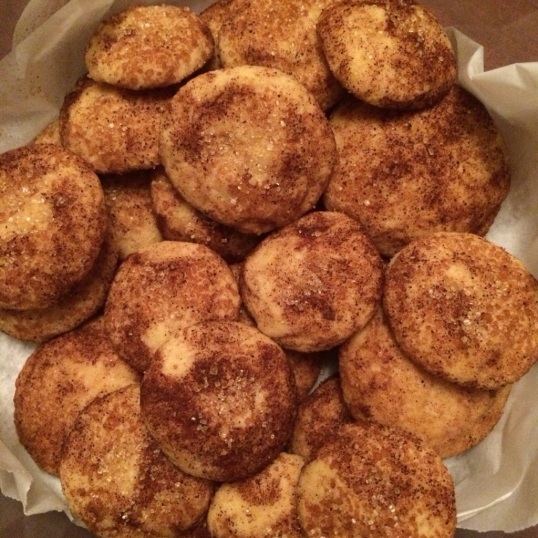
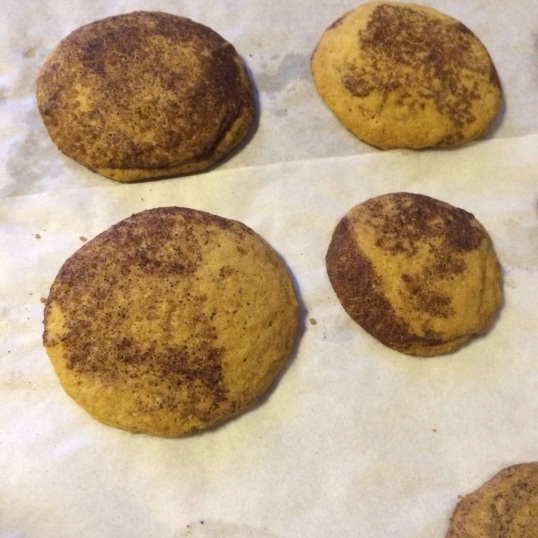
20131008-072529.jpgThis is my foodie son’s own creation and his experiments with baking. For his 12th birthday.

He made these with eggs a few days ago and they were chewy and just right. Tried them again without eggs and we actually couldn’t tell the difference. So here is the eggless recipe made for the birthday boy and his friends by him:).

When did he grow up to bake his own cookies?

There is a teeny tiny part of me that wishes I could continue to bake something for his birthday like I used to but the time together in the kitchen was fun enough to make me proud as I watched him don an apron:). We do it in style, you see.

Ingredients: (for 18 large cookies or about 24 medium ones) – Adapted from Food.com

  • 3/4 cup sugar (we used raw unrefined sugar)
  • 3/4 cup butter
  • 3 tablespoons milk
  • 3 teaspoons vanilla extract
  • 1 1/2 cups all-purpose flour
  • 2 1/4 teaspoons baking powder
  • 1 1/2 pinches salt
  • 4 1/2 tablespoons flour

For the topping:

  • 2 tbsp sugar
  • 2 tsp cinnamon powder

Method:

  • Preheat oven to 350°F
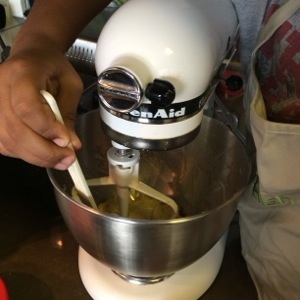
  • Combine butter (room temperature so it’s soft) and sugar in a bowl or stand mixer with paddle attachment, and mix on medium speed until it gets lighter and fluffier.
  • Add vanilla and milk to butter/sugar mixture. (You can be flexible with the amount of vanilla you use).
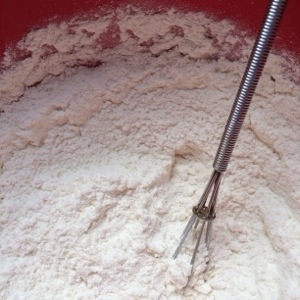
  • Combine salt, flour and baking powder in a separate bowl.

20131008-072358.jpg

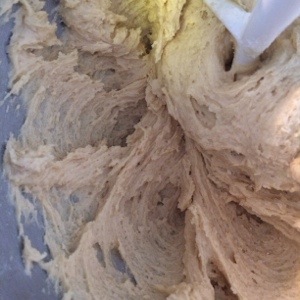
  • Combine the dry and wet ingredients, using either a spatula or your hands. (Dough should be a little bit sticky at this point).

20131008-072443.jpg

  • Add extra flour as needed until dough becomes less sticky and it’s easy to shape into round balls without the dough sticking to your fingers.

20131008-072458.jpg

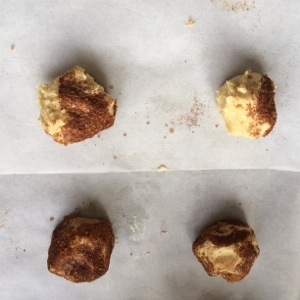
  • Form 12-18 equal-sized balls, flatten to about 1/2 – 2/3 inch in thickness. Coat one side with cinnamon sugar. (Lay about 1/8 Cup sugar on flat surface and lay each flattened ball of dough on it, pressing gently).

20131008-072519.jpg

  • Bake for 8-10 minutes, until bottom is lightly golden.

If you’d like to try these using eggs, he used this Martha Stewart recipe. They were delish!

20131008-072548.jpg

20131008-072600.jpg

We Knead to Bake Project – Bialys with Caramelized Onions and Paneer

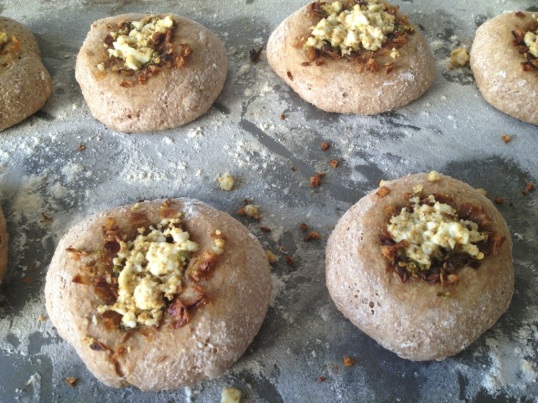
20130607-145951.jpgThis was a new one for me. I had not heard of Bialys before Aparna introduced it to me in this month’s We Knead to Bake Project.

Bialy, a Yiddish word short for bialystoker kuchen, from Białystok, a city in Poland, is a small roll that is a traditional dish in Polish Ashkenazi cuisine. In the early 1900s, many Eastern Eurpoeans, including the Polish, immigrated to the US and settled down in New York bringing their Bialy making skills with them. And that is how the New York Bialy became famous. There you go, that’s a mini history lesson on Bialys for you.

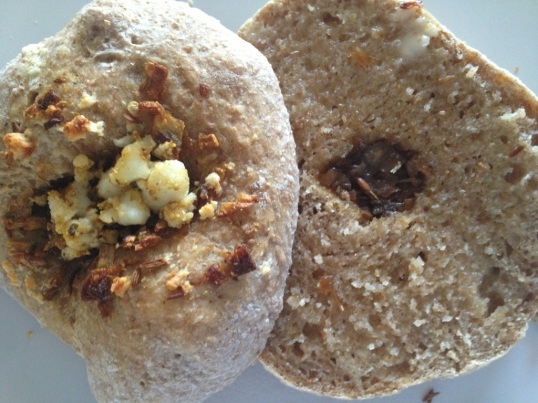
For those new to Bialys like me, they look and maybe taste close to a bagel, but there are some differences. For one, a Bialy doesn’t have a hole in the middle like a bagel but is depressed in the center with a filling (usually onions, garlic, poppy seeds etc). A Bagel is boiled and then baked while a Bialy is just baked. According to Aparna – a good Bialy should have a springy soft crumb but a chewy and floury crust.

I haven’t made bagels from scratch either so I wouldn’t know the actual differences in process but I was quite excited to try these out this past month. These were quite easy to make except for the rising time (still doesn’t beat the croissant process:) and of course, Aparna had Indianized it a bit by adding paneer and garam masala so I couldn’t wait to try this bread.

I added green chili (of course, for the spice), paneer, caramelized onions and stuffed paratha masala. It tasted like a paneer kulcha in a bagel form if you know what I mean. The paneer and stuffed paratha masala was a great combo and complimented each other quite well. Here’s the recipe (Adapted from King Arthur Flour) http://www.kingarthurflour.com/recipes/bialys-recipe

Ingredients:

For the dough:

1 teaspoon instant yeast

1 tbsp sugar

1 1/4 cup water

3 cups all-purpose flour (use bread flour if you can find it or all-purpose flour + 1 tbsp vital wheat gluten)- I used 3 cups of wholemeal bread flour

1 tsp salt

Milk for brushing the dough

For the Onion Filling:

1 tbsp oil

3 medium onions, finely chopped

1 1/2 tsp cumin seeds

3/4 tsp stuffed paratha masala

3 green chili crushed or minced

Salt to taste

100gm paneer, crumbled (optional)

Method:

1. Put the yeast, sugar, salt and flour in a stand mixer or food processor bowl. Pulse a couple of times to mix and then add the warm water in a steady stream. Knead until the dough comes together as a mass and then let the dough rest for 10 minutes. This will help the dough absorb water. Knead again, adding a little more water or flour (not too much) if you need it, until your dough is smooth and elastic but not sticky.

2. Shape it into a ball and put it in a well-oiled bowl, turning the dough till it is well coated. Cover and let it rise till about double. This should take about 2 hours.

If you’re not making the Bialys right away, you can refrigerate the dough overnight at this point. When ready to make them, keep the dough at room temperature for about half an hour and then proceed with the rest of the recipe.

3. In the meanwhile, make the filling. Heat the oil in a pan, and add the cumin seeds. When the crackle, add the onions, and sauté over low to medium heat. Sprinkle a little salt and continue sautéing until they become soft and turn golden brown in colour. Add the stuffed paratha masala and stir well. Keep the caramelised onions aside to cool.

4. Sprinkle your work surface lightly with flour and place the dough on it. Divide it into 8 equal pieces and shape each one into a roll by flattening it and then pinching the ends together to form a smooth ball.

(See this video for shaping rolls, if necessary http://www.youtube.com/watch?v=TB908K3Kd6k )

5. Place the rolls on a lightly greased baking sheet and cover them with a towel. Let them rise for about one hour (about 1 1/2 to 2 hours for refrigerated dough) till pressing with a finger on the top leaves a dent.

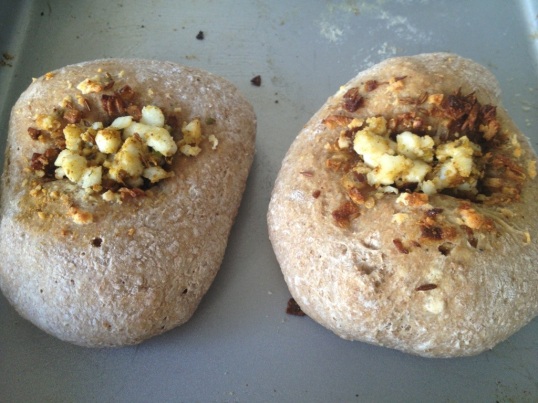
6. Work on one piece at a time, while you keep the others covered so they don’t dry out. When the rolls are ready, pick them up one at a time and using your fingers, form the depression in the middle. Hold the roll like a steering wheel with your thumbs in the middle and your fingers around the edges. Pinch the dough between your thumb and fingers, rotating as you go and gradually making the depression wider without actually poking a hole through. The depression should be quite thin so the filling can stay in and not rise when the Bialy bakes.

Remember not to press on the edges, or they will flatten out. Once shaped, you should have a depression about 3” in diameter with 1” of puffy dough around the edge, so your Bialy should be about 4” in diameter. Prick the centre of the Bialy with a fork so the centre doesn’t rise when baking.

7. Place the shaped dough on a parchment lined (or greased) baking tray leaving about 2 inches space between them.

8. Place the caramelized onion filling in the depressions of each Bialy. Add some mined green chili to each as a topping. Brush the outer dough circle with milk. If you’re using crumbled paneer, add it to the Bialys in the last 5 minutes of baking or it will get burnt.

20130607-145941.jpg

Bake the Bialys at 230C (450F) for about 15 minutes till they’re golden brown in color. Cool them on a rack. Serve slightly warm or at room temperature. This recipe makes 8 largish Bialys.

Enjoy warm with butter or cream cheese.

20130607-150452.jpg

Hokkaido Milk Bread – We Knead to Bake Project March 2013

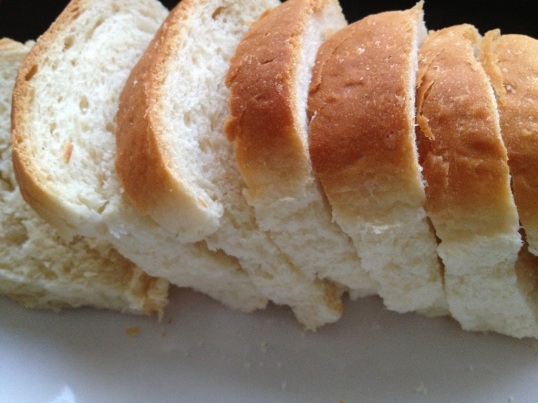
20130424-105247.jpgDespite all the talk about needing a push, the blog prompt, blah blah, I’m late..again. This post is exactly a month late for the “We Knead to Bake Project” for March .

I didn’t get to make it by the 24th last month (the deadline for each monthly post) for all sorts of reasons. But I wasn’t going to miss baking it entirely too – I’d always wanted to try “soft, pillowy bread” as Aparna describes this.

20130424-105310.jpg

Keep in mind that though the milk bread is the traditional “white bread” made with AP flour or bread flour, this can be easily made with wholemeal or whole wheat flour as well. I tried them all and the texture may not be as soft but it will make for a great toasting bread.

Coincidentally I had come across a Hokkaido bakery in Singapore just last month and this place called Pullman bakery is apparently famous for its curry bun from Hokkaido, Japan. I’m not sure if this is the same technique they use as this Hokkaido bread but there’s got to be a connection, and clearly a sign for me to absolutely try it this month:)
This Hokkaido bread gets its texture due to the use of an interesting ingredient called Tangzhong which involves cooking bread flour with water at 65°C (149 °F) to form what’s called a “roux”. Scientifically speaking, the gluten in the bread flour and water mixture absorb the moisture and create a “leavening” action. This Tangzhong when added into other ingredients produces light, fluffy bread.

Apparently this popular South Asian technique was made popular by Yvonne Chen, in her book which translates to “65C Bread Doctor”.
Since the recipe called for using half of the Tangzhong each time, I made this twice, once with bread flour for the first half and then with all purpose flour. The one with the AP flour was amazingly soft and fluffy and pillowy as promised. The one with bread flour was equally good, a tad less soft but great for toast with toppings/dips etc. Great for bruschetta:)
So once again, Aparna thanks for showing us a new technique this month. Here’s the link to her original post.
I plan to try this Tanzhong method in all my bread baking experiments, with whole wheat, multigrain flour etc. Will keep you posted on how they turn out. I think these will make for great substitute to pav breads as well so the next time I make these I will try making them smaller and probably with a bhaji (curried vegetable) filling:)

Ingredients:
For The Tangzhong (Flour-Water Roux)
1/3 cup all-purpose flour
1/2 cup water
1/2 cup milk
For The Dough:
2 1/2 cups all-purpose flour
3 tbsp sugar
1tsp salt
2 tbsp powdered milk
2 tsp instant dried yeast
1/2 cup milk (and a little more if needed)
1/8 cup cream (25% fat)
1/3 cup tangzhong (use HALF of the tangzhong from above)
25gm or about 1 1/2 tbsp unsalted butter (cut into small pieces, softened at room temperature)
1/2 to 3/4 cup mini chocolate chips if making the chocolate chip rolls (optional – I didn’t use this)
Method:
The Tangzhong (Flour-Water Roux):
  • Whisk the flour, water and milk in a saucepan until smooth and there are no lumps.
  • Place the saucepan on the stove, and over medium heat, let the roux cook till it starts thickening. Keep stirring/ whisking constantly so no lumps form and the roux is smooth.
  • If you have a thermometer, cook the roux/ tangzhong till it reaches 65C (150F) and take it off the heat. If you don’t have a thermometer (like me), then watch the roux/ tangzhong until you start seeing “lines” forming in the roux/ tangzhong as you whisk/ stir it. Take the pan off the heat at this point.
  • Let the roux/ tangzhong cool completely and rest for about 2 to 3 hours at least. It will have the consistency of a soft and creamy pudding (or like thick cooked oatmeal:).
  • If not using immediately, transfer the roux to a bowl and cover using plastic wrap. It can be stored in the fridge for about a day, but not any further as it may spoil.
The Bread Dough:
I used my stand mixer for this part but you could also use a food processor or your hands. Keep in mind that this dough is a bit sticky and can take some time and effort to knead by hand. And do not add more flour to make it less sticky either!
  • Put the flour, salt, sugar, powdered milk and instant yeast in the stand mixer bowl with the dough hook attachment and pulse a couple of times to mix.
  • In another small bowl mix the milk, cream and Tangzhong till smooth and ensure there are no lumps.
  • Add this tangzhong mixture to the processor bowl. Run on slow speed until the dough comes together.
  • Now add the butter and process till you have a smooth and elastic dough which is just short of sticky.
  • The dough will start out sticky but kneading for about 5 minutes will make it smooth. If the dough feels firm and not soft to touch, add a couple of tsps of milk till it becomes soft and elastic. To check if the dough is done, try to break the dough. You should be able to stretch the dough without it breaking right away. When it does break, the break should be form a circle at the end.
  • Make a ball of the dough and place it in a well-oiled bowl turning it so it is well coated. Cover with a towel or plastic wrap, and let the dough rise for about 45 minutes or till almost double in volume. This is the proofing stage.
  • Once it’s risen, place the dough on your working surface. You don’t need flour to work or shape this dough. This recipe makes enough dough to make one loaf (9” by 5” tin), 2 small loaves (6” by 4” tins) or 1 small loaf (6” by 4”) and 6 small rolls (muffin tins). Depending on what you are making, divide your dough. If you are making 1 loaf, divide your dough in 3 equal pieces. If you are making two smaller loaves, divide your dough into 6 equal pieces.
  • I made 3 small loaves in one 9’x5′ tin first with the half Tangzhong and with bread flour for the dough. I divided the dough into three pieces.
20130423-171321.jpg
Roll out each portion of the dough with a rolling pin into an oval shape, approximately about 1/8” thick.20130423-171333.jpg Take one end of the dough from the shorter side of the oval and fold it to the middle of the oval. Take the other end and fold so it slightly overlaps the other fold.20130424-105147.jpg
Roll this folded dough with the rolling pin so the unfolded edges are stretched out to form a rectangle.
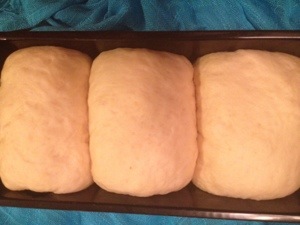
20130424-105156.jpgRoll the rectangle from one short edge to the other, pinching the edges to seal well. Do this with each of the three larger pieces and place them, sealed edges down, in a well-oiled loaf tin.
20130424-105204.jpgCover with a towel and leave the dough to rise for about 45 minutes.20130424-105223.jpg
20130424-105237.jpg

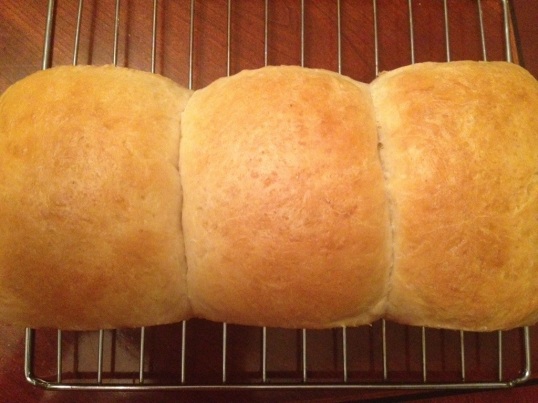
Carefully brush the tops of the rolls and the loaf with milk (or cream) and bake them at 170C (325F) for about 20 to 30 minutes till they are done (if you tap them they’ll sound hollow) and beautifully browned on top. Let them cool in the tins for about 5 minutes and then un-mould and transfer to a rack till slightly warm or cool.
20130424-105257.jpg

20130424-105304.jpg

Paneer Tikka Masala Naanza

20130411-173426.jpgI can almost see this dish being featured on the Indian version of the CopyKat recipes website – the community that posts popular recipes from key chain restaurants in the US- even if I say so myself:).

This particular recipe has been inspired from a food court style restaurant called Eatopia at India Habitat center in New Delhi. We recently returned from a whirlwind but memorable trip to Rajasthan, Agra and Delhi (in that order) with the family. Besides the breathtaking locales and the cherished monument sightings, this was also meant to be a food sighting and savoring trip – a gastronomic experience of sorts. While we couldn’t savor all that north India had to offer in 7 days with a tight schedule and a few Delhi bellies:) we did manage to cram in some key food experiences which I will save for a separate post.

Eatopia was our last food stop in Delhi. Decent food at affordable prices and a good sampling of cuisines to choose from – Nepali, Indo Chinese, Pizza, street food/chat, Punjabi Dhaba and so on. Good one to visit if you have limited time and want to try/taste all that Delhi restaurants would have to offer, well almost:).

This particular entree stood out for me for its flavor and uniqueness. An Indian inspired pizza or rather Naan smothered with tikka masala with chunks of paneer and cheese topping. The tikka masala flavor was so flavorful and distinct (and a great alternative to the usual tomato basil pizza sauce) that it left me wanting to lick the masala off the pizza along with my fingers. Of course I didn’t get to a second piece of that pizza thanks to our ravenous tween/teenagers with us (my son and nephew) who polished it off before we could say “please”:).

So is it a naan, is it a pizza, a Nizza? Naanza was the original name so Naanza it is. Perfect name for a naan pizza. A Paneer Tikka Masala Naanza.

So last weekend, as we were toying with dinner ideas, (keep in mind weekend dish requests are complicated at our home – Girish would rather eat Indian what with all the travelling over the week and noshing on greasy restaurant food, and Nikhil’s usually craving something in between an enchilada, burrito or a pizza) we very amicably settled on the Naanza, a pizza with an Indian twist.:)

Ingredients: (serves 5)

For the tikka masala paste: (Sanjeev Kapoor recipe adapted from the blog Indian Healthy Recipes)

¼ tsp cumin seeds (jeera)

1-2 bay leaves

½ tsp black peppercorns

1 cinnamon stick

2-3 cloves

2-3 green or black cardamom (black cardamom has a better flavor)

¾ cup of finely chopped onions (about 1 medium sized red onion)

2-3 green chilies slit or crushed

½ can tomato paste (original recipe called for fresh tomatoes pureed which is fine too)

1 tsp ginger garlic paste

1-2 tsp olive oil

1-2 tsp red chili powder (depending on your spice tolerance:))

1 tsp garam masala powder (available at Indian food stores or homemade)

1 tsp kasuri methi (dried fenugreek leaves, available at Indian food stores)

¼ cup cashew paste (soak ¼ cup raw cashews in about ½ cup water for 30 mins to an hour. Blend to a smooth paste.)

Other ingredients:

½ cup cilantro chopped

1 ½ cups Paneer (Indian cottage cheese store bought or home made) – sliced into ½ to 1 inch cubes

Tandoori Naans (store bought or home made). You may use frozen store bought naans as well. – 5

2 cups grated mozzarella cheese

Method:

For tikka masala paste:

  1. Heat the oil in a heavy bottomed pan or kadai.
  2. Add the cumin first and when it starts to sizzle, add the bay leaf, cloves, cinnamon and peppercorns. Saute for about 2 minutes till they start to lightly brown.
  3. Add the chopped onions, and green chilies. Fry till the onions turn golden brown.
  4. Add the ginger garlic paste and sauté for another minute.
  5. Add the tomato paste, red chili powder and cook for another 3-5 minutes.
  6. Pour about ¼ cup water, add the kasuri methi, garam masala powder and fry again for 3-5 minutes.
  7. Add the cashew paste and mix well. Continue to cook till the mixture starts to boil.
  8. Cook till the gravy becomes thick and almost paste like. Ensure that the mixture is not too watery as it will not stick well to the naan base. For this do make sure you add water to just the right consistency in Step 6, and adjust water quantity as needed.
  9. You may now add half of the paneer pieces to this paste and set it aside until you assemble the naan. This allows the paneer to soak in the tikka masala “juices”.
  10. 20130411-173352.jpg

You may also try this recipe for paneer no butter masala I posted earlier. I wanted to try this Sanjeev Kapoor version for kicks (and licks:) and also since this was supposedly the original “tikka” recipe, but I’m sure either would work.

For the Naanza:

  1. Preheat oven to 375-400F. (190-200C)
  2. Lightly grease and flour a pizza tray. Alternatively if you have a pizza stone, heat the stone at the required temperature for about 10 minutes.
  3. 20130411-173402.jpg
  4. Using a blunt knife, spread the tikka paste on one naan base till it is completely covered.
  5. 20130411-173420.jpg
  6. Now add some of the paneer pieces that are soaking in the masala paste on top. You may also add some of the fresh un-soaked paneer pieces as a topping at this stage. This gives the naanza a good balance of the gravy and paneer.
  7. Top this with some grated cheese ( 1-2 tbsp) and chopped cilantro. For those who like it spicy, add some crushed green chili as well.
  8. 20130411-173410.jpg
  9. Place the naanza on the pizza stone or baking tray and bake in the oven for about 10-15 minutes until the cheese has melted and the base is lightly browned. Since the naan is already cooked, you may not need to wait very long for the base to cook.

Verdict : This recipe came very close to the Eatopia version. Finger licking good and extra credits for the amazing aroma in the kitchen from the tikka masala baking in the oven:). I’m still experimenting with the right pizza cheese to use in Singapore so that’s the only thing I would change since I used an Indian mozzarella cheese. I also tried this with grated Amul cheese which didn’t give it the right consistency either, so I would probably use regular American grated mozzarella cheese the next time for that gooey pizza consistency.

Classic Croissants – We Knead to Bake Project February 2013

DSC01580

I would probably call this challenge the ultimate in baking challenges, at least for me:). After the first pull apart bread, I was all set to turn in my entry to this challenge “on time”, only to discover that Aparna had truly made this a sequel to the “Daring Baker’s Challenge”:). For the uninitiated, that is another group of bakers and as the title suggests the recipes are quite challenging. The recipe for making these croissants is all of 3 pages long and the process takes 3 days. Intimidating and definitely not something I would’ve even bothered to give a second look – those who know me well know how much I love to “cook and get out” – of the kitchen, I mean. But much as I would’ve been rigid in that rule of mine, there does come a time when you know that getting out of that comfort zone and pushing yourself once in a while is what makes life interesting – gives you that rush, that sense of fulfillment. Kinda like managing to finish a 10k. For someone like me who just 14 months ago hated the thought of running – outdoors or indoors. I know, I digress. But to me the two situations were quite similar, and coincidentally happened around the same time, a week apart from each other.

And someone or something does play a major role in pushing all of us. For the run it happened to be my husband Girish who started to run two years ago and got reluctant me into the habit. Now I feel like it has become an addiction of sorts and I’m signing us up for all the running events in the city:). Well sort of.

And Aparna’s group has been that someone and something for pushing me to bake more . I joined the Daring Bakers a year ago and for some reason couldn’t really get into it. It probably didn’t push me enough even if the recipes were equally or more daunting. What’s worked for me here has been Aparna’s concept of a (closed) Facebook group, the daily updates from the 100 or so members, the drooling pictures that make you feel a tad guilty that you are yet another day behind on the challenge – all this has driven me to bake something I would never have dreamed
of a year ago.

In both cases I did learn one thing – nothing is daunting if you plan well and work steadily towards your goal. This recipe looks long but if you read it well and plan it, it’s not all that bad. Yeah I know that sounds cliched. And even if I didn’t think that for a minute while baking them or running those miles, I do now, after I managed to get past the finish line, in both cases:)

Here’s the step by step recipe for Classic Croissants. They were a hit – flaky, soft, layered and just right. Enough to make me feel like a Nigella Lawson, even for a day:)

Ingredients:

For the dough:

4 cups all-purpose flour, and a little more for dusting/ rolling out dough

1/2 cup plus 2 tbsp ice water

1/2 cup plus 2 tbsp cold milk

1/4 cup sugar

40gm soft/melted unsalted butter (about 3 tbsps)

1 tbsp + 1/2 tsp instant yeast

2 tsp salt

DSC01562

For the butter layer:

250 gm cold unsalted butter (~2 sticks + 2 tablespoons)

1/4 cup of milk or mix of milk & heavy cream to brush the rolled croissants

Method:

Day 1:

Make the dough (and refrigerate overnight)

  1. Combine all the ingredients for the dough in the bowl of a stand mixer fitted with the dough hook. You can also use a food processor with the plastic blade, or do this by hand.
  2. DSC01564
  3. Mix everything on low speed for 3 minutes, scraping the sides of the mixing bowl once if necessary. Then mix further on medium speed for 3 minutes. Lightly flour a 10-inch pie pan or a dinner plate. And place the ball of dough on this.
  4. Gently shape the dough into a flat ball by pressing it down before storing it in the fridge, this makes rolling out next morning easier. Making a tight ball will strengthen the gluten which you do not need. Lightly dust the top of the dough with flour and wrap well with plastic so it doesn’t dry out. Refrigerate overnight.
  5. DSC01565

Day 2:

Make the butter layer

  1. The next day, cut out 2 pieces of parchment or waxed paper into 10” squares each. Cut the cold butter into 1/2-inch-thick slabs. Place these pieces on one piece of parchment/ waxed paper so they form a 5- to 6-inch square. Cut the butter further into pieces as required to fit the square. Top with the other piece of parchment/ waxed paper.
  2. Using a rolling pin, pound the butter with light, even strokes. As the pieces begin to stick together, use more force. Pound the butter until it flattens out evenly into a square that’s approximately 7-1/2”. Trim the edges of the butter to make a neat square. Put the trimmings on top of the square and pound them in lightly with the rolling pin. Refrigerate this while you roll out the dough.

Laminate the dough

Note – I don’t have great pictures for this as this was the most important step and I really wanted to focus and yes it was also the most messy with the butter and dough:)

  1. Unwrap and lay the dough on a lightly floured work surface. Roll it out to a 10-1/2-inch square, and brush off the excess flour. Take the butter out from the refrigerator —it should be cold but pliable. If it isn’t refrigerate it till it is. This so that when you roll out the dough with the butter in ti, neither should it be soft enough to melt, or hard enough to break. Unwrap the butter and place it on the square of dough in the center, so that it forms a “diamond” shape on the dough.
  2. Fold one flap of dough over the butter toward you, stretching it slightly so that the point just reaches the middle of the butter square. Bring the opposite flap to the middle, slightly overlapping the previous one. Similarly repeat with the other two so that the dough forms an envelope around the butter. Lightly press the edges together to completely seal the butter inside the dough to ensure the butter doesn’t escape when you roll out the dough later.
  3. Lightly flour the top and bottom of the dough. With the rolling pin, firmly press along the dough uniformly to elongate it slightly. Now begin rolling instead of pressing, focusing on lengthening rather than widening the dough and keeping the edges straight.
  4. Roll the dough into an 8” by 24” rectangle. If the ends lose their square shape, gently reshape the corners with your hands. Brush off the excess flour.Mark the dough lightly equally into three along the long side. Using this as a guideline, pick up one short end of the dough and fold 1/3rd of it back over the dough, so that 1/3rd of the other end of dough is exposed. Now fold the 1/3rd exposed dough over the folded side. Basically, the dough is folded like 3-fold letter before it goes into an envelope (letter fold). Put the folded dough on a floured baking sheet, cover with plastic wrap, and freeze for 15 to 20 minutes to relax and chill the dough.
  5. Repeat the rolling and folding, this time rolling in the direction of the two open ends (from the shorter sides to lengthen the longer sides) until the dough is about 8” by 24”. Once again fold the dough in thirds, brushing off excess flour and turning under any rounded edges or short ends with exposed or smeared layers. Cover once again with plastic wrap and freeze for another 15 to 20 minutes.
  6. Roll and fold the dough exactly in the same way for the third time and put it baking sheet. Cover with plastic wrap, tucking the plastic under all four sides and refrigerate overnight.

Day 3:

Divide the dough

  1. The next day, unwrap and lightly flour the top and bottom of the dough. Cut the dough along the longer side into halves. Cover one half with plastic wrap and refrigerate it while working on the other half.
  2. “Wake up the dough up” by pressing firmly along its length with the rolling pin. Don’t widen the dough but simply begin to lengthen it with these first strokes. Slowly roll the dough into a long and narrow strip, approximately 8” by 22”. If the dough sticks as you roll, sprinkle with flour.
  3. DSC01567
  4. Once the dough is about half to two-thirds of its final length, it may start to resist rolling and even shrink back. If this happens, fold the dough in thirds, cover, and refrigerate for about 10 minutes; then unfold the dough and finish rolling.
  5. Lift the dough an inch or so off the table at its midpoint and allow it to shrink from both sides and prevent the dough from shrinking when it’s cut. Check that there’s enough excess dough on either end so that when you trim the edges to straighten them, you have a strip of dough that is 20’ inches long. Now trim the edges so they’re straight.
  6. If you’re good at “eyeballing” and cutting the dough into triangles, then forget the measuring rule, marking and cutting instructions. Otherwise, lay a measuring rule or tape measure lengthwise along the top length of the dough. With a knife, mark the top of the dough at 5-inch intervals along the length (there will be 3 marks in all). Now place the rule or tape measure along the bottom length of the dough. Make a mark 2-1/2 inches in from the end of the dough. Make marks at 5-inch intervals from this point all along the bottom of the dough. You’ll have 4 marks that fall halfway between the marks at the top.
  7. Make diagonal cuts by positioning the yardstick at the top corner and the first bottom mark. Use a pizza wheel/ pie wheel or a bench scraper and cut the dough along this line which connects each top mark to the next bottom mark and then back to the next top mark and so on. This way you will have 7 triangles and a scrap of dough at each end.
  8. DSC01569

Shape the croissants

  1. Now work with one piece of triangular dough at a time. Using your rolling pin, very lightly roll (do not make it thin but only stretch it slightly) the triangle to stretch it a little, until it is about 10” long. This will give your croissants height and layers. You can stretch it by hand too, but if you don’t have the practice, your stretching could be uneven.
  2. Using a sharp small knife, make a 1/2- to 3/4-inch-long notch in the center of the short side of each triangle. The notch helps the rolled croissant curl into a crescent.
  3. Place the triangle on the work surface with the notched side closest to you. With one hand on each side of the notch, begin to roll the dough away from you, towards the pointed end.
  4. Flare your hands outward as you roll so that the notched “legs” become longer. Roll the triangle tight enough but not too tight to compress it, until you reach the “pointy” end which should be under the croissant.
  5. Now bend the two legs towards you to form a tight crescent shape and gently press the tips of the legs together (they’ll come apart while proofing but keep their crescent shape).
  6. Shape all the triangles like this into croissants and place them on a greased or parchment lined baking sheet leaving as much space between them as they will rise quite a bit.
  7. DSC01572

Proof the croissants

  1. Brush the croissants with milk (or a mix of milk and cream). If you use eggs, make an egg wash by whisking one egg with 1 tsp water in a small bowl until very smooth. Lightly brush this on each croissant.
  2. Refrigerate the remaining milk/ milk+cream (or egg wash) for brushing the croissants again later. Place the croissants in a cool and draft-free place (the butter should not melt) for proofing/ rising for about 1 1/2 to 2 hours. They might need longer than 2 hours to proof, maybe as much as 3 hours, so make sure to let croissants take the time to proof. The croissants will be distinctly larger but not doubled in size. They’re ready if you can see the layers of dough from the side, and if you lightly shake the sheets, the croissants will wiggle.
  3. 20130305-180733.jpg

Bake the croissants

  1. Just before the croissants are fully proofed, pre-heat your oven to 200C (400F) in a convection oven or 220C (425F) in a regular oven. Brush the croissants with milk/ milk+cream (or egg wash) a second time, and place your baking sheets on the top and lower thirds of your oven (if regular) or bake one tray at a time in the convection oven.
  2. Bake them for about 15 to 20 minutes till they’re done and golden brown on top and just beginning to brown at the sides. In a regular oven, remember to turn your baking sheets halfway through. If they seem to be darkening too quickly during baking, lower the oven temperature by 10C (25F). Cool the croissants on the baking sheets on racks.
  3. 20130305-180816.jpg

Serve warm. This recipe makes 15 croissants. I used only half (7) and added some filling to the other half and baked it the next day. I filled some with Punjabi Samosa filling, nutella, and PB&J. PBJ was Nikhil’s creation and it oozed a bit but was yummy nevertheless.

Will post those pictures soon and update this post.

20130305-180759.jpg

Here’s a link to a great video that gives you the step by step recipe for more clarity.

Link to video on making croissants – http://www.youtube.com/watch?v=Ot3jKnkTfPY&feature=player_embedded

20130307-064643.jpg

Pain Au Samosa

20130307-064659.jpg

Pain Au PBJ

20130307-065756.jpg

Proofing in the oven

20130307-064725.jpg

An assortment


“We Knead to Bake” Project – Green Chutney Chili and Cheese Pull-Apart Bread

20130204-160429.jpg

I know I said I’m not one for resolutions but if there’s one thing I need to get better at is blogging more often. I need a challenge. Cooking up new and interesting dishes is never an issue – it’s the compilation of the pictures (and I may need to do a post on just the pictures that never made it to the blog), the story behind the post, the flow, the recipe – you get the gist. And when I see inspiring blogs like Panfusine, My Diverse Kitchen, What’s for Lunch, honey? – creative bloggers with jaw-dropping food porn on their blogs, I get that steely resolve to get better at this self-induced hobby of mine. Only the resolve gets blurry as soon as I sit down to blog. It’s a block.

Until I got this prompt from my son’s example, literally. My 5th grader, Nikhil started to blog about a year and a half ago over the summer and sure enough, after the school year began, the blog lay on the wayside. The move to Singapore and the new school was the perfect antidote – and I would tell him to capture his memories and travels on his long forgotten blog, which he momentarily did.

Interestingly his new school’s syllabus added an introduction to blogging as a part of their writing and language art curriculum. Every child would get to start a new blog and write about anything that fancies him/her. They regularly got what were called “picture prompts” to help them get out of a writer’s block and stay on track. Great idea – not only to spark some creative writing juices among kids but also to engage the classmates to read each other’s blog and comment and critique. Pretty soon, my son was on a blogging roll and it’s now almost second nature (well, of course its homework so its mandatory but enough to start a habit;) for him to write even if a few lines every other day. He does take the critiquing quite seriously as he did with my blog posts recently:)

Here was my answer. I needed a “picture prompt” to get me on track.

And so when I chanced upon the “We Knead to Bake” project it was my antidote. Aparna Balasubramanian, the author of My Diverse Kitchen just started this group for culinary enthusiasts with the idea of getting like minded bloggers together to bake one bread a month for 2013. January’s theme was Herb and Cheese Pull Apart Bread which was my prompt for the month.

I joined the group at the end of January, and made it to the group by the skin of my teeth – so it has taken me an additional week to bake and post this recipe, what should have been done by the 24th. I guess I also need to work on meeting baking deadlines:). I’m linking this post to Aparna’s blog post on the theme.

I followed the recipe for the most part except for the mix-ins. I used Amul cheese and a green-chili, mint paste or chutney as the spread for the bread. (my favorite combination for making grilled toast – Chili Cheese toast)

II haven’t had great luck baking breads before but this recipe was perfect in terms of the consistency and texture.

Note: I would add more of the mix-ins as I couldn’t really taste much of the chutney or green chilies in the bread with the original measures for the ingredients so would double the measures (which is what I have noted here in the ingredients).

Also I’m still in the process of updating all the pictures from my camera so look out for another update to this post shortly.

Ingredients:

For the Dough:

1/2 cup warm milk

1 tsp sugar

2 tsp active dry yeast

2 3/4 to 3 cups all-purpose flour

1 tsp salt

2 1/2 tbsp butter, soft at room temperature

3/4 to 1 tsp garlic paste

3/4 cup milk (+ a couple of tbsp to brush over the bread)

For the Filling:

3 tbsp melted butter or a mix of olive oil (EVO) and butter

1/4 cup green chutney (thick and not watery) – 1/2 cup cilantro+1/4 cup mint leaves+1/4-1/2 tsp black salt. Blend together with very little water to a smooth paste.

2 tbsp crushed green chilies (you may use longer chilies or jalapenos for less spice. I used thai chilies that are extra spicy:)

3/4 cup grated Amul cheese

Method:

1. In a small bowl, dissolve the sugar and the yeast in the 1/2 cup of warm milk. Set this mixture aside for about 5 minutes till it starts to froth and rise up.

2. Mix the flour, salt, softened butter, and garlic paste in a stand mixer with a hook attachment. Now add the yeast mixture and the 3/4 cup of milk and knead till you have a soft, smooth and elastic/ pliable dough which is not sticky. Add a little extra flour if your dough is sticking, but only just as much as is necessary.

3. Shape the dough into a ball and place it in a well-oiled bowl, turning the dough to coat it completely with oil. Cover and let it rise for about 1 to 1 1/2 hours or until almost double in volume.

Dough for pull apart bread

4. Prepare the work surface by dusting it lightly with flour. Deflate the dough, divide it into 2. Return one of the portions back to the bowl and cover. Take the other portion and shape it into a large square or rectangle.

5. Brush the rectangle liberally with the melted butter/EVO. Spread the green mint,cilantro, green chili mixture on the rectangle.

DSC_0072

Using a pizza cutter, slice the dough from top to bottom into 8 long and even strips – they do not have to be perfect. Lay each strip on top of the next, with the topping facing upwards, until you have a stack of the strips.

You can put the 2 strips cut from the sides in the middle of the stack so it looks neater. Using a pastry scraper or a sharp knife, cut straight down through the stack dividing it into 6 equal pieces (8 square stacks).

6. Now take the other dough portion and shape it into another large rectangle. Brush with EVO or butter, add the grated Amul cheese on to the surface of the rectangle. Use a cutter and make another 8 square stacks.

DSC_0074

7. Grease and lightly flour a 9” by 4” (or 5”) loaf tin. Layer the square slices, alternating the chutney slices with the amul cheese slices.

DSC_0077

8. Cover the loaf tin dough with a towel and allow the dough to rise for an hour. Lightly brush some milk over the top of the loaf.

DSC_00819. Bake the dough at 180C (350F) for about 30 to 40 minutes until it is done and the top is golden brown. This recipe bakes one 9” by 5” loaf.

Juicing my way into the New Year

Yeah I know it’s probably too late to be saying “in the new year”. It’s almost the end of the first month into the the new year and I have been slacking. No, I didn’t make any great resolutions, I don’t really believe in making any, as they would’ve lasted all of 1 month anyway, if that.

The year started off quiet after a fun-filled family filled reunion at the end of the year. For the first time in many years, we actually spent a quiet evening on New Year’s eve. I think we deserved it and maybe even owed it to ourselves:)

It has been quite an eventful 2012 – a big move to Asia, change of schools, change of homes, change of jobs – our entire world had suddenly turned almost a full circle, as we moved closer to India, where we started! With all that, it didn’t really feel out of place to take a breather and brace ourselves for whatever is  coming in 2013.

So as we look ahead, 27 days already into the new year, I keep my fingers crossed that we make the best of this adventure, taking life one day at a time – discovering and evolving  in our journey. If anything, this move has taught me that – we have no idea what or when the next adventure is – so let’s take it slow and live in the present:)

I know one discovery I have made after moving here – it must be the change of pace – I have become more conscious of eating healthy, more veggies, more fruits, more grains, and more juices – not to forget, eating small meals every 2-3 hours.

Juicing and smoothie-ing (if that was a word) is slowly becoming a way of life. I was first inspired by the film, Fat, Sick and Nearly Dead and resolved to buy a juicer when I moved to Singapore. I bought a Philips centrifugal juicer which worked great until I discovered this world of centrifugal vs masticating vs slow juicers. Thanks to my dear friend Pushita, who is a health and wellness counselor (check out her page on Facebook for health tips and recipes), I was introduced to the technicalities of juicing. What types of juices heal, provide energy, and give the body the alkalinity it needs to stay healthy. And so researching juicers became a new found passion. I became a “juicer geek” from a handheld geek:). Um there are many apps and FB pages for juicing as well, in case you were wondering.

My new year’s gift to myself and the family was the investment (it literally is one, given the price) of the Hurom Slow Juicer. I’ll let you read the differences between the centrifugal and slow juicers here. But in a nutshell, the slow juicer produces more juice, less pulp and doesn’t lead to oxidation of the juice. So the juice stays fresher longer – as long as you store in glass bottles in the refrigerator. And they taste as fresh as can be:)

IMG_0149

I am now hooked – a juice or a smoothie is a staple in our home  and I make it a point to either make vegetable juices or introduce some veggie in the fruit juices. You don’t really want to do 100% fruit juices everyday with the high amount of sugar it has. Adding in celery, spinach or kale seems to work wonders and doesn’t really interfere with the taste much.

So here’s the first of possibly a series in juices and smoothies – pomegranate, celery juice on day 1 of buying the juicer.

-Seeds of 2 pomegranates, 2 sticks celery on Day 1

-Orange, carrot , celery, tomato, ginger and lemon on Day 2.

IMG_0233

– Carrot, passion fruit, celery on Day 3.

IMG_0550

Pretty soon I was on a roll. But there was a small catch. I was beginning to collect a lot of pulp. Now this was different from the Philips juicer pulp of course, the Hurom juicer extracts all or most of the juice so you get very dry pulp. But I didn’t have the heart to throw away the carrot or the apple pulp. Here are some tips to use the fruit pulp after juicing-

  1. Use as compost for your plants
  2. Make sure you save the pulp separately in plastic containers or Ziploc bags and keep them in the freezer.
  3. Use the celery, carrot, spinach, kale pulp for making vegetable stock. Boil the pulp in twice or three times the amount of water, add a pinch of salt and pepper and let it boil till the pulp begins to float on top. Strain and use the liquid in soups, gravies, sauces etc.  You can also freeze the stock in ice trays and use for later.
  4. Use the fruit pulp for cakes, muffins
  5. Add some of the pulp to smoothies.

With the carrot and green apple that I had left over, I made a carrot, apple cake. The best part- it was eggless and vegan. I used flax seed meal as the egg substitute added some dry fruits and the 2 cups of pulp and it was the moistest cake I had ever had. Recipe adapted from the Joy of Vegan Baking by Colleen Patrick-Goudreau.

Carrot Apple Vegan Cake:

IMG_0157

Ingredients for one 9 inch cake:

3 tbsp ground flaxseed

1/2 cup water

2/3 cup olive oil

1 cup carrot pulp

3/4 to 1 cup apple pulp

1 cup chopped walnuts

1/4 cup raisins

1 1/3 cups all purpose flour (you may also substitute this with 1/2 cup wheat flour)

1 cup demerara sugar

1 1/2 tsp baking soda

1 tsp baking powder

1 tsp ground cinnamon

1/2 tsp ground cloves

1/2 tsp grate nutmeg

1/2 tsp allspice ground

1/2 tsp salt

You may use cream cheese frosting for this cake but I didn’t have any cream cheese and didn’t want to add any more sugar so opted not to.

Method:

1. Preheat the oven to 350F or 180C.

2. Grease a 9×9 inch square cake pan.

3. Whip together the ground flaxseed and water until its frothy and creamy, for about 2 minutes.

4. Take this mixture in a stand mixer or hand blender or food processor with the paddle attachment, add the olive oil and beat at low speed till combined.

5. Add the carrot, pulp, apple pulp, walnuts and raisins and stit to combine.

6. In a separate bowl, mix all the dry ingredients together.

7. Add the dry mixture to the wet mixture and stor again to combine.

8. Transfer the contents to the greased pan and spread evenly.

9. Bake until a toothpick inserted into the center comes out clean, for about 30-35 minutes. Let cool for about 15 minutes. Invert the cake, let cool and then cut into squares.

Creepy Cupcakes for Halloween

As you can see, I’m getting into a cupcake frenzy. My latest challenge was to bake some cupcakes for a Halloween party at school. I’d seen this picture of a Creepy Medusa Cupcake in a magazine and Nikhil promised to help me make them. Of course he helped me pile the sour gummies on the cupcake and in his mouth:)

I needed a recipe for a perfect vanilla cupcake to begin with. Looking around, I found Glorious Treats and realized she was not only good at cupcake making but at search marketing too:) Only someone with that knowledge would title her recipe “Perfect Vanilla Cupcakes” to be found by amateurs like me:). She had tried every version of vanilla cupcakes there were and her story sounded so familiar to my cupcake wars that I had to try this recipe.

And I have to hand it to her. These cupcakes were the perfect-est, moist-est, soft-est I have ever made. Great recipe for a base vanilla cupcake to be used with any frosting.

Savory Sweet Life had this recipe for chocolate butercream frosting that I used for this recipe. I used store bought sour gummies, cut them into thin strips and piled them on top of the frosted cupcakes. I then added a googly eye which was the only non-edible piece of this cupcake. If I’d had a little more time, I would have used black and white edible frosting or edible gum to make shapes for the eyes.

The cupcakes looked creepy enough on the Halloween snack table for the 5th graders to get to try them. It felt so satisfying see them devour the gummies before they wiped off the cupcakes. The best compliment I received was from a cheery 5th grader who told me these were “the best he’d had” and that I should write a book on cupcakes:)

Thank you Cooper for your confidence after just one cupcake. About that book – I’ll get right on it, and you will be my taster. Deal?:)

Ingredients (for 15 cupcakes) – I made 30 of them so just doubled the measures

1 1/4 cups cake flour

1 1/4 teaspoons baking powder

1/2 teaspoon baking soda

1/2 teaspoon salt

2 eggs

3/4 cup sugar

1 1/2 teaspoons pure vanilla extract

1/2 cup oil (vegetable, canola or extra light olive oil)

1/2 cup buttermilk (or 1/2 cup milk plus 1/2 teaspoon white vinegar or lemon juice- add acid to the milk then set aside for 5 minutes before using)

Method:

1. Preheat oven to 350*F.

2. In a medium bowl, add cake flour, baking powder, baking soda and salt.  Stir together with whisk, and set aside.

3. In the bowl of an electric mixer, add eggs and beat 10-20 seconds.  Add sugar and continue to beat on medium speed about 30 seconds.  Add vanilla and oil, beat.

4. Reduce mixer speed to low and slowly add about half of the flour mixture.  Add half of the milk, then the rest of the flour and the rest of the milk.  Beat until just combined.  Scrap down the side of the bowl.

5. The batter will be thin.   Pour batter into a muffin pan prepared with paper liners.  Fill liners about 2/3 full.

6. Bake cupcakes in pre-heated oven for 15 minutes.

7. Cool in pan 1-2 minutes, then remove cupcakes from pan (carefully) and finish cooling on a wire rack.

8. Frost as desired when fully cool.

Recipe for chocolate buttercream frosting : (adapted from Savory Sweet LIfe’s blog)

Ingredients

  • 1 cup unsalted butter (2 sticks or 1/2 pound), softened (but not melted!)
  • 3 1/2 cups confectioners (powdered) sugar
  • 1/2 cup cocoa powder
  • 1/2 teaspoon table salt
  • 2 teaspoons vanilla extract or 1 teaspoon almond extract
  • 4 tablespoons milk or heavy cream
Method:
  1. Cream butter for a few minutes in a mixer with the paddle attachment on medium speed. Turn off the mixer.
  2. Sift 3 cups powdered sugar and cocoa into the mixing bowl. Turn your mixer on the lowest speed (so the dry ingredients do not blow everywhere) until the sugar and cocoa are absorbed by the butter.
  3. Increase mixer speed to medium and add vanilla extract, salt, and milk/cream and beat for 3 minutes.
  4. If your frosting needs a more stiff consistency, add a little more sugar. If your frosting needs to be thinned out, add additional milk 1 tablespoon at a time.

Red Velvet Cupcakes – A special October Birthday.

20121008-180724.jpg

October is a special month. We have quite a few friends and family who are October babies but it is a special month for a very special reason. Eleven years ago, at 11.25pm to be exact, we welcomed our wide eyed, curious, kicking and (not screaming but) sprightly bundle of joy into this world. And eleven years later, he is still our wide eyed, curious, and yes, still kicking (in his sleep:) and very sprightly tween-ager. And of course he is and will always be the brightest moment in our life – our bundle of joy. Happy Birthday Nikhil!!

I made these red velvet cupcakes last night at Nikhil’s request. The original request was a bundt cake which is his all time favorite cake but was modified to cupcakes for ease with doling them out as treats for school. Will have to try these again for the bundt cake. This recipe is adapted from Simply Recipe’s blog. I followed the recipe for the most part except for using buttermilk and used the adapted suggestion for making buttermilk.

Ingredients:

  • 1 1/2 cups of sugar
  • 1/2 cup (1 stick) of butter, room temperature
  • 2 eggs, room temperature
  • 2 1/3 cups of cake flour
  • 2 tablespoons of Dutch-processed cocoa powder
  • 1 teaspoon of baking soda
  • 1 teaspoon of baking powder
  • 1/2 teaspoon of salt
  • 1 cup of milk mixed with 1 tbsp of white vinegar (let it stand for 10 minutes)
  • 1 1/2 tablespoons of red food coloring (I would use upto 2 tbsp, the batter should be quite a brightish red)
  • 1 teaspoon of vanilla extract
  • 1 teaspoon of distilled white vinegar

For the Cream Cheese icing:

  • 1/2 cup of butter (1 stick), room temperature
  • 1/2 packet of Philly cream cheese softened
  • 2 – 3 cups of powdered sugar
  • 1 teaspoon of vanilla extract

Method for the Cupcakes:

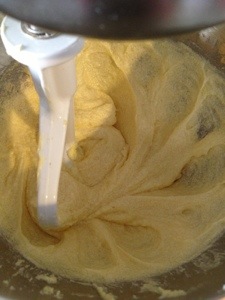
1. Preheat the oven to 350°F or 170C. Beat the butter and sugar in an electric mixer for 3 minutes on medium speed until light and fluffy.

20121008-180633.jpg

2 . Add the eggs, one at a time, beating until fully mixed. Use a spatula to scrape down the sides of the bowl to ensure even mixing.

3. In a large bowl, sift together the cake flour, cocoa powder, baking soda, baking powder, and salt.

4. In another bowl whisk together the milk/vinegar mixture, vinegar, vanilla extract, and red food coloring.

5. Add the dry ingredients to the butter/sugar/egg mixture in the mixer. Use the mixer to stir the ingredients. Now add the red colored wet mixture. Continue adding in a dry, wet, dry pattern, ending with the dry ingredients. You should get a brightish red colored batter as a result.

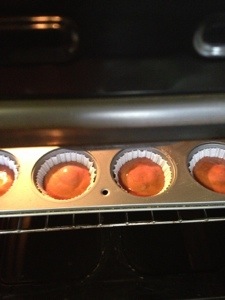
6. Scoop into cupcake papers, about 1/2 to 2/3 of the way full. Bake for 18-22 minutes or until a toothpick comes out clean. Rotate the pan after the first 15 minutes of baking to ensure even baking.

20121008-180657.jpg

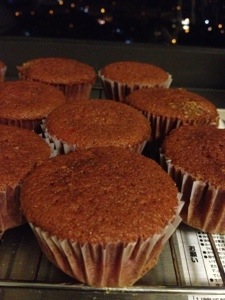
6 Allow to cool for one minute in the pan then transfer to a wire rack to cool completely. (see how the color looks more like chocolate cupcakes rather than red velvet. While some of it is the lighting, they could use more food color.)

20121008-180716.jpg

Method for the Cream Cheese Icing

1 Cream the butter and cream cheese together, about 3 minutes. Use a spatula to scrape down the sides and bottom of the bowl to ensure even mixing.

2 Add the vanilla extract and mix.

3 Add the powdered sugar, continually taste to get to desired sweetness. Pipe onto cooled cupcakes.

Verdict : The foodie/critic that Nikhil is – he had one look at the cupcakes coming out of the oven and told me exactly what may be missing:) The red food color could have been a little more. (reason for my updated notes in the ingredients. Use 2 tbsp instead of 1 1/2). The cupcakes came out very moist and flavorful though, one of the better cupcakes I have made in a while and the taste was perfect. Overall a keeper recipe.

A very Happy Birthday to all other October babies in the family – these cupcakes are for each one of you:)

I would like to know if there is an alternative to using  food color in this recipe. Part of my hesitation to add more color was the aversion to using a dye, especially given this recipe already has enough butter and cream cheese and is not exactly what you would call a healthy recipe:). Any suggestions for a low fat no dye red velvet recipe out there?


Post Navigation