Hokkaido Milk Bread – We Knead to Bake Project March 2013
 Despite all the talk about needing a push, the blog prompt, blah blah, I’m late..again. This post is exactly a month late for the “We Knead to Bake Project” for March .

I didn’t get to make it by the 24th last month (the deadline for each monthly post) for all sorts of reasons. But I wasn’t going to miss baking it entirely too – I’d always wanted to try “soft, pillowy bread” as Aparna describes this.
Keep in mind that though the milk bread is the traditional “white bread” made with AP flour or bread flour, this can be easily made with wholemeal or whole wheat flour as well. I tried them all and the texture may not be as soft but it will make for a great toasting bread.
Coincidentally I had come across a Hokkaido bakery in Singapore just last month and this place called Pullman bakery is apparently famous for its curry bun from Hokkaido, Japan. I’m not sure if this is the same technique they use as this Hokkaido bread but there’s got to be a connection, and clearly a sign for me to absolutely try it this month:)
This Hokkaido bread gets its texture due to the use of an interesting ingredient called Tangzhong which involves cooking bread flour with water at 65°C (149 °F) to form what’s called a “roux”. Scientifically speaking, the gluten in the bread flour and water mixture absorb the moisture and create a “leavening” action. This Tangzhong when added into other ingredients produces light, fluffy bread.
Apparently this popular South Asian technique was made popular by Yvonne Chen, in her book which translates to “65C Bread Doctor”.
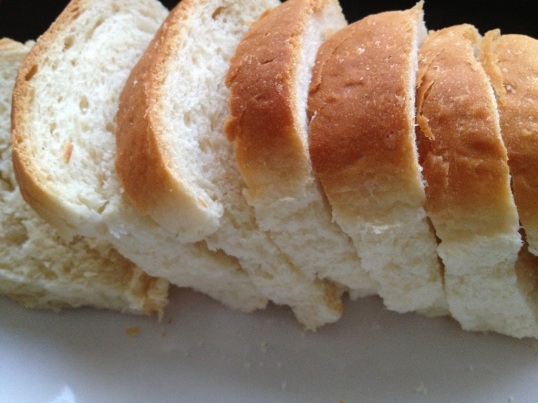
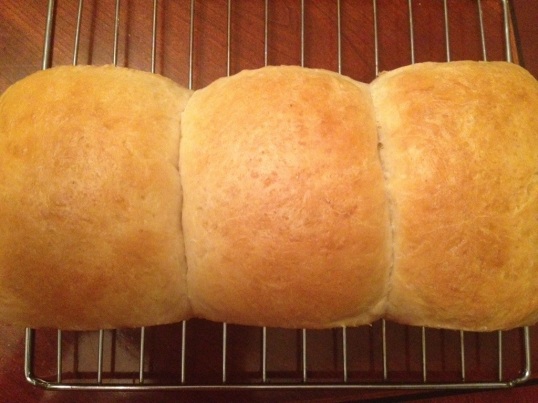
Since the recipe called for using half of the Tangzhong each time, I made this twice, once with bread flour for the first half and then with all purpose flour. The one with the AP flour was amazingly soft and fluffy and pillowy as promised. The one with bread flour was equally good, a tad less soft but great for toast with toppings/dips etc. Great for bruschetta:)
So once again, Aparna thanks for showing us a new technique this month. Here’s the link to her original post.
I plan to try this Tanzhong method in all my bread baking experiments, with whole wheat, multigrain flour etc. Will keep you posted on how they turn out. I think these will make for great substitute to pav breads as well so the next time I make these I will try making them smaller and probably with a bhaji (curried vegetable) filling:)
- Whisk the flour, water and milk in a saucepan until smooth and there are no lumps.
- Place the saucepan on the stove, and over medium heat, let the roux cook till it starts thickening. Keep stirring/ whisking constantly so no lumps form and the roux is smooth.
- If you have a thermometer, cook the roux/ tangzhong till it reaches 65C (150F) and take it off the heat. If you don’t have a thermometer (like me), then watch the roux/ tangzhong until you start seeing “lines” forming in the roux/ tangzhong as you whisk/ stir it. Take the pan off the heat at this point.
- Let the roux/ tangzhong cool completely and rest for about 2 to 3 hours at least. It will have the consistency of a soft and creamy pudding (or like thick cooked oatmeal:).
- If not using immediately, transfer the roux to a bowl and cover using plastic wrap. It can be stored in the fridge for about a day, but not any further as it may spoil.
- Put the flour, salt, sugar, powdered milk and instant yeast in the stand mixer bowl with the dough hook attachment and pulse a couple of times to mix.
- In another small bowl mix the milk, cream and Tangzhong till smooth and ensure there are no lumps.
- Add this tangzhong mixture to the processor bowl. Run on slow speed until the dough comes together.
- Now add the butter and process till you have a smooth and elastic dough which is just short of sticky.
- The dough will start out sticky but kneading for about 5 minutes will make it smooth. If the dough feels firm and not soft to touch, add a couple of tsps of milk till it becomes soft and elastic. To check if the dough is done, try to break the dough. You should be able to stretch the dough without it breaking right away. When it does break, the break should be form a circle at the end.
- Make a ball of the dough and place it in a well-oiled bowl turning it so it is well coated. Cover with a towel or plastic wrap, and let the dough rise for about 45 minutes or till almost double in volume. This is the proofing stage.
- Once it’s risen, place the dough on your working surface. You don’t need flour to work or shape this dough. This recipe makes enough dough to make one loaf (9” by 5” tin), 2 small loaves (6” by 4” tins) or 1 small loaf (6” by 4”) and 6 small rolls (muffin tins). Depending on what you are making, divide your dough. If you are making 1 loaf, divide your dough in 3 equal pieces. If you are making two smaller loaves, divide your dough into 6 equal pieces.
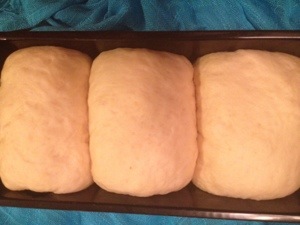
- I made 3 small loaves in one 9’x5′ tin first with the half Tangzhong and with bread flour for the dough. I divided the dough into three pieces.

Roll out each portion of the dough with a rolling pin into an oval shape, approximately about 1/8” thick.
 Take one end of the dough from the shorter side of the oval and fold it to the middle of the oval. Take the other end and fold so it slightly overlaps the other fold.
Roll this folded dough with the rolling pin so the unfolded edges are stretched out to form a rectangle.
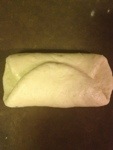
 Roll the rectangle from one short edge to the other, pinching the edges to seal well. Do this with each of the three larger pieces and place them, sealed edges down, in a well-oiled loaf tin.
 Cover with a towel and leave the dough to rise for about 45 minutes.


