Roz Ka Khana

A blog about everyday food. Mostly Indian. All vegetarian.

Archive for the category “Cooking with Eggs”

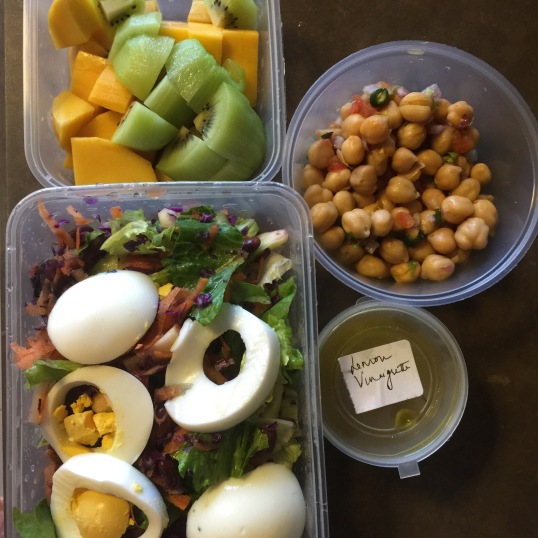
Lunchbox Series – A Week of Protein Packed Lunches – Day One – Rainbow Salad with Lemon Vinaigrette

I just realized that this is my first post for the new year. A wee bit late but what better way to start than with some healthy lunchbox recipes. It’s always heartening to see the whole family get on a healthy streak versus a lone crusader (that would be me) experimenting with single serve “healthy” menus which has been the case for some time now. I’d still try to cook and pack healthy food for Nikhil but I have never wanted to force “dairy free” or “gluten free” or “grain free” menus on anyone, even on myself. Those have purely been weekly experiments to see the effect of elimination of some of these highly talked about diets, on my own body. And I have realized that some things that work for me may not work for everyone. To each his own. I have, for example, tried to eliminate milk, caffeine, white flour, white rice, white sugar etc. from my diet, I try to be gluten free once a month if I can, have introduced fermented foods like kefir and kombucha on a regular basis and have noticed quite drastic effects on my energy levels, skin, vision and even my outlook in general. I keep trying something new every month and it’s amazing to see the direct effects of food on the body and mind.

But I’m also not wont to spending hours catering to every diet need at home so this project meant that either everyone get on the healthy bandwagon or I jump off and “be normal”:) Save my green smoothies of course, which I have stuck on to – possibly for life:)

So it came as a pleasant surprise when last week G announced that he wanted to try packing lunches to work. And make it a rice-free but protein laden week. Like I said I have enjoyed packing lunches for Nikhil, something I would never have imagined I had in me, but I also love a good challenge. One of my favorite pastimes on weekends (call me strange) is creating healthy menus for the week ahead and it has been a blessing to have a planned food calendar for everyone in the house – removes the stress out of crazed weekday mornings, eradicates the eternal and annoying “what’s for lunch or dinner” questions and makes shopping easier.

And so we were on. Vegetarian, protein laden menus for the week, minus rice, pasta and heavy carbs. Here’s what it looked like:

Screen Shot 2015-01-30 at 9.03.33 PM

I have been posting the daily lunchboxes on the Facebook and Twitter pages but do need to record the recipes somewhere for posterity and of course to share with those interested. So here goes…a daily recap of the #proteinweek #lunchbox.

Day One:

IMG_1511-0

Rainbow Salad with Boiled Egg and Lemon Vinaigrette:

Ingredients: (for one lunchbox)

  • Romaine Lettuce – 2 cups
  • Grapes – 1 cup, sliced
  • Red apples – 1 cup, chopped
  • Red Bell pepper- 1/2 cup sliced thin
  • Carrot – 1/2, grated
  • Red cabbage- 1/4 grated
  • Sunflower seeds – 1/4 cup
  • Boiled egg – 1, sliced (you may replace with tofu or tempeh or quinoa if you don’t eat eggs for other protein alternatives; even paneer or haloumi cheese if you don’t mind dairy)
  • Kidney beans, 1/2 cup, boiled

Lemon Vinaigrette: (Epicurious.com recipe)

  • 1/2 teaspoon finely grated lemon zest
  • 2 tablespoons freshly squeezed lemon juice
  • 1 teaspoon sugar
  • 1/2 teaspoon Dijon mustard
  • 1/4 teaspoon fine sea salt, or to taste
  • 3 to 4 tablespoons extra-virgin olive oil
  • Freshly ground black pepper to taste

Method:

In a small bowl, whisk together the lemon zest, lemon juice, sugar, mustard, and fine sea salt, until the sugar and salt are dissolved. Add the oil , whisking constantly until the dressing is well blended. Season with fine sea salt and freshly ground black pepper. The vinaigrette can be prepared ahead and refrigerated, in an airtight container, up to 3 days.

Chickpea or Kabuli Chana Chaat:

  • 1 cup chickpeas, soaked overnight, boiled and drained
  • 1 small onion, chopped fine
  • 1 cherry tomato, chopped fine
  • 1 tsp Jiralu powder or chaat masala (available at Indian stores)
  • Salt to taste
  • Juice of half a lemon
  • a small bunch of cilantro, chopped.

Take the chickpeas in a bowl and mix the first 5 ingredients. Add the lemon juice and garnish with chopped cilantro.

Creepy Cupcakes for Halloween

As you can see, I’m getting into a cupcake frenzy. My latest challenge was to bake some cupcakes for a Halloween party at school. I’d seen this picture of a Creepy Medusa Cupcake in a magazine and Nikhil promised to help me make them. Of course he helped me pile the sour gummies on the cupcake and in his mouth:)

I needed a recipe for a perfect vanilla cupcake to begin with. Looking around, I found Glorious Treats and realized she was not only good at cupcake making but at search marketing too:) Only someone with that knowledge would title her recipe “Perfect Vanilla Cupcakes” to be found by amateurs like me:). She had tried every version of vanilla cupcakes there were and her story sounded so familiar to my cupcake wars that I had to try this recipe.

And I have to hand it to her. These cupcakes were the perfect-est, moist-est, soft-est I have ever made. Great recipe for a base vanilla cupcake to be used with any frosting.

Savory Sweet Life had this recipe for chocolate butercream frosting that I used for this recipe. I used store bought sour gummies, cut them into thin strips and piled them on top of the frosted cupcakes. I then added a googly eye which was the only non-edible piece of this cupcake. If I’d had a little more time, I would have used black and white edible frosting or edible gum to make shapes for the eyes.

The cupcakes looked creepy enough on the Halloween snack table for the 5th graders to get to try them. It felt so satisfying see them devour the gummies before they wiped off the cupcakes. The best compliment I received was from a cheery 5th grader who told me these were “the best he’d had” and that I should write a book on cupcakes:)

Thank you Cooper for your confidence after just one cupcake. About that book – I’ll get right on it, and you will be my taster. Deal?:)

Ingredients (for 15 cupcakes) – I made 30 of them so just doubled the measures

1 1/4 cups cake flour

1 1/4 teaspoons baking powder

1/2 teaspoon baking soda

1/2 teaspoon salt

2 eggs

3/4 cup sugar

1 1/2 teaspoons pure vanilla extract

1/2 cup oil (vegetable, canola or extra light olive oil)

1/2 cup buttermilk (or 1/2 cup milk plus 1/2 teaspoon white vinegar or lemon juice- add acid to the milk then set aside for 5 minutes before using)

Method:

1. Preheat oven to 350*F.

2. In a medium bowl, add cake flour, baking powder, baking soda and salt.  Stir together with whisk, and set aside.

3. In the bowl of an electric mixer, add eggs and beat 10-20 seconds.  Add sugar and continue to beat on medium speed about 30 seconds.  Add vanilla and oil, beat.

4. Reduce mixer speed to low and slowly add about half of the flour mixture.  Add half of the milk, then the rest of the flour and the rest of the milk.  Beat until just combined.  Scrap down the side of the bowl.

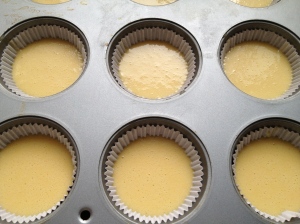
5. The batter will be thin.   Pour batter into a muffin pan prepared with paper liners.  Fill liners about 2/3 full.

6. Bake cupcakes in pre-heated oven for 15 minutes.

7. Cool in pan 1-2 minutes, then remove cupcakes from pan (carefully) and finish cooling on a wire rack.

8. Frost as desired when fully cool.

Recipe for chocolate buttercream frosting : (adapted from Savory Sweet LIfe’s blog)

Ingredients

  • 1 cup unsalted butter (2 sticks or 1/2 pound), softened (but not melted!)
  • 3 1/2 cups confectioners (powdered) sugar
  • 1/2 cup cocoa powder
  • 1/2 teaspoon table salt
  • 2 teaspoons vanilla extract or 1 teaspoon almond extract
  • 4 tablespoons milk or heavy cream
Method:
  1. Cream butter for a few minutes in a mixer with the paddle attachment on medium speed. Turn off the mixer.
  2. Sift 3 cups powdered sugar and cocoa into the mixing bowl. Turn your mixer on the lowest speed (so the dry ingredients do not blow everywhere) until the sugar and cocoa are absorbed by the butter.
  3. Increase mixer speed to medium and add vanilla extract, salt, and milk/cream and beat for 3 minutes.
  4. If your frosting needs a more stiff consistency, add a little more sugar. If your frosting needs to be thinned out, add additional milk 1 tablespoon at a time.

Red Velvet Cupcakes – A special October Birthday.

20121008-180724.jpg

October is a special month. We have quite a few friends and family who are October babies but it is a special month for a very special reason. Eleven years ago, at 11.25pm to be exact, we welcomed our wide eyed, curious, kicking and (not screaming but) sprightly bundle of joy into this world. And eleven years later, he is still our wide eyed, curious, and yes, still kicking (in his sleep:) and very sprightly tween-ager. And of course he is and will always be the brightest moment in our life – our bundle of joy. Happy Birthday Nikhil!!

I made these red velvet cupcakes last night at Nikhil’s request. The original request was a bundt cake which is his all time favorite cake but was modified to cupcakes for ease with doling them out as treats for school. Will have to try these again for the bundt cake. This recipe is adapted from Simply Recipe’s blog. I followed the recipe for the most part except for using buttermilk and used the adapted suggestion for making buttermilk.

Ingredients:

  • 1 1/2 cups of sugar
  • 1/2 cup (1 stick) of butter, room temperature
  • 2 eggs, room temperature
  • 2 1/3 cups of cake flour
  • 2 tablespoons of Dutch-processed cocoa powder
  • 1 teaspoon of baking soda
  • 1 teaspoon of baking powder
  • 1/2 teaspoon of salt
  • 1 cup of milk mixed with 1 tbsp of white vinegar (let it stand for 10 minutes)
  • 1 1/2 tablespoons of red food coloring (I would use upto 2 tbsp, the batter should be quite a brightish red)
  • 1 teaspoon of vanilla extract
  • 1 teaspoon of distilled white vinegar

For the Cream Cheese icing:

  • 1/2 cup of butter (1 stick), room temperature
  • 1/2 packet of Philly cream cheese softened
  • 2 – 3 cups of powdered sugar
  • 1 teaspoon of vanilla extract

Method for the Cupcakes:

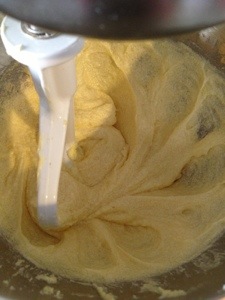
1. Preheat the oven to 350°F or 170C. Beat the butter and sugar in an electric mixer for 3 minutes on medium speed until light and fluffy.

20121008-180633.jpg

2 . Add the eggs, one at a time, beating until fully mixed. Use a spatula to scrape down the sides of the bowl to ensure even mixing.

3. In a large bowl, sift together the cake flour, cocoa powder, baking soda, baking powder, and salt.

4. In another bowl whisk together the milk/vinegar mixture, vinegar, vanilla extract, and red food coloring.

5. Add the dry ingredients to the butter/sugar/egg mixture in the mixer. Use the mixer to stir the ingredients. Now add the red colored wet mixture. Continue adding in a dry, wet, dry pattern, ending with the dry ingredients. You should get a brightish red colored batter as a result.

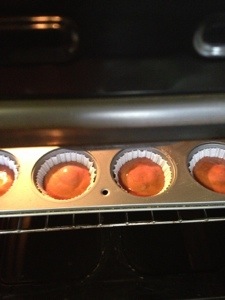
6. Scoop into cupcake papers, about 1/2 to 2/3 of the way full. Bake for 18-22 minutes or until a toothpick comes out clean. Rotate the pan after the first 15 minutes of baking to ensure even baking.

20121008-180657.jpg

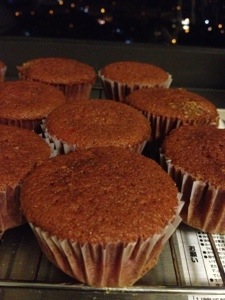
6 Allow to cool for one minute in the pan then transfer to a wire rack to cool completely. (see how the color looks more like chocolate cupcakes rather than red velvet. While some of it is the lighting, they could use more food color.)

20121008-180716.jpg

Method for the Cream Cheese Icing

1 Cream the butter and cream cheese together, about 3 minutes. Use a spatula to scrape down the sides and bottom of the bowl to ensure even mixing.

2 Add the vanilla extract and mix.

3 Add the powdered sugar, continually taste to get to desired sweetness. Pipe onto cooled cupcakes.

Verdict : The foodie/critic that Nikhil is – he had one look at the cupcakes coming out of the oven and told me exactly what may be missing:) The red food color could have been a little more. (reason for my updated notes in the ingredients. Use 2 tbsp instead of 1 1/2). The cupcakes came out very moist and flavorful though, one of the better cupcakes I have made in a while and the taste was perfect. Overall a keeper recipe.

A very Happy Birthday to all other October babies in the family – these cupcakes are for each one of you:)

I would like to know if there is an alternative to using  food color in this recipe. Part of my hesitation to add more color was the aversion to using a dye, especially given this recipe already has enough butter and cream cheese and is not exactly what you would call a healthy recipe:). Any suggestions for a low fat no dye red velvet recipe out there?


Masala Egg “Half” Fry


This is a recipe handed down to me by my dear friends – the Patels – yes, the same amazing cooks that brought us the gujarati khichdi and kadhi recipe. Not sure why we call it “half” fry but I suppose you can choose to completely cook the egg or leave it half cooked. It’s somewhat of a hybrid between fried egg and omelette. Either ways, this is a weekend staple breakfast dish and Nikhil’s and Girish’s favorite.

Ingredients – (for one egg)

Egg -1

Finely chopped onions – 1 tbsp

Finely chopped green chilies – 1/4 tsp

Finely chopped cilantro – 1/4 tsp

Garam masala powder – a pinch

Red chili powder – a pinch (optional)

Salt to taste

Method:

1. Heat 1/2 tsp of olive oil in a fry pan. I use the small egg fry pan but you can use any sized fry pan, preferably the non stick kind.

2. When the oil is hot, break the egg and spread the yolk slightly so it breaks.

3. Sprinkle the chopped onion, green chili, cilantro mixture.


4. Add red chili powder, gram masala and salt to taste.

5. Once the egg mixture starts to lightly brown on the sides, use a small, flat spatula and flip it over so the yolk, white and the onion chili mixture are now facing the bottom of the pan. This step is important to cook the yolk well.

6. Press the flipped egg lightly so the yolk gets completely cooked.

7. Serve hot with whole wheat toast.

Linking this post to Farmer Girl’s Kitchen food event – and the Breakfast Club. 

Banana Bread French Toast

I know…surprise, surprise! Two posts in two days? Rather, three if you count the fact that I finally clicked “publish” to the Kothu Parotta post from almost two months ago;) Yes, I have slacked, but I’ve also set the bar so low that anything looks good now:) 

This Banana Bread French Toast is inspired from this breakfast place we went to a a few months ago. “Bread Winner’s Cafe” is a popular restaurant in the DFW area and , in my opinion has the best pancakes and french toasts . Easy recipe, and not sure why I didn’t think of it before, but that’s why I don’t call myself a cook…my recipes are all inspired. Its made with my favorite ingredient…bananas so I couldnt resist sharing it here.

Ingredients:

4 slices banana bread (recipe link here)

2 eggs beaten lightly

1 tbsp maple syrup

Banana slices and pecans/walnuts for garnish

Method:

Beat the eggs in a bowl. Soak a slice of banana bread for about a minute on each side till completely coated.

In the meantime, melt some butter in a skillet (or use oil/butter spray). Add the egg-coated slice of banana bread and cook each side till done and browned.

Serve the french toast with banana slices, pecans or walnuts, whipped cream and of course, a drizzle of maple syrup.

As you can see here, I went a little overboard on the syrup and cream, making this look like a scrumptious ice cream instead, but you get the idea!

Lunchbox Series – Kothu Parotta (Scrambled Spicy Tortilla/Parotta)

A very Happy New Year to all. I know this is a belated wish as with most of my recent posts. I’m not going to start this year with another resolution like last January….resolutions are jinxed, at least mine seem to be:).
Amidst the pick ups and drop offs from school, work and back, its been chaotic. But there is always time for food, lunch box food and otherwise. I try hard to not compromise on that. Its just writing it all down that I find it hard to keep up with. Trust me, I’m trying to get better at it, so hopefully 2011 will be a better year for RKK.

I had not personally tasted Kothu Parotta as it is dished out in the streets of South India, Chennai and south of it. Girish told me about it as he remembers eating it while in college in Chidambaram at the Railway Station. So when our local Indian restaurant (the same one that had Pondicherry Masala Dosa on their menu) had this on their menu, we had to venture out to try it. That was my first taste of Kothu Parotta, probably not close to the authentic street food version, but enough to tantalise my taste buds and try it for myself. A search online led me to Kanchana’s blog “Married to a Desi“, where she tastefully recounts her connection to India after being Married to a Desi, that is. I used regular wheat chapathis here but as she specifies, layered parottas or flaky flat bread will add to the aunthentic taste. I followed her recipe for the most part, and Nikhil loved it for lunch. I added some cucumber
raita as an accompaniment and to cool it down a bit (we like our food spicy if you haven’t figured it out with the extra green chilies in the recipe:)
Ingredients:

  • 2-4 leftover or store bought parottas torn into pieces (if using store bought, use the Malaysian parathas or any parathas with layers)
  • 1 large tomato chopped or 2 small tomatoes
  • 1 red onion chopped
  • 1 tsp turmeric
  • 1 tsp chili powder
  • 2 tsp pav bhaji masala
  • 3 Thai green chili minced
  • 1″ piece ginger minced
  • 1/2 cup chopped cilantro
  • 1 egg beaten (optional)

Method:

Saute the green chilies, ginger, and then onions in oil. Add the turmeric, and chili powder.

Add the tomatoes and cook them until they get mushy. You may also add the salt to make it a little pasty. Add the beaten egg now and mix well till it resembles a scrambled mixture (this step is completely optional as the parotta tastes great even without eggs) Add the pav bhaji masala, and then the parotta and mix. Garnish with cilantro. Serve with a squeeze of lime, and cucumber or onion raitha.

Lunchbox Series – Indian Style Egg Salad

Nupur from One Hot Stove was my inspiration to try this out for Lunchbox Series this morning. Nikhil is not a huge fan of Egg Salad Sandwich so thought I would give this a try. He has acquired some “desi” tastebuds from both Girish and I so I’m keeping my fingers crossed that this lunchbox will come back empty and eaten, of course:) I thought it was a brilliant idea by Nupur to Indian-ise this lunchbox staple with the paprika, cilantro and “kitchen king” masala.

Ingredients:

5 hard-boiled eggs (I use a color-changing egg-timer for perfectly boiled eggs, that I bought at Bed Bath and Beyond, but you can find this in many home/kitchen specialty stores)

1 small chopped yellow onion

1 small tomato, chopped

1/2 tsp crushed green chilies (I use thai chilies but you can also use jalapenos)

1/4 tsp crushed garlic

1/4 tsp crushed ginger

1/4 cup chopped cilantro

1/4 tsp red chili powder

1/4 tsp kitchen king masala (available in Indian grocery stores)

1 tsp turmeric

1 tsp mayo

1 tsp spicy brown mustard

1- 1 1/2 tsp oil

Salt to taste

Method:

1. Peel the eggs and chop into small chunks.

2. Heat the oil in a pan and add the chopped onions.

3. When onions become transluscent, add the crushed ginger, garlic and green chilies.

4. Add turmeric, red chili powder, kitchen king masala and salt to taste.

5. Saute for a few minutes and then add the chopped tomatoes. Cook till the mixture is a little dry.

6. Cool the mixture and add this to the chopped boiled eggs.

7. Add the mayo and mustard and mix well. Add chopped cilantro.

8. You may also add a dash of red chili powder for additional color.

9. This egg salad will taste great in pita bread or pita pockets. I used bread this morning but will suggest toasting the bread a little and adding a lettuce leaf to the bread slices to prevent them from getting soggy by lunchtime. I used red cabbage today but only because I didn’t have all the ingredients.

Daring Baker’s Challenge – Orange Tian

To be very honest, I had not heard of a “Tian” until now. That’s the beauty of the challenges that are dished out of the Daring Kitchen, I suppose. This is my second month on the challenge, but the first one that I’m actually posting.The first challenge was Tiramisu, that somehow eluded me, or I avoided it, however you want to put it:) These challenges are quite complicated (duh!) , and though I’m glad I finished it this month, I’m not sure I would necessarily make it again, at least not the same complicated steps.

The tian was quite delicious, don’t get me wrong, but I think the same orange cream pie/creamsicle taste could have been achieved via a recipe that took half the time. At least, that was my immediate reaction after I tasted it.

The 2010 March Daring Baker’s challenge was hosted by Jennifer of Chocolate Shavings. She chose Orange Tian as the challenge for this month, a dessert based on a recipe from Alain Ducasse’s Cooking School in Paris. These were the variations/conditions of the challenge-
Variations allowed:
* You can choose to serve the dessert ‘family-style’ and don’t have to make it in individual portions. (This is how I made it)
* You can use your favorite “Pate Sablee” recipe if you have one, but it must be a pate sablee
* You can add any additional flavoring to your whipped cream
* You can play with different citrus in this dessert (grapefruit, blood orange, lemon) at any step in the recipe.
* However, you must make the tart dough, the whipped cream, the caramel sauce, citrus segments and marmalade.

I ended up making everything on the same day which didn’t help. By the time I was done and put the Tian in the freezer, it was close to midnight . I will suggest that you make the marmalade, caramel sauce and the pate sablee a day ahead and the whipped cream the next day, so you can assemble the dessert and leave it in the freezer overnight. Then put it out to thaw in the refrigerator the next day and possibly out at room temperature about 2 hours prior to serving.Mine was probably in the fridge too long as the base was still a little frozen when I served it to my guests. When I ate it the next day, it felt perfect but I’d already made an impression (not the right kind) on my 30 guests who tried to eat it with a fork at first and eventually had to pick it up with their fingers to eat it like a scone with whipped cream on top!

Well, on  a positive note, I learnt how to make marmalade that turned out perfect and I survived my first Daring Baker’s Challenge . April DBC, here I come!

For the Pate Sablee:

Ingredients U.S. Imperial Metric Instructions for Ingredients
2 medium-sized egg yolks at room temperature
6 tablespoons + 1 teaspoon granulated sugar 2.8 oz; 80 grams
½ teaspoon vanilla extract
¼ cup + 3 tablespoons Unsalted butter 3.5 oz; 100 grams ice cold, cubed
1/3 teaspoon Salt 2 grams
1.5 cup + 2 tablespoons All-purpose flour 7 oz; 200 grams
1 teaspoon baking powder 4 grams

Directions:
Put the flour, baking powder, ice cold cubed butter and salt in a food processor fitted with a steel blade.

In a separate bowl, add the eggs yolks, vanilla extract and sugar and beat with a whisk until the mixture is pale. Pour the egg mixture in the food processor.

Process until the dough just comes together. If you find that the dough is still a little too crumbly to come together, add a couple drops of water and process again to form a homogeneous ball of dough. Form into a disc, cover with plastic wrap and leave to rest in the fridge for 30 minutes.
Preheat your oven to 350 degree Fahrenheit.

Roll out the dough onto a lightly floured surface until you obtain a ¼ inch thick circle.

Place a parchment (or silicone) lined baking sheet inside a round cake tin or a springform pan. Place the dough on the paper and bake for 20 minutes or until the edges start to get golden.

For the Marmalade:

Ingredients
Freshly pressed orange juice ¼ cup + 3 tablespoons; 3.5 oz; 100 grams
1 large orange used to make orange slices
cold water to cook the orange slices
pectin 5 grams
granulated sugar: use the same weight as the weight of orange slices once they are cooked

Finely slice the orange. Place the orange slices in a medium-sized pot filled with cold water. Simmer for about 10 minutes, discard the water, re-fill with cold water and blanch the oranges for another 10 minutes.

Blanch the orange slices 3 times. This process removes the bitterness from the orange peel, so it is essential to use a new batch of cold water every time when you blanch the slices.

Once blanched 3 times, drain the slices and let them cool.

Once they are cool enough to handle, finely mince them (using a knife or a food processor).

Weigh the slices and use the same amount of granulated sugar . If you don’t have a scale, you can place the slices in a cup measure and use the same amount of sugar.

In a pot over medium heat, add the minced orange slices, the sugar you just weighed, the orange juice and the pectin. Cook until the mixture reaches a jam consistency (10-15 minutes).

Transfer to a bowl, cover with plastic wrap and put in the fridge.

For the Orange Segments:

For this step you will need 8 oranges.

Cut the oranges into segments over a shallow bowl and make sure to keep the juice. Add the segments to the bowl with the juice.

[See YouTube video in the References section below for additional information on segmenting oranges.]

For the Caramel:

Ingredients :
granulated sugar 1 cup; 7 oz; 200 grams
orange juice 1.5 cups + 2 tablespoons; 14 oz; 400 grams

Place the sugar in a pan on medium heat and begin heating it.

Once the sugar starts to bubble and foam, slowly add the orange juice. As soon as the mixture starts boiling, remove from the heat and pour half of the mixture over the orange segments.

Reserve the other half of the caramel mixture in a small bowl — you will use this later to spoon over the finished dessert. When the dessert is assembled and setting in the freezer, heat the kept caramel sauce in a small saucepan over low heat until it thickens and just coats the back of a spoon (about 10 minutes). You can then spoon it over the orange tians.

[Tip: Be very careful when making the caramel — if you have never made caramel before, I would suggest making this step while you don’t have to worry about anything else. Bubbling sugar is extremely, extremely hot, so make sure you have a bowl of ice cold water in the kitchen in case anyone gets burnt!]

For the Whipped Cream:

Ingredients :
heavy whipping cream 1 cup; 7 oz; 200 grams
3 tablespoons of hot water
1 tsp vegetarian Gelatine (I bought this at Whole Foods and it’s called vegetarian jello. You may also use agar agar)
1 tablespoon of confectioner’s sugar
orange marmalade (see recipe above) 1 tablespoon

In a small bowl, add the gelatine and hot water, stirring well until the gelatine dissolves. Let the gelatine cool to room temperature while you make the whipped cream. Combine the cream in a chilled mixing bowl. Whip the cream using a hand mixer on low speed until the cream starts to thicken for about one minute. Add the confectioner sugar. Increase the speed to medium-high. Whip the cream until the beaters leave visible (but not lasting) trails in the cream, then add the cooled gelatine slowly while beating continuously. Continue whipping until the cream is light and fluffy and forms soft peaks. Transfer the whipped cream to a bowl and fold in the orange marmalade.
[Tip: Use an ice cold bowl to make the whipped cream in. You can do this by putting your mixing bowl, cream and beater in the fridge for 20 minutes prior to whipping the cream.]

Assembling the Dessert:

Make sure you have some room in your freezer. Ideally, you should be able to fit a small baking sheet or tray of desserts to set in the freezer.

Line a small tray or baking sheet with parchment paper or a silicone sheet. Lay out a springform pan onto the parchment paper/silicone.

Drain the orange segments on a kitchen towel.

Have the marmalade, whipped cream and baked circle of dough ready to use.

Arrange the orange segments at the bottom of the springform pan. Make sure the segments all touch either and that there are no gaps. Make sure they fit snugly and look pretty as they will end up being the top of the dessert. Arrange them as you would sliced apples when making an apple tart.

Once you have neatly arranged one layer of orange segments at the bottom of the pan, add a couple spoonfuls of whipped cream and gently spread it so that it fills the cpan in an even layer. Leave about 1/4 inch at the top so there is room for dough circle.

Using a butter knife or small spoon, spread a small even layer of orange marmalade on the circle of dough.

Carefully place the circle of dough over each ring (the side of dough covered in marmalade should be the side touching the whipping cream). Gently press on the circle of dough to make sure the dessert is compact.

Place the dessert to set in the freezer to set for 10 minutes to overnight.

Using a small knife, gently go around the edges of the cookie cutter to make sure the dessert will be easy to unmold. Gently place your serving plate on top of a dessert (on top of the circle of dough) and turn the plate over. Gently remove the cookie cutter, add a spoonful of caramel sauce and serve immediately.

Resources:

http://www.wisegeek.com/what-is-a-tian.htm(An article about the dessert known as tian.)

YouTube link on how to segment an orange: http://www.youtube.com/watch?v=ZG5mcEEBlcI

To learn more about Pectin: http://en.wikipedia.org/wiki/Pectin

What to substitute for Pectin: http://www.gourmetsleuth.com/Dictionary/P/Pectin-6222.aspx
Vanilla Cupcake

I haven’t been baking much this year aside from the ones already posted here, the banana bread and the pistachio cookies, all the same tried recipes. I did get the idea once to bake a batch of different cookies and give them as homemade gifts this year, to add that personal touch. But like everything else, the time got away from me and I resorted to gift cards, once again, the tried and true method:) I know, sounds a little boring, but aside from looking up some delectable recipes on the web, I couldn’t get myself to actually shake things up a little this season. Until I went grocery shopping with my nephew and he told me he was craving cupcakes and wanted to buy some, from Walmart! Of all the places, I thought. I mean, Walmart is fine for basic groceries, but I don’t consider it to be a place to buy gourmet food.

Is vanilla cupcake considered “gourmet food”, probably not, but I had my biases with Walmart anyway. Of course, my actual response was, “I’ll make a better cupcake for you!!” There, I had said it. Now I had opened myself up to a challenge that I make better cupcakes than Walmart. Should have said “better than “Sprinkles” – the best cupcake-ry in town, but I had to start small:)

So we got home and I started on the challenge of making the cupcakes from scratch, the cake, frosting and all….I was not going to use a mix or frosting out of a box or can. That’s probably not a big deal for most, but it felt good, saying that at least;)

In case you’re curious, I got the recipe from here.

Vanilla Cupcakes

1/2 cup unsalted butter, room temperature

2/3 cup granulated white sugar

3 large eggs

1 teaspoon pure vanilla extract

Zest of 1 large lemon (optional)

1 1/2 cups all purpose flour

1 1/2 teaspoons baking powder

1/4 teaspoon salt

1/4 cup milk

Buttercream Frosting:

2 cups confectioners sugar (icing or powdered sugar), sifted

1/2 cup unsalted butter, room temperature

1 teaspoon pure vanilla extract

2tablespoons milk or light cream

Method:

Vanilla Cupcakes:

1. Preheat oven to 350F and line 12 muffin cups with paper liners.

2. In a food processor or a stand mixer with the whisk attachment, cream the butter and sugar until light and fluffy. Add the eggs, one at a time, beating well after each addition. The mixture will look a little curdled. Beat in the vanilla extract and lemon zest.

3. In a separate bowl whisk together the flour, baking powder, and salt.

4. If using the stand mixer, chage the whisk attachment to the paddle attachment. If using a food processor, continue as is. With the mixer on low speed, alternately add the flour mixture and milk. Scrape down the sides of the bowl.

5. Fill the muffin cups with the batter and bake for about 18-20 minutes or until nicely browned and a toothpick inserted into a cupcake comes out clean. Remove from oven and place on a wire rack to cool. Once the cupcakes have completely cooled, frost with icing. You may scrape the top off a little to flatten the top of the muffin so the frosting goes on smoothly.

For the Frosting:

In an electric mixer, or standmixer, cream the butter until smooth and fluffy. Add the vanilla extract. With the mixer on low speed, gradually beat in the sugar. Add the milk and beat on high speed until frosting is light and fluffy (about 3-4 minutes). Add a little more milk or sugar, if needed.

Verdict: According to my nephew, he may not buy a Walmart cupcake again:) It turned out moist and just right, like the recipe said it would.

Happy Holidays everyone!!

“Nana’s” Banana Bread

Got this nice note from Sheela, my dear friend from Hyderabad who also happens to be a regular RKK reader (she doesn’t have a choice sometimes when I also call her to tell her about it ;), RKK’s proof reader, critic and an eloquent freelance journalist in the very happening metroplex in India, Hyderabad. Here it is…

Read this in the Reader’s Digest.Thought I might share it with you.

Mariel Hemingway:

” I learned that less can be more, that pulling back is good, that slowly is okay. These beliefs are all contrary to our way of life where life is so full, busy and fast. We think that if we’re not doing something, we’re not valuable. Not true! I learned that making time for myself was vital to good health.
My other solace is Nature.
I’ve retained an appreciation for good food, but I’ve learned to serve meals from a place of love. We should cook good food because we care about the people we’re doing it for. It’s not about playing the gourmand.”

She suggested that she wanted to send this for the RKK anniversary but this was probably the best time for it.

Couldn’t have been more apt. For the last month, I’ve been nagged by guilt – the guilt of procrastination. I realize I haven’t been as prompt as I should in writing, as recipes and pictures keep piling up, waiting to get some life of their own. As much as I love poring through other blogs, this guilt has led me to almost be a little fearful to look at the other gourmet creations, fearful that the guilt will haunt me even more.

The words mentioned above make me take a deep breath and realize that this hobby of mine is more than recreating Amma’s recipes or visiting Anusuya’s kitchen or even packing Nikhil’s lunches…it’s about the satisfaction of dishing it out, on the table and in words, with love. It has to come from the heart and sometimes that only happens once or probably two or three times a month. It’s okay to stop and smell the roses, or the food once in a while.

Enough pontificating. This recipe is one that I’ve tried for many months with many variations and I finally think that it deserves to be shared here. I added the quotes to Nana since this recipe is adapted for one. The other reason is that Nana obviously means Grandma and I don’t call my grandmother “Nana”. She is “Paatti” to me. So maybe this should be renamed “Patti’s Banana Bread”. But my Paatti never really made banana bread. And so it will remain in quotes as an adapted recipe.

I’ve used eggs in this recipe after many attempts at making eggless kinds. Though I have to say one recipe from “Understocked Veggie Kitchen” penned by another good friend of mine is probably one of the best eggless variations I’ve tried.

This particular recipe calls for eggs and substituting it with Egg replacer or flax seeds or other variations doesn’t really give you the same results. If you do stick to the measurements and the ingredients, you get a really moist, flavorful bread.

Ingredients:

5 tbsps butter

1/2 cup organic natural sugar

1/2 cup firmly packed light brown sugar

1 large egg

2 egg whites

1 tsp vanilla extract

1 1/2 cups mashed, very ripe bananas

1 3/4 cups all-purpose flour (here I used half measure white flour and half measure whole wheat flour)

1 tsp baking soda

1/2 tsp salt

1/4 tsp baking powder

1/2 cup heavy cream (optional, you can also use milk)

1/3 cup chopped walnuts

Method:

1. Preheat oven to 350F. Spray the bottom of a loaf pan with nonstick cooking sprat.

2. Beat butter in a large bowl with an electric mixer set at medium speed until light and fluffy.

3. Add sugar, brown sugar and beat well. Add egg, egg whites and vanilla; beat until well blended.

4. Add mashed banana, and beat on high speed for 30 seconds.

5. Combine flour, baking soda, salt and baking powder in a medium bowl. Add flour mixture to the butter mixture alternately with cream, ending with the flour mixture. Add walnuts to the batter and mix well.

banana-bread-dough

6. Pour the batter evenly into the loaf pan. Bake until browned and toothpick inserted in center comes out clean. This will take approximately 1 hour 15 minutes.

banana-bread-1

7. Cool the bread in the pan on a wire rack for about 10 minutes. Remove bread from the pan and cool completely. You can also wrap it in plastic wrap after it cools and leave it out overnight. It always tastes better the next day!

banana-bread3

Post Navigation