Roz Ka Khana

A blog about everyday food. Mostly Indian. All vegetarian.

Archive for the category “Breakfast Dishes”

Anusuya’s Kitchen – Kuzhi Paniyaram

20140119-115744.jpg

This one comes from Anusuya’s kitchen…remotely that is. I have missed visiting and posting from her kitchen for the last two years since our move, but this winter visit to Dallas was a good reminder to bring this series back, and savor this amazing cook’s simple and yum recipes. This recipe was one I wrote down in 2010, when she was in the mood to share some quick and easy snack favorites. I’m not even sure if she remembers having shared this gem but this recipe came very handy this week as I was out of lunchbox ideas for Nikhil. Mix some left over idli batter, chilies, cilantro and sambar/vethalkuzhambu powder powder and you have a new savory “appam” dish that is quite healthy too. You may add grated carrot or beans or any vegetable of your choice though I left that out in this recipe. I did add some chopped onions but that is optional too. You don’t need to use oil at all if you use a non stick “appa-karal” or the ebelskiver pan. I barely used one to one a half tsp oil for making about 15-20 paniyarams.

They make a great breakfast or snack recipe and if your child or you like it enough even if cold can be a good lunchbox staple too. I have to thank my good friend Maha for suggesting this as a lunchbox recipe.

Enjoy with any chutney of your choice – coconut or peanut or tomato or anything spicy:)

Ingredients:

  • Left over idli batter – 2 cups
  • 1 tsp sambar powder
  • 1 tsp vethal kuzhambu powder (you may use 2 tsp sambar powder if you don’t have this one. You can find this occasionally in Indian stores abroad but I usually get mine from Grand Sweets in Chennai)
  • Ground ginger and chili paste (1 inch ginger plus 2-3 chilies or more if you like it very spicy)
  • Chopped cilanto 2 tbsp
  • Chopped curry leaves 1 tbsp
  • 1/4 tsp asafetida
  • Salt to taste
  • Olive oil or rice bran oil – 2 tsp
  • Optional – chopped onions and grated veggies like carrots or beans (1/4 cup each)

Method:

Take the idli batter in a mixing bowl and add all the other ingredients. Mix well.

Heat the appa karal or ebelskiver pan with about 1- 1 1/2 tsp of the oil. Just pour 1 tsp oil across all the cups in the pan so each cup gets a little to grease it a bit.

When the oil is hot, add one tbsp each of the batter. Cook till the batter is about golden brown and using a spoon or skewer or a chopstick turn the appam/paniyaram over to cook on the other side.

20140121-104220.jpg

When golden and puffy on both sides, the paniyarams are ready to eat.


The 30 Day Green Smoothie Challenge begins October 1!

20130930-091521.jpg

I mentioned earlier that green smoothies have been quite life changing for me. I’ve noticed some remarkable changes in my health even since I started to juice and blend every day. The Vitamix blender and the Hurom juicer are a countertop staple in my kitchen despite limited counter space. I have realized that having them at eye level keeps it top of mind – I now use them both every single day, sometimes more than once a day.

I’ve had several sources of inspiration as I mentioned earlier – the movie and site of Joe Cross’s reboot, Pushita’s The Rawsome Life, Kimberly Snyder’s Beauty Detox and more recently Simple Green Smoothies. The last one has been a go-to for all things smoothies, especially the green kind. I tried their first 30 day challenge a few months ago and am now hooked. I start my morning with a daily glass of warm water with lemon, and then it’s usually a green smoothie for breakfast. I may or may not have additional toast or oatmeal – it depends on how full I feel after the smoothie and they are usually quite filling. Of course I’m hungry in about two hours for a mid morning snack so while I’m eating more frequently it’s actually helped with my energy levels.

This ritual has helped in more ways than one:

  • My energy levels have increased significantly – I don’t feel the need for caffeine any more in the morning – I have cut out morning tea or coffee except for an occasional afternoon cup of green tea or herbal tea
  • My skin has noticeably improved – what used to be very acne prone is now relatively smooth and on weeks I eat right it actually does have a sheen, not due to oil but a brightness to it:)
  • My eyesight has improved –  this took me a few validations from 2 different eye exams – but in my opinion the juicing of carrots has actually helped. My prescription has dropped a full 0.5 points.
  • Has helped with more than  my daily intake of fruits and veggies.
  • Has helped with toning and losing a few pounds – small but noticeable.
  • Has helped with immune support – my sinus issues have cleared up.

And so when Simple Green Smoothies announced they would start their next 30 day challenge – I was of course all set. Only this time I wanted to share my progress so hopefully we can do this together:)

If you are interested in joining and supporting me on this challenge please follow me on my Tumbl-og, FB and on Instagram to get daily updates, weekly shopping lists and recipes. Of course go ahead and sign up with Simple Green Smoothies too, the creators of this challenge.

Feel free to share your experiences and any green smoothie recipes that have worked for you as well.

Getting Started with the Challenge: (adapted from Simple Green Smoothies)

The goal is to help you drink at least one green smoothie a day for the next 30 days…and you can keep it flexible as long as you can make it happen.
 #1: Drink at least one green smoothie per day (1 green smoothie = 16 ounces). The recipes make 2 servings— so you can share with a friend,  save the other half for a snack or half the recipe.
#2: Keep eating regular meals. If you’re trying to shed some pounds, you can substitute a green smoothie for a meal. In general maintain a healthy diet – no heavy fats, fried stuff, avoid sugary stuff, hydrogenated fats etc. if you want to see a difference in your weight and in your overall health.
#3: Read the weekly shopping list and daily recipes on either of those sources mentioned above.
#4: Be adventurous! Buy those mustard or collard greens at the farmer’s market! Throw in some coconut oil! Sprinkle the top with chia seeds! You can be flexible with your smoothies.
#5: Buy fresh veggies and organic as much as you can. Be sure to wash the greens and fruits well especially if they are non organic to wash off the pesticides.
#6: The green smoothie general recipe is greens (1-2) + fruits (1-2) + herbs (1-2) + liquid base (coconut water or almond milk or water) + superfood (optional – chia, flax, spirulina etc)
#5: Blend your heart out! Any blender will do as long as you are consistent and use it a lot.

Happy smoothi-eing. You will notice that one green smoothie a day will transform your life as well, and hopefully help you drop a few pounds if you need to.

Here is the shopping list for the 1st week that I will share here and in all the other places of course. The things you will need other than the list are a good blender (I find the best ones to be Vitamix or the Blendtec if you are looking for suggestions but have found any blender to do the basic trick).

Note that this list makes about 4-5 cups or 2 servings of smoothies a day for 2 people so feel free to halve if you want to make less. Also note that you may use any greens (if you don’t have kale available for example use any local greens and any liquid base.

Shopping list for week 1:

FRUITS:
  • 6 bananas
  • 6 oranges
  • 1 pineapple, fresh or frozen
  • 2 apples
  • 4 pears
  • 1 avocado
  • 1 package mixed berries
  •    (strawberries, blueberries, raspberries)
  • 1 lemon
  • 1 small bag grapes 
VEGGIES: 
  • 1 small bag spinach, fresh (10-16 ounces)
  • 1 small bunch kale, fresh
  • 1 bunch basil, fresh

OTHER (LIQUID BASE):

  • Almond milk, unsweetened
  • Ginger root
  •  Coconut water
OPTIONAL (yet recommended!):
  • Chia, flax seeds
  • Elderberry extract
  • Probiotics
  • Spirulina powder

You may substitute the fruits as you like but try to keep it within the same family of stone fruits, melons, berries etc. For instance you can substitute oranges with grapefruit or clementines. Pears with green apples or maybe even guavas etc.

Also those are frozen berries in the picture – you may use fresh or frozen.

Stay open minded, flexible and watch that transformation happen!

Lunchbox Series – Weekly Menu/Calendar Round 2

Thanks for all the feedback on the weekly calendar. There were some good questions on time management especially for the breakfast and lunch recipes so  I thought I would share some tips that have worked for us. Most of the recipes are quick enough to assemble together in the morning though a bit of planning the night before helps a great deal.

For example, you can add all the ingredients for the smoothie and store in the blender container in the refrigerator. The next morning, just fix the container to the base, turn it on and blend, blend.

Assemble all the ingredients for the grilled sandwiches the night before. You can butter the slices (if you use butter or any spread), add the filling and cover with a grease proof sheet and store in the fridge. The next morning turn on the sandwich maker or grill, and just add in your buttered slices with filling and grill till brown.

Make all the ingredients for the burrito or burger the night before and assemble in the am. Be sure to use lettuce on the bread or wrap first before adding the filling. The lettuce keeps the bread from turning soggy and the burrito will stay fresher till the afternoon if you wrap in foil or parchment paper. You can also make the burgers ahead of time and freeze. Just thaw and add to the sandwich in the morning.

Make the pancakes in large batches and freeze as well. Pop into the microwave or toaster oven in the morning.

Basically you can make most of these recipes ahead of time if you have an idea of what to pack for the week. Hope this is helpful. Do keep your tips and suggestions coming on other ideas that have worked for you.

WEEKLY MENU FOR THE WEEK OF SEPTEMBER 23rd

DAY 1 – MONDAY

BREAKFAST – Cereal with chopped bananas or apples

GREEN SMOOTHIE – Spinach, mango, cilantro detox smoothie

JUICE – Beet, pomegranate, spinach, cucumber

LUNCHBOXSprouts and potato sandwich

SNACK – Grapes and a cereal bar

DAY 2 – TUESDAY

BREAKFAST – Muesli

SMOOTHIE – Spinach, avocado, banana, passion fruit

LUNCHBOX – Bollywood Burrito (recipe will follow) – an Indianised version of the Chipotle Burrito

SNACK – Apple slices with almond butter

DAY 3 – WEDNESDAY

BREAKFAST – Toast with smoothie

SMOOTHIE – Blueberry, banana, spinach, chia seeds

LUNCHBOXVegetarian Black Bean Burger 

SNACK – Orange segments and trail mix

DAY 4 – THURSDAY

BREAKFASTEggless Pancakes

GREEN SMOOTHIE/JUICE

LUNCHBOX – Green Chili and Cheese Sandwich

SNACK – Pomegranate seeds

DAY 5 – FRIDAY

BREAKFAST – Oatmeal with bananas and walnut

GREEN SMOOTHIE/JUICE

LUNCHBOXSprouts n Salsa in Chapathi rolls

SNACK – Celery sticks with almond butter and raisins


Lunchbox Series – Weekly Menu/Calendar

As I mentioned earlier, I find that a tad bit of planning maybe for 20 minutes or so every Sunday evening goes a long way to keep our weeknights and mornings stress and yell free. (Well, the energy conserved is now channeled to run around for things we forget when we get to the bus stop – it never ends:)

I did get a few requests to share our weekly menu calendar here so will attempt to begin sharing them this week. I still haven’t found the best wordpress plugin to make this look sophisticated, so bear with me as I share links by day in  a post like format for now. Hope you find this as useful as I do.  Do keep the comments coming here and on FB and Twitter of course.

Oh and while I don’t mean to bombard you with a daily log of our nutrition calendar I figured giving you a peek into the breakfast menu wouldn’t hurt. I did mention earlier that our morning breakfasts are now increasingly dotted by juices and smoothies , didn’t I? This has been quite a life changing step into a healthier lifestyle so this menu also gives you a sneak peek into some of the green smoothies and juices in my kitchen and breakfast suitable for kids and adults alike. Again I have provided links where the recipes are available here on RKK.

On a separate note, I plan to start a 30 day smoothie/green smoothie recipe list on my Tumblog here and on Facebook beginning Monday, September 30. So do keep a look out for some shopping lists every week and daily recipes and pictures. Let me know if this is helpful to you too. I meant every letter when I said that green smoothies and green juices have been quite life changing so more on that in a later post.

WEEKLY MENU FOR THE WEEK OF SEPTEMBER 16TH

DAY 1 – MONDAY

BREAKFASTSouth Indian Style Oatmeal (lovingly called Thachi Mammu Oatmeal in our home:)

GREEN SMOOTHIE – Kailan or kale, carrots, banana, orange, chia seeds and coconut water

JUICE – Green apple, cucumber, celery

LUNCHBOX – Peanut or almond butter, banana and maple syrup sandwich on a multi-grain or gluten free bread

Note : Do use raw organic peanut or almond butter. I prefer almond butter over the PB but it is an acquired taste for kids so experimentation and substitution is acceptable. I have found it is tough to wean kids (who grow up on sodium and hydrogenated fat laden Jif and Skippy PB) off to raw PB or AB or even Cashew or Hazelnut butters, but baby steps are totally worth it.  If you can make the peanut or almond butter at home in a high power blender (Vitamix or Blendtec) nothing like it. Also use pure 100% maple syrup, not the flavored kind.

SNACK – Sliced peaches

(We only have one snack break in middle school so this suffices for us, but in the past I would also send a vegetable for snack. Carrot sticks, celery sticks, Kind bars etc worked great.)

DAY 2 – TUESDAY

BREAKFAST Egg half fry and toast

SMOOTHIE – Spinach, mango, mint, celery and ginger

JUICE – Carrot, orange and celery

LUNCHBOXScrambled Spicy Tortilla/Paratha (Kothu Parotta)

SNACK – Carrot sticks with hummus or avocado dressing

DAY 3 – WEDNESDAY

BREAKFAST – Toast with cream cheese (plain or onion chives or any savory flavor) topped with avocado salad (sliced avocados, onion slices and tomatoes with a squeeze of lemon)

SMOOTHIE/JUICE (recipes will follow in a separate post)

LUNCHBOXBombay Sandwich and Green salad

SNACK – Apple slices with almond butter

DAY 4 – THURSDAY

BREAKFASTMuesli or Cereal with Bananas

GREEN SMOOTHIE/JUICE

LUNCHBOXSabudana Khichdi (Sago Stir Fry)

SNACK – Orange segments

DAY 5 – FRIDAY

BREAKFAST – Oatmeal with maple syrup and pecans

GREEN SMOOTHIE/JUICE

LUNCHBOX Scrambled tofu/paneer wrap or Sandwich

SNACK – Celery sticks with almond butter and raisins

Send in your comments to let me know if this worked for you. I can continue to post every Sunday night as my menu gets scheduled if you find this helpful.

We Knead to Bake Project – Bialys with Caramelized Onions and Paneer

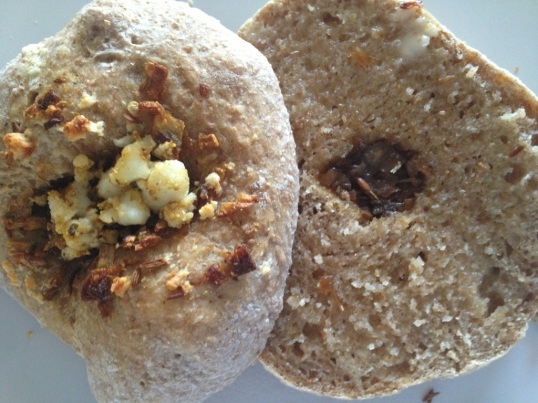
20130607-145951.jpgThis was a new one for me. I had not heard of Bialys before Aparna introduced it to me in this month’s We Knead to Bake Project.

Bialy, a Yiddish word short for bialystoker kuchen, from Białystok, a city in Poland, is a small roll that is a traditional dish in Polish Ashkenazi cuisine. In the early 1900s, many Eastern Eurpoeans, including the Polish, immigrated to the US and settled down in New York bringing their Bialy making skills with them. And that is how the New York Bialy became famous. There you go, that’s a mini history lesson on Bialys for you.

For those new to Bialys like me, they look and maybe taste close to a bagel, but there are some differences. For one, a Bialy doesn’t have a hole in the middle like a bagel but is depressed in the center with a filling (usually onions, garlic, poppy seeds etc). A Bagel is boiled and then baked while a Bialy is just baked. According to Aparna – a good Bialy should have a springy soft crumb but a chewy and floury crust.

I haven’t made bagels from scratch either so I wouldn’t know the actual differences in process but I was quite excited to try these out this past month. These were quite easy to make except for the rising time (still doesn’t beat the croissant process:) and of course, Aparna had Indianized it a bit by adding paneer and garam masala so I couldn’t wait to try this bread.

I added green chili (of course, for the spice), paneer, caramelized onions and stuffed paratha masala. It tasted like a paneer kulcha in a bagel form if you know what I mean. The paneer and stuffed paratha masala was a great combo and complimented each other quite well. Here’s the recipe (Adapted from King Arthur Flour) http://www.kingarthurflour.com/recipes/bialys-recipe

Ingredients:

For the dough:

1 teaspoon instant yeast

1 tbsp sugar

1 1/4 cup water

3 cups all-purpose flour (use bread flour if you can find it or all-purpose flour + 1 tbsp vital wheat gluten)- I used 3 cups of wholemeal bread flour

1 tsp salt

Milk for brushing the dough

For the Onion Filling:

1 tbsp oil

3 medium onions, finely chopped

1 1/2 tsp cumin seeds

3/4 tsp stuffed paratha masala

3 green chili crushed or minced

Salt to taste

100gm paneer, crumbled (optional)

Method:

1. Put the yeast, sugar, salt and flour in a stand mixer or food processor bowl. Pulse a couple of times to mix and then add the warm water in a steady stream. Knead until the dough comes together as a mass and then let the dough rest for 10 minutes. This will help the dough absorb water. Knead again, adding a little more water or flour (not too much) if you need it, until your dough is smooth and elastic but not sticky.

2. Shape it into a ball and put it in a well-oiled bowl, turning the dough till it is well coated. Cover and let it rise till about double. This should take about 2 hours.

If you’re not making the Bialys right away, you can refrigerate the dough overnight at this point. When ready to make them, keep the dough at room temperature for about half an hour and then proceed with the rest of the recipe.

3. In the meanwhile, make the filling. Heat the oil in a pan, and add the cumin seeds. When the crackle, add the onions, and sauté over low to medium heat. Sprinkle a little salt and continue sautéing until they become soft and turn golden brown in colour. Add the stuffed paratha masala and stir well. Keep the caramelised onions aside to cool.

4. Sprinkle your work surface lightly with flour and place the dough on it. Divide it into 8 equal pieces and shape each one into a roll by flattening it and then pinching the ends together to form a smooth ball.

(See this video for shaping rolls, if necessary http://www.youtube.com/watch?v=TB908K3Kd6k )

5. Place the rolls on a lightly greased baking sheet and cover them with a towel. Let them rise for about one hour (about 1 1/2 to 2 hours for refrigerated dough) till pressing with a finger on the top leaves a dent.

6. Work on one piece at a time, while you keep the others covered so they don’t dry out. When the rolls are ready, pick them up one at a time and using your fingers, form the depression in the middle. Hold the roll like a steering wheel with your thumbs in the middle and your fingers around the edges. Pinch the dough between your thumb and fingers, rotating as you go and gradually making the depression wider without actually poking a hole through. The depression should be quite thin so the filling can stay in and not rise when the Bialy bakes.

Remember not to press on the edges, or they will flatten out. Once shaped, you should have a depression about 3” in diameter with 1” of puffy dough around the edge, so your Bialy should be about 4” in diameter. Prick the centre of the Bialy with a fork so the centre doesn’t rise when baking.

7. Place the shaped dough on a parchment lined (or greased) baking tray leaving about 2 inches space between them.

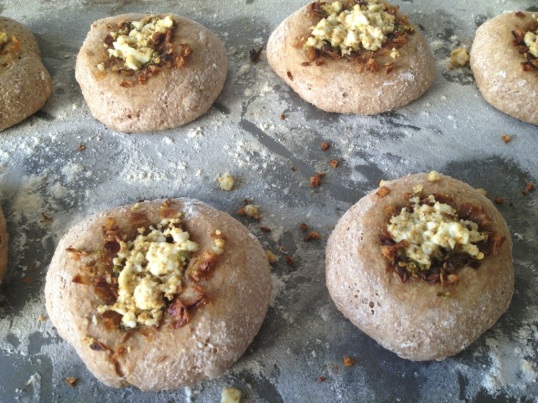
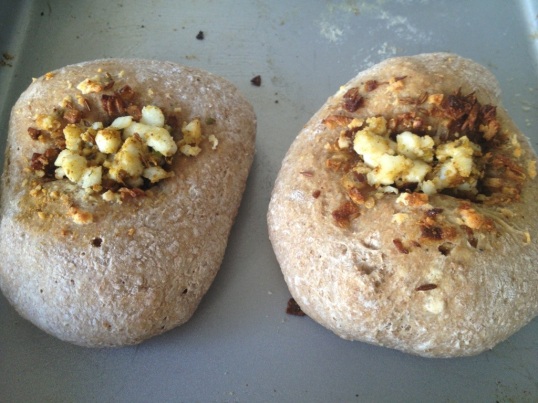
8. Place the caramelized onion filling in the depressions of each Bialy. Add some mined green chili to each as a topping. Brush the outer dough circle with milk. If you’re using crumbled paneer, add it to the Bialys in the last 5 minutes of baking or it will get burnt.
20130607-145941.jpg

Bake the Bialys at 230C (450F) for about 15 minutes till they’re golden brown in color. Cool them on a rack. Serve slightly warm or at room temperature. This recipe makes 8 largish Bialys.

Enjoy warm with butter or cream cheese.
20130607-150452.jpg

Mango Coco Loco Smoothie

20130506-170115.jpgThis is a quick post and a quick way to use up all those juicy Alphonso mangoes filling up in my kitchen (and our tummies) this season. There are a gazillion mango dessert recipes out there that I’m dying to try, but what better way to use up some overripe mangoes than in a hearty and nutritious smoothie. Made with the goodness of coconut water and avocados and oranges , this one has a chock full of electrolytes, healthy fats, Vitamin C and is a filling smoothie and great breakfast by itself.

Of course if you’re like me, don’t bother chopping the mangoes – just squeeze the heck out of them with your fingers into the blender – then enjoy savoring the sweet goodness of the seed with bits of the pulp and juice trickling down your fingers:). That is by far my favorite way to enjoy a mango.

Ingredients: (makes 6 cups)

  • Aphonso mangoes (or you can use any sweet ripe mango) – peeled and chopped into chunks – 2
  • Avocado – 2
  • Oranges – peeled and cut into big chunks – 2
  • Coconut water from one tender coconut – 1 to 1 1/2 cups
  • Coconut meat – 1/4 – 12/ cup (optional)
  • Whey protein powder (optional) – 1 tbsp
  • Ice cubes – 1 cup
  • Water as needed
  • Vanilla paste or pod or essence – 1/2 tsp

Method:

Add all the ingredients in the order listed into a Vitamix or other high powered blender and blend first at a low speed then on high for 1-2 minutes. Add the water as needed to reach the desired consistency.

Taste and Create – Eggless Fluffy Buttermilk Pancakes

This is my first month participating in Taste and Create, a community that encourages sharing, tasting and blogging. The idea behind Taste and Create is that you get paired with a blog each month, and you each choose a recipe, make it, taste it and share it. It’s that simple. And yes, adds to the list of my blogging prompts for the month:)

Image

I was paired with 3sidesofCrazy for the month of March. This is such a neat concept as I love browsing new food blogs. She has a lovely blog with some amazing recipes and so many that I was quite overwhelmed. The only thing was that many of the recipes were meat dishes so I had to restrict myself to the desserts and the breakfast dishes, not that it was a real issue, given the notorious sweet tooth I have:).

Her recipe for fluffy buttermilk pancakes was very tempting and very timely as Nikhil had been complaining that he hadn’t eaten a decent pancake since our move to Singapore:). I did modify the recipe a bit to add flax seeds instead of eggs and used a mixture of milk and vinegar as I was out of buttermilk. I also used 3/4 cup wholemeal flour and 3/4 cup all purpose instead of 1 1/2 cup all purpose that the original recipe required. The result – pancakes as fluffy as those with eggs and all purpose flour:).

Ingredients :

1 1/2 cups all-purpose flour (I used 3/4 cup wholemeal and 3/4 cup all purpose flour)
2 teaspoons baking powder
1 teaspoon baking soda
1/2 teaspoon salt
3 tablespoons sugar
2 eggs, lightly beaten ( I used 1 tbsp flax seed meal whisked in 1/2 cup water till frothy)
1 1/2 cups buttermilk (1 1/4 cups milk plus 1 tbsp white vinegar)
2 tablespoons unsalted butter, melted

Method:

  • Sift together flour, baking powder, baking soda, salt, and sugar into a medium bowl.
  • Add flax seed mixture, buttermilk, and 4 tablespoons butter; whisk to combine. Batter should have small to medium lumps.
  • Using a 1/2 cup measure, pour pancake batter about 2 inches away from each other on a heated griddle or fry pan.
  • When pancakes have bubbles on top and are slightly dry around edges, about 2 1/2 minutes, flip over.
  • Cook until golden on bottom, about 1 minute.
  • Repeat with remaining batter, keeping finished pancakes warm.
  • Top with bananas, walnuts and pure maple syrup.

Image

Classic Croissants – We Knead to Bake Project February 2013

DSC01580

I would probably call this challenge the ultimate in baking challenges, at least for me:). After the first pull apart bread, I was all set to turn in my entry to this challenge “on time”, only to discover that Aparna had truly made this a sequel to the “Daring Baker’s Challenge”:). For the uninitiated, that is another group of bakers and as the title suggests the recipes are quite challenging. The recipe for making these croissants is all of 3 pages long and the process takes 3 days. Intimidating and definitely not something I would’ve even bothered to give a second look – those who know me well know how much I love to “cook and get out” – of the kitchen, I mean. But much as I would’ve been rigid in that rule of mine, there does come a time when you know that getting out of that comfort zone and pushing yourself once in a while is what makes life interesting – gives you that rush, that sense of fulfillment. Kinda like managing to finish a 10k. For someone like me who just 14 months ago hated the thought of running – outdoors or indoors. I know, I digress. But to me the two situations were quite similar, and coincidentally happened around the same time, a week apart from each other.

And someone or something does play a major role in pushing all of us. For the run it happened to be my husband Girish who started to run two years ago and got reluctant me into the habit. Now I feel like it has become an addiction of sorts and I’m signing us up for all the running events in the city:). Well sort of.

And Aparna’s group has been that someone and something for pushing me to bake more . I joined the Daring Bakers a year ago and for some reason couldn’t really get into it. It probably didn’t push me enough even if the recipes were equally or more daunting. What’s worked for me here has been Aparna’s concept of a (closed) Facebook group, the daily updates from the 100 or so members, the drooling pictures that make you feel a tad guilty that you are yet another day behind on the challenge – all this has driven me to bake something I would never have dreamed
of a year ago.

In both cases I did learn one thing – nothing is daunting if you plan well and work steadily towards your goal. This recipe looks long but if you read it well and plan it, it’s not all that bad. Yeah I know that sounds cliched. And even if I didn’t think that for a minute while baking them or running those miles, I do now, after I managed to get past the finish line, in both cases:)

Here’s the step by step recipe for Classic Croissants. They were a hit – flaky, soft, layered and just right. Enough to make me feel like a Nigella Lawson, even for a day:)

Ingredients:

For the dough:

4 cups all-purpose flour, and a little more for dusting/ rolling out dough

1/2 cup plus 2 tbsp ice water

1/2 cup plus 2 tbsp cold milk

1/4 cup sugar

40gm soft/melted unsalted butter (about 3 tbsps)

1 tbsp + 1/2 tsp instant yeast

2 tsp salt

DSC01562

For the butter layer:

250 gm cold unsalted butter (~2 sticks + 2 tablespoons)

1/4 cup of milk or mix of milk & heavy cream to brush the rolled croissants

Method:

Day 1:

Make the dough (and refrigerate overnight)

  1. Combine all the ingredients for the dough in the bowl of a stand mixer fitted with the dough hook. You can also use a food processor with the plastic blade, or do this by hand.
  2. DSC01564
  3. Mix everything on low speed for 3 minutes, scraping the sides of the mixing bowl once if necessary. Then mix further on medium speed for 3 minutes. Lightly flour a 10-inch pie pan or a dinner plate. And place the ball of dough on this.
  4. Gently shape the dough into a flat ball by pressing it down before storing it in the fridge, this makes rolling out next morning easier. Making a tight ball will strengthen the gluten which you do not need. Lightly dust the top of the dough with flour and wrap well with plastic so it doesn’t dry out. Refrigerate overnight.
  5. DSC01565

Day 2:

Make the butter layer

  1. The next day, cut out 2 pieces of parchment or waxed paper into 10” squares each. Cut the cold butter into 1/2-inch-thick slabs. Place these pieces on one piece of parchment/ waxed paper so they form a 5- to 6-inch square. Cut the butter further into pieces as required to fit the square. Top with the other piece of parchment/ waxed paper.
  2. Using a rolling pin, pound the butter with light, even strokes. As the pieces begin to stick together, use more force. Pound the butter until it flattens out evenly into a square that’s approximately 7-1/2”. Trim the edges of the butter to make a neat square. Put the trimmings on top of the square and pound them in lightly with the rolling pin. Refrigerate this while you roll out the dough.

Laminate the dough

Note – I don’t have great pictures for this as this was the most important step and I really wanted to focus and yes it was also the most messy with the butter and dough:)

  1. Unwrap and lay the dough on a lightly floured work surface. Roll it out to a 10-1/2-inch square, and brush off the excess flour. Take the butter out from the refrigerator —it should be cold but pliable. If it isn’t refrigerate it till it is. This so that when you roll out the dough with the butter in ti, neither should it be soft enough to melt, or hard enough to break. Unwrap the butter and place it on the square of dough in the center, so that it forms a “diamond” shape on the dough.
  2. Fold one flap of dough over the butter toward you, stretching it slightly so that the point just reaches the middle of the butter square. Bring the opposite flap to the middle, slightly overlapping the previous one. Similarly repeat with the other two so that the dough forms an envelope around the butter. Lightly press the edges together to completely seal the butter inside the dough to ensure the butter doesn’t escape when you roll out the dough later.
  3. Lightly flour the top and bottom of the dough. With the rolling pin, firmly press along the dough uniformly to elongate it slightly. Now begin rolling instead of pressing, focusing on lengthening rather than widening the dough and keeping the edges straight.
  4. Roll the dough into an 8” by 24” rectangle. If the ends lose their square shape, gently reshape the corners with your hands. Brush off the excess flour.Mark the dough lightly equally into three along the long side. Using this as a guideline, pick up one short end of the dough and fold 1/3rd of it back over the dough, so that 1/3rd of the other end of dough is exposed. Now fold the 1/3rd exposed dough over the folded side. Basically, the dough is folded like 3-fold letter before it goes into an envelope (letter fold). Put the folded dough on a floured baking sheet, cover with plastic wrap, and freeze for 15 to 20 minutes to relax and chill the dough.
  5. Repeat the rolling and folding, this time rolling in the direction of the two open ends (from the shorter sides to lengthen the longer sides) until the dough is about 8” by 24”. Once again fold the dough in thirds, brushing off excess flour and turning under any rounded edges or short ends with exposed or smeared layers. Cover once again with plastic wrap and freeze for another 15 to 20 minutes.
  6. Roll and fold the dough exactly in the same way for the third time and put it baking sheet. Cover with plastic wrap, tucking the plastic under all four sides and refrigerate overnight.

Day 3:

Divide the dough

  1. The next day, unwrap and lightly flour the top and bottom of the dough. Cut the dough along the longer side into halves. Cover one half with plastic wrap and refrigerate it while working on the other half.
  2. “Wake up the dough up” by pressing firmly along its length with the rolling pin. Don’t widen the dough but simply begin to lengthen it with these first strokes. Slowly roll the dough into a long and narrow strip, approximately 8” by 22”. If the dough sticks as you roll, sprinkle with flour.
  3. DSC01567
  4. Once the dough is about half to two-thirds of its final length, it may start to resist rolling and even shrink back. If this happens, fold the dough in thirds, cover, and refrigerate for about 10 minutes; then unfold the dough and finish rolling.
  5. Lift the dough an inch or so off the table at its midpoint and allow it to shrink from both sides and prevent the dough from shrinking when it’s cut. Check that there’s enough excess dough on either end so that when you trim the edges to straighten them, you have a strip of dough that is 20’ inches long. Now trim the edges so they’re straight.
  6. If you’re good at “eyeballing” and cutting the dough into triangles, then forget the measuring rule, marking and cutting instructions. Otherwise, lay a measuring rule or tape measure lengthwise along the top length of the dough. With a knife, mark the top of the dough at 5-inch intervals along the length (there will be 3 marks in all). Now place the rule or tape measure along the bottom length of the dough. Make a mark 2-1/2 inches in from the end of the dough. Make marks at 5-inch intervals from this point all along the bottom of the dough. You’ll have 4 marks that fall halfway between the marks at the top.
  7. Make diagonal cuts by positioning the yardstick at the top corner and the first bottom mark. Use a pizza wheel/ pie wheel or a bench scraper and cut the dough along this line which connects each top mark to the next bottom mark and then back to the next top mark and so on. This way you will have 7 triangles and a scrap of dough at each end.
  8. DSC01569

Shape the croissants

  1. Now work with one piece of triangular dough at a time. Using your rolling pin, very lightly roll (do not make it thin but only stretch it slightly) the triangle to stretch it a little, until it is about 10” long. This will give your croissants height and layers. You can stretch it by hand too, but if you don’t have the practice, your stretching could be uneven.
  2. Using a sharp small knife, make a 1/2- to 3/4-inch-long notch in the center of the short side of each triangle. The notch helps the rolled croissant curl into a crescent.
  3. Place the triangle on the work surface with the notched side closest to you. With one hand on each side of the notch, begin to roll the dough away from you, towards the pointed end.
  4. Flare your hands outward as you roll so that the notched “legs” become longer. Roll the triangle tight enough but not too tight to compress it, until you reach the “pointy” end which should be under the croissant.
  5. Now bend the two legs towards you to form a tight crescent shape and gently press the tips of the legs together (they’ll come apart while proofing but keep their crescent shape).
  6. Shape all the triangles like this into croissants and place them on a greased or parchment lined baking sheet leaving as much space between them as they will rise quite a bit.
  7. DSC01572

Proof the croissants

  1. Brush the croissants with milk (or a mix of milk and cream). If you use eggs, make an egg wash by whisking one egg with 1 tsp water in a small bowl until very smooth. Lightly brush this on each croissant.
  2. Refrigerate the remaining milk/ milk+cream (or egg wash) for brushing the croissants again later. Place the croissants in a cool and draft-free place (the butter should not melt) for proofing/ rising for about 1 1/2 to 2 hours. They might need longer than 2 hours to proof, maybe as much as 3 hours, so make sure to let croissants take the time to proof. The croissants will be distinctly larger but not doubled in size. They’re ready if you can see the layers of dough from the side, and if you lightly shake the sheets, the croissants will wiggle.
  3. 20130305-180733.jpg

Bake the croissants

  1. Just before the croissants are fully proofed, pre-heat your oven to 200C (400F) in a convection oven or 220C (425F) in a regular oven. Brush the croissants with milk/ milk+cream (or egg wash) a second time, and place your baking sheets on the top and lower thirds of your oven (if regular) or bake one tray at a time in the convection oven.
  2. Bake them for about 15 to 20 minutes till they’re done and golden brown on top and just beginning to brown at the sides. In a regular oven, remember to turn your baking sheets halfway through. If they seem to be darkening too quickly during baking, lower the oven temperature by 10C (25F). Cool the croissants on the baking sheets on racks.
  3. 20130305-180816.jpg

Serve warm. This recipe makes 15 croissants. I used only half (7) and added some filling to the other half and baked it the next day. I filled some with Punjabi Samosa filling, nutella, and PB&J. PBJ was Nikhil’s creation and it oozed a bit but was yummy nevertheless.

Will post those pictures soon and update this post.

20130305-180759.jpg

Here’s a link to a great video that gives you the step by step recipe for more clarity.

Link to video on making croissants – http://www.youtube.com/watch?v=Ot3jKnkTfPY&feature=player_embedded

20130307-064643.jpg

Pain Au Samosa

20130307-064659.jpg

Pain Au PBJ

20130307-065756.jpg

Proofing in the oven

20130307-064725.jpg

An assortment


Persimmon Orange Creamsicle Smoothie with Homemade “Kind” Bars

20121206-124102.jpg

The best part about living in Singapore is the abundance of fresh fruits and veggies, and some exotic ones too, readily available and mostly imported from the rest of the neighboring world . Persimmons are native to Asia specifically Japan and China, and seem to be “in season” here as the local wholesale fruits and veggie market had the non-astringent Fuyu persimmons on sale this past week.  So of course I grabbed them, without a clue of what I was going to do with them:)

I’d had persimmons in the US mostly in salads and didn’t think they had a distinct flavor except for a slight tanginess to them. Which is probably what makes these versatile enough to add in salads, juices and smoothies, so they add to the texture but don’t necessarily mask any flavors. A quick look at my Pinterest board collections gave me this interesting smoothie recipe (probably the first time I’m really trying something from Pinterest – I usually just hoard my boards). I added all orange fruits and veggies to this – carrot, orange and persimmon with a dash of the usual smoothie ingredients and the result was this creamy, quite flavorful smoothie with enough Vit C to keep colds at bay this Singapore rainy season:)

I have also been trying extra hard to stay healthy with Nikhil’s snacks – and I cannot say this enough times – but Whole Foods and Sprouts and yeah, maybe Trader Joes (now that you are in Dallas too) – you seriously need to think about opening shop in SE Asia, yes Singapore specifically. With the number of American expats living here, you will give the local Marketplace and Supernature a run for their money. While fresh fruits and veggies are in abundance and relatively easy on the wallet, organic dry goods (grains, cereals) are frightfully expensive at local grocery stores. And so, I’ve been trying to make some things from scratch that previously I would buy from those huge bins of goodness  at WF and Sprouts.  I suppose that’s all for good reason if you really think about it.

This recipe was one I chanced upon from this interesting blog called Iowa Girl Eats and I adapted the recipe for the most part and changed some ingredients and measures a bit to call it the homemade “Kind” bar recipe. Kind bars have always been my most favorite bars not just for their taste but for what they stand for. (Do the Kind thing for your body, your taste buds and the World). This is a recipe for Almond-Cashew-Cranberry-Apricot bars all held together with a touch of coconut and honey. All I could say is YUM!

Persimmon Orange Creamsicle Smoothie 

Ingredients: (for 3 6 oz. cups)

2 Persimmons – peeled and quartered

1/2 carrot

1 orange, peeled

1 1/2 tbsp non fat dry milk powder or almond milk

1 tsp vanilla essence

1/2 cup water or skim milk (or almond milk)

2 cups ice

1 – 1 1/2 tsp honey or agave syrup

Put all the ingredients in the order listed in a high speed blender ( I use Vitamix) and run the blender from slow to high speed for about 2-3 minutes. Enjoy cold.

Almond-Cashew-Cranberry-Apricot Bars Recipe

20121206-124121.jpg

Ingredients:

3/4 cup Almonds and Cashews mixed

1/4 cup dried cranberries

1/4 cup chopped dried apricots

1/2 cup of rolled oats

2 tbsp coconut oil

4 tbsp honey or agave syrup or a mix of the two

Method:

1. Add the oats, 1/2 cup each of the almonds and cashews to a blender or food processor and pulse till you get a coarse powder.

20121206-123404.jpg

2. Now take the remaining nuts and very coarsely chop them. Add this to the above mixture

20121206-123411.jpg

3. Chop the dried cranberries and apricots as well and add to the above .

20121206-123417.jpg

4. Take a mixture of the coconut oil and honey/agave in a small saucepan and heat it on a low flame. Keep stirring till the mixture starts to foam and get cooked.

20121206-123422.jpg

5. Now pour the oil/honey over the oat-fruit and nut mixture. Mix well till the dry ingredients get well coated with the wet ingredients.

6. Line a 8×8 inch baking tray or a loaf pan (depending on how thick you want your bars) with a cling wrap or parchment paper sheet. Make sure the sheet hangs over the ends of the pan. Spread the mixture onto the bottom of the pan.

7. Wrap the sheet over the poured mixture and press the mixture with the bottom of a steel or glass container so it gets evenly flat.

20121206-123428.jpg

8. Place the pan in the fridge for a few hours till the mixture hardens.

9. Cut into bars while its still in the pan, cover with parchment paper and store in airtight containers.

Notes – You can modify the coconut oil and honey quantities as needed for taste and consistency. I initially used  a bit more than needed and the bars got quite sticky when I left them out of the fridge. I have modified the amount used in the ingredients above which resulted in just the right consistency for me but if you like your bars chewy, feel free to modify the measures slightly.

Masala Egg “Half” Fry


This is a recipe handed down to me by my dear friends – the Patels – yes, the same amazing cooks that brought us the gujarati khichdi and kadhi recipe. Not sure why we call it “half” fry but I suppose you can choose to completely cook the egg or leave it half cooked. It’s somewhat of a hybrid between fried egg and omelette. Either ways, this is a weekend staple breakfast dish and Nikhil’s and Girish’s favorite.

Ingredients – (for one egg)

Egg -1

Finely chopped onions – 1 tbsp

Finely chopped green chilies – 1/4 tsp

Finely chopped cilantro – 1/4 tsp

Garam masala powder – a pinch

Red chili powder – a pinch (optional)

Salt to taste

Method:

1. Heat 1/2 tsp of olive oil in a fry pan. I use the small egg fry pan but you can use any sized fry pan, preferably the non stick kind.

2. When the oil is hot, break the egg and spread the yolk slightly so it breaks.

3. Sprinkle the chopped onion, green chili, cilantro mixture.


4. Add red chili powder, gram masala and salt to taste.

5. Once the egg mixture starts to lightly brown on the sides, use a small, flat spatula and flip it over so the yolk, white and the onion chili mixture are now facing the bottom of the pan. This step is important to cook the yolk well.

6. Press the flipped egg lightly so the yolk gets completely cooked.

7. Serve hot with whole wheat toast.

Linking this post to Farmer Girl’s Kitchen food event – and the Breakfast Club. 

Post Navigation