Roz Ka Khana

A blog about everyday food. Mostly Indian. All vegetarian.

Archive for the category “Contributions”

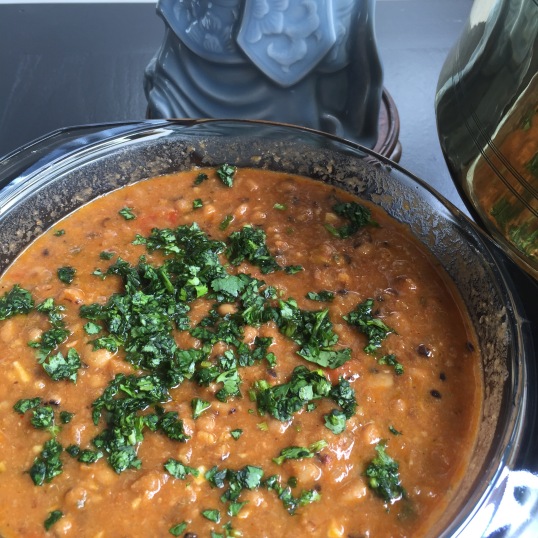
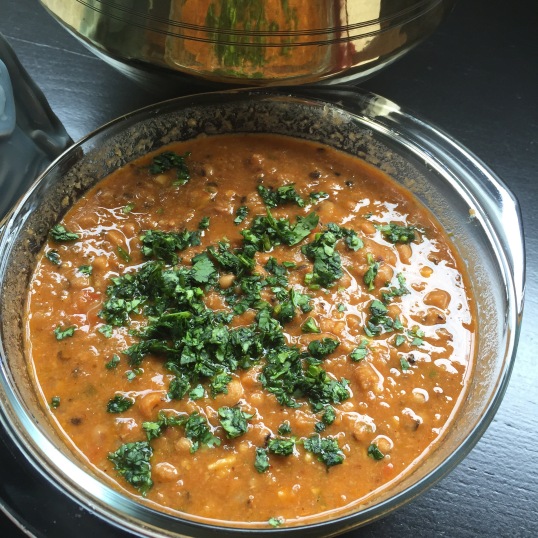
Black-Eyed Beans (Lobhia) with Tomatoes

IMG_1673

This recipe has universal appeal because it blends techniques and tastes that are popular across cuisines. The dish pairs as well with a crusty batard or flat bread as with steamed rice and because it uses so few ingredients, is a breeze to put together.

The only mildly challenging part is cooking the dried black-eyed beans, or lobhia as they are called in Hindi. You’ll have to soak the beans in water first and allow for some generous cooking time. Of course, you could always use canned black-eyed beans, in which case this will be ready in a jiffy.

The dish improves with keeping so it’s a perfect make-ahead if you’re planning to entertain.

You could serve it on its own with tortillas and french bread or you could add some cheese and pop it under a hot grill before bringing it to the table. Alternately, top the dish with some roasted bell peppers or lightly sautéed strips of capsicum.

Ingredients:

Serves 2-3

  • 1 cup dried black eyed beans or two 410g (14 oz) cans of cooked beans
  • Onion – 2 medium, finely chopped
  • Tomato – 4 medium, skinned and finely chopped, or a can of peeled tomatoes, drained and chopped
  • Garlic – 4-5 cloves, finely minced
  • Cumin seeds – 1 tsp
  • Chilli powder or minced fresh green chillies (optional, to taste)
  • Garam masala – ½ tsp (optional)
  • Olive oil
  • Salt as needed
  • Butter (optional)

Method:

  • Soak the beans in water for about four hours.
  • Rinse, cover with plenty of water, and bring to a boil. Lower the flame and let the beans cook, stirring occasionally and adding more water so that there is always an inch of liquid above the beans. This could take about an hour and a half or slightly longer. Alternately, if you have a pressure cooker, cook the beans for about 10 minutes under pressure. Do not discard any excess water. If you are using canned beans, rinse thoroughly under running water and drain.
  • Mash a few cooked beans to thicken the gravy.
  • Heat the olive oil in a wok or pan and when hot add the cumin seeds and let them sizzle for a second or two.
  • Add the finely minced garlic cloves and fry for a few seconds.
  • Add the onion and fry on medium heat for about five minutes until they start to change color.
  • Add the fresh or canned chopped tomatoes and fry until the moisture evaporates and the mixture is homogenous.
  • Add the chilli powder and garam masala, if using, and fry for a few seconds.
  • Add the cooked beans, salt and some water if necessary, cook for about 10-15 minutes until the mixture thickens.
  • Add pats of butter and serve.
IMG_1675

Eating in the Raw — Rasam week – Pachi Pulusu (Raw Spiced Tamarind broth)

IMG_0479.JPG

In keeping with Rasam week, I wanted to try something I had been meaning to try for ages, since I tasted it for the first time in my friend Harini’s home almost 10 years ago. This is a typical Telangana dish that Harini made for us for dinner one evening and the dish was so flavorful it stuck. Simple to make yet I somehow never got to really try it in my own kitchen until this week. This pulusu or broth is fully raw and needs no heating or boiling. It’s the tadka or popu or tempering that gives it its unique kick and flavor. The tartness of the tamarind and spice of the red chili with garlic along with a hint of jaggery and a secret ingredient to finish is what makes this dish different from any rasam/pulusu you may have tasted . Eat it with hot rice, ghee and mudda pappu or thick spiced tuvar dal and it is a combination that will live on your taste buds for a long long time.Like it did for me for over a decade:). This recipe is Harini’s contribution to Roz Ka Khana and though I’m sure it doesn’t come close to the way she or her in laws make it in their home, it hopefully is a decent first attempt. .

Ingredients for Pachi Pulusu:

Serves 4. Prep time : 15 minutes. Cooking time: 10 minutes

  • Tamarind – 1 small lemon sized ball, soaked in warm water.
  • Jaggery – 1/2 tsp
  • Fore tempering:
  • Mustard seeds- 2 tsp
  • Cumin seeds (jeera) – 1 tsp
  • Dry red chilies – 3-4
  • Green chili – 3-4 sliced thin
  • Red onion, chopped fine – 1/4
  • Garlic, crushed or chopped fine – 3 small or 2 big
  • Curry leaves – a sprig
  • Roasted sesame seed powder – 1 tsp
  • Cilantro, chopped – 1 bunch
  • Cream or whole milk – 1 tsp (optional)
  • Oil- 2 tsp
  • Salt to taste

Method:

  1. Squeeze the juice from the soaked tamarind and add enough water to it to make about 2 cups. Add salt to taste and the jaggery and mix well.
  2. Heat oil in a small pan, when hot add the mustard seeds. When they splutter, add the jeera, red chilies and curry leaves. Add garlic, green chilies. Saute for 1 minute.
  3. Pour the tempering over the tamarind water. Add chopped onions and cilantro for garnish.
  4. Add the roasted sesame powder.
  5. As a final touch, add 1 tsp of cream or whole milk and give it a quick mix before you serve. (The cream compensates for the tartness of the tamarind. You can avoid this step if you don’t like the idea of adding milk to the pulusu or are vegan).

Serve with rice, ghee and pappu (yellow tuvar dal tempered with mustard seeds, jeera and curry leaves). It’s called “mudda pappu” as it is meant to be thick when mixed with rice so the pulusu is a runny and tangy accompaniment. According to Harini, spinach dal (paalak pappu) and moong dal spiced are also great accompaniments for pachi pulusu. Will try that next and let you know:)

Coming up next for Rasam week is Inji (Ginger) Rasam.


Easy Tomato Gothsu (Tomato Stew) – without onion or garlic

It’s the season of Navaratri (festival of Nine Nights) and besides the daily offerings of jaggery laden sweets and protein packed sundals (savory dish made with legumes) to the Goddess, I have to get creative with the daily menu. As with most temple offerings the food cooked during these 9 days is meant to be “saatwik” or strong in the sattwa guna or purity, leading to clarity and equanimity of the mind.

It can be debated as to how the list even originated as it dates back to Ayurveda and food that ancient Yogis consumed. The list we know of includes fresh leafy vegetables, fruits, nuts, seeds and grains, legumes, interestingly diary (raw milk from happy cows:), ghee (clarified butter), raw honey etc. Meat and its by products, some pungent vegetables including onion and garlic were avoided as they were meant to stimulate the tamasik qualities leading to dullness of the mind and body. For the Yogis this was meant to be detrimental to their spiritual aspirations.

As I mentioned before I didn’t really fully understand (and still have some q’s) why some vegetables scientifically considered  healthy (like onion and garlic) were excluded from this diet. I do get the meat exclusion to some extent as it follows the doctrine of “you are what you eat” and the relationship between food and the mind. I suppose you could use the same logic to the other foods too?

Oh well. As for me, I tend to consider these 9 days as an excuse to undergo a detox of the body and mind. If you look at that explanation scientifically too Navaratri falls at the juncture of two seasons, when the fall season recedes and and winter season sets in (in the Northern hemisphere). There is a shift in pattern with nature too, the plants shed their leaves, fruits fall and go into a non productive mode, grains are being harvested and so on. The body (and mind) needs to undergo a periodic cleanse to get stronger for sustaining the bleak winter months. Hence the detox during this season which conveniently aligns with the festival too. Traditionally Navaratri is meant to be a time to fast and/or eat sparingly to allow the body to detox.

Isn’t it ironical that detoxes are becoming so popular in today’s times and when you really “peel the onion” (no pun intended;) they are manifestations of what the ancient Sutras and Ayurveda dictated eons ago? Suddenly Yogic practices, Ayurveda are becoming fashionable, a fad and fasting and detox diets once originally done for spiritual reasons are becoming a sought after lifestyle. We have come a full circle and the goal interestingly is the same. To be healthy and strong in body and mind.

So the many offerings to the Goddesses are made as saatwik as possible and for the same spiritual and possibly convenient reasons it trickles down into the daily menu as well.

Today’s prasadam (offering) was Venn Pongal, a traditional South Indian porridge made during festivals but also a filling breakfast or lunch dish. Made with rice and yellow mung beans, it packs enough fibre and protein to balance out the carbs. And garnished with dollops of ghee (clarified butter), another nutritious good fat packed with Vitamins A, D and K.

As an accompaniment for the Venn Pongal I made a Thakkali Gothsu or Spicy Tomato Stew. Super easy to make and quite a tasty accompaniment to the venn pongal, this is a recipe I learned from Amma (my mom). This dish can be made with onions too but for today I made it without them for all the reasons mentioned above:)

IMG_0371.JPG

Ingredients:

Medium sized tomatoes on the vine – 4, finely chopped

Green chilies – 4-5, slit

Curry leaves – a sprig

Jeera or cumin seeds – 1 tsp

Asafetida – a pinch

Mustard seeds – 1 tsp

Sambar powder – 2 -3 tsp (depending on spice level)

Turmeric powder – 1/2 tsp

Cinatro – 1 small bunch chopped

Oil – 1 tsp

Salt to taste

Method:

1. Heat oil in a pan. When hot add the mustard seeds. After they begin to splutter add the jeera and asafetida.

2. Add the slit green chilies and curry leaves.

IMG_0363.JPG

3. Add the chopped tomatoes, salt, turmeric powder. Mix well and sauté for 2 minutes.

IMG_0364.JPG

4. Add the sambar powder, mix, add let cook for about 2-3 minutes.

IMG_0365.JPG

5. Add about 1/4 cup of warm water and cook again for 5-7 minutes till it all begins to come together in a thin chutney like consistency.

IMG_0366.JPG

6. Garnish with chopped cilantro and serve hot.

Note: If you’re adding onions, add one medium sliced onion finely chopped, and add it right after the step where you sauté the green chilies and curry leaves. Sauté well till they turn translucent before you add the tomatoes.

IMG_0368.JPG

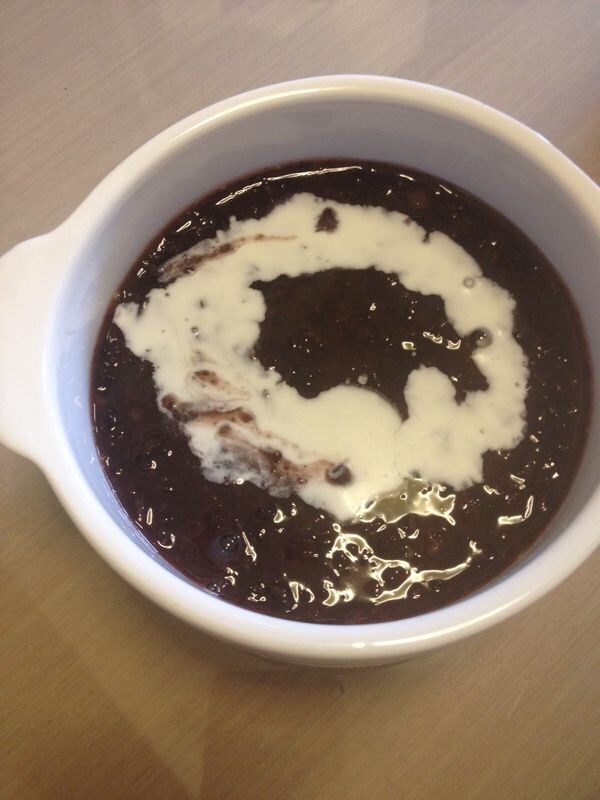
Pulut Hitam – Sticky Black Rice Pudding

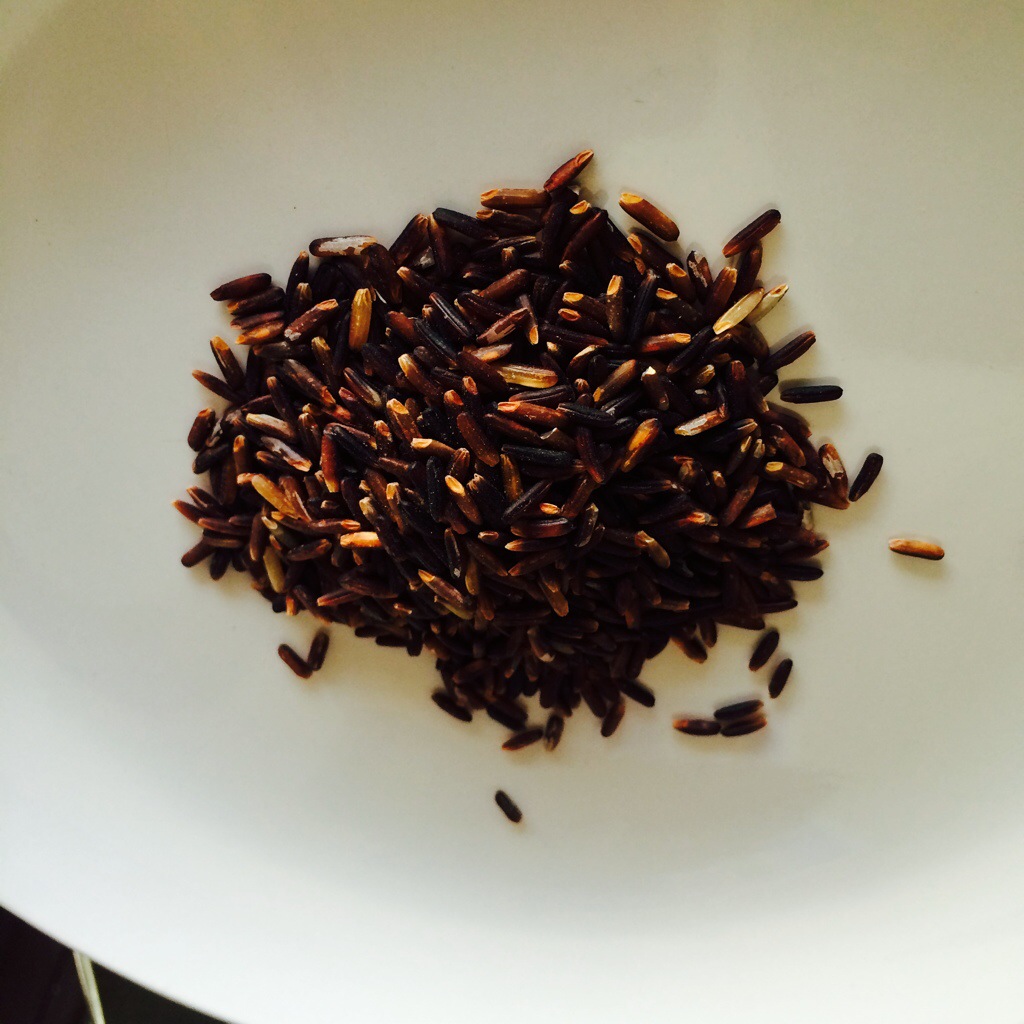
Desserts made with sticky black rice are a specialty of Southeast Asia. This unpolished, short-grain rice is often labeled as glutinous rice, a reference to its consistency when cooked and not to its gluten content. The color isn’t black either, which becomes obvious when you start to wash it. The grains stain the water a deep wine and turn purplish when cooked.

It wasn’t until I started researching black rice that I discovered its health benefits. The pigment comes from anthocyanins, antioxidants found also in purple vegetables and fruits such as beetroot, blackberries, and mangosteen. Besides fiber, black rice is also rich in iron.

I first tasted sweetened black rice as a filling in a dumpling. However, a more popular black rice dessert, especially in Malaysia and Singapore, is pulut hitam (Malay for black glutinous rice), a mélange of the grain, coconut milk, and palm sugar.

This is not your traditional, mushy rice pudding. Black rice is far more assertive – it has a nutty flavor and retains some bite when cooked as the husks are still intact. This also means it requires more water and takes much longer to cook than its polished white counterpart so a bit of planning is necessary. But once you’re done with that stage, the dish requires very little effort.

The other nice thing about pulut hitam is that it allows you to experiment. You can use virtually any type of sugar. I have used the Indian jaggery and brown sugar with equal success. Pandan leaf (screwpine leaf) is the traditional flavoring ingredient but you can add cardamom pods or vanilla. You can also substitute the coconut milk with pouring or whipped cream, fruit puree, or even custard. The dessert pairs well with many fruits. Try mango or banana slices, or lychee for an exotic twist.

Ingredients:

  • 200 g black glutinous rice
  • 200 g palm sugar (gula melaka) or jaggery (unrefined cane sugar), or brown sugar to taste
  • 6-8 cups water
  • Pinch of salt
  • 150 ml coconut milk


Optional

  • Two pandan leaves or three cardamom pods, skinned and crushed
  • Coconut cream and fruits to serve

20140710-094155-34915862.jpg


1. Toast the rice in a frying pan or low oven to bring out the aroma. Wash and soak it for a couple of hours.

2. If you’re cooking the rice on an open fire, cover it with water and bring it to the boil. Add the pandan leaves, turn the heat to low and cook, stirring every now and then and adding more water as necessary until the grains are soft. The process may take 1.5-2 hours. Alternatively, you can use a slow cooker or a pressure cooker, if you have one. I usually let the rice cook overnight in a slow cooker. If you’re using a pressure cooker, allow about 15 minutes.

3. Meanwhile, boil 100 ml water and dissolve the palm sugar or jaggery and a pinch of salt until syrupy. Add the crushed cardamom pods, if using.

4. Stir the syrup into the rice.

4. Add the coconut milk.

5. Swirl some coconut cream on top and serve.

20140710-094155-34915998.jpg


“The Rajma” – Indian Spiced Vegetarian Chili

IMG_1816This is my all time favorite comfort food. Being a Tambrahm family Rajma (red kidney bean curry) wasn’t really a dish we had every other day. My dad would actually make a face and ask “what kind of dish is called Rajammal?”

So I actually only had this dish for the first time when I was 4. And the fact that I remember it says a lot:) We were living in Srinagar back then, yes the Jammu & Kashmir Srinagar which is the farthest back I can remember of my childhood. We were friends with this warm and kind hearted Punjabi family next door and Badi Ma (grandma) would make the best rajma ever. I would live in their home reveling in all the finger licking Punjabi food- kaali dal, kadhi and rajma. So you could say this Tambrahm girl got her loyalties all mixed up – rasam wasn’t so much my comfort food as was rajma. And it still is, to this day. This is one dish I could literally eat every day and not get bored. Well, within reason:).

I call this recipe “The Rajma” as it is the best recipe ever that comes close to the taste of my childhood rajma days. This is a contribution from my sister-in-law, Mathangi, who is an Army wife and who grew up in Jammu, Delhi, lived in Pathankot and who you could say is a Punjabi at heart thanks to all the traveling and living in North India. She is an exceptional cook and this is only one of her many famous recipes. So while you would think this is a cliched dish, her recipe involves some slow cooking which truly brings out all the flavors of the spices and the gravy is absolutely finger-licking. Have it with some hot rice and ghee and you will agree, this is the ultimate comfort food for those lazy Sundays.

Ingredients: (serves 4)

  • Rajma (red kidney beans) – 1 cup. I usually get the lighter red smaller kidney beans also known as Jammu Rajma, though you can make it with any variety. I feel the smaller ones cook faster and when you mash a few it blends well with the gravy, but to each his own.
  • Garlic – 3 small or 2 large pods, crushed
  • Ginger – 1 1/2 inch, grated or crushed
  • Red onion – 2 small or medium sized, chopped roughly
  • Tomatoes – 3 small or 2 large, chopped roughly
  • Cumin seeds (jeera) – 1 tsp
  • Whole coriander seeds (dhaniya) – 1 tsp
  • Turmeric powder – 1/2 tsp
  • Red chili powder – 1 tsp
  • Rajma masala – 1 tsp (available in Indian stores)
  • Salt to taste
  • Olive oil – 1 tbsp

Method:

  • Soak the rajma in about 2-3 cups of water overnight. Alternatively soak it in hot water for about 4-6 hours.
  • Boil the rajma in a pressure cooker or you can add water in a saucepan and boil over a stove till cooked. You may also use a slow cooker to cook the rajma.
  • Make a fine paste of the garlic and jeera with a little water.
  • Grind the onion and ginger separately to a fine paste.
  • Dry roast the dhaniya or coriander seeds in a flat pan without adding any oil. Now grind the roasted dhaniya with the tomatoes in a blender to a fine paste.
  • Keep the 3 pastes separately.
  • Take a heavy bottomed vessel and add about 1 tbsp of olive oil.
  • When the oil gets hot, add the garlic and cumin seed (jeera) paste. Saute for about 2 minutes till the paste becomes light brown and the raw smell goes away.

IMG_1800

  • Now add the onion and ginger paste to this mixture. Saute this mixture on a low to medium flame for about 5-10 minutes, until the raw smell of onions goes away. This step is important as the onion needs to be cooked well. The mixture will become golden brown (more than what you see in the pic below).

IMG_1801

  • Then add the tomato-dhaniya paste. Saute well once again for about 10 more minutes till the mixture blends well together and oil begins to seep out from the sides. This indicates that the onion tomato paste is well cooked.
  • Now add salt, turmeric powder, red chili powder to the mixture.

IMG_1802

  • Saute again for about 5 minutes till the spices get mixed and cooked.
  • Drain the boiled rajma and keep the rajma water aside. You will use this later instead of water for the gravy.
  • Add drained rajma to the onion-tomato-spice mixture in the vessel and mix very well till the beans get coated with the paste. Saute for another 2-3 minutes.

IMG_1804

  • Add the rajma water slowly to this mixture until you get the desired consistency for the gravy. Keep in mind that rajma thickens as it cooks so you can be a bit generous with the water, maybe 2-3 cups or as needed.

IMG_1806

  • Let this mixture come to a boil first and then keep it on a slow flame and let it slow cook for another 15 to 20 minutes. At this stage you may also transfer to a slow cooker and leave it on low for 20-30 minutes.
  • Add rajma masala, mix well and cook again for about 5 minutes.
  • Garnish with chopped cilantro and serve hot with hot rice or jeera rice and a dollop of freshly made ghee. Yum!
  • You can also use this in the Bollywood Burrito recipe:)

IMG_1812

Ginger and palm sugar punch (Panakam), Spiced Buttermilk (Neer Mor) and Lentil green mango salad (Kosumalli)

20140411-103815.jpg


This is a bit late for posting a Rama Navami recipe but as with all festival recipes, I record them here for posterity. I’m sure this will come handy in the years to come to me or to another reader so it’s better late than never. As always with all the festival recipes here, these are Amma’s recipes.

Panakam, Neer Mor are not just Rama Navami recipes by the way. While legend goes that this was served during Sita and Rama’s (Hindu mythological God and Goddess for the uninitiated) wedding and during Rama’s birth, the tradition seems to have stuck as these are the post celebration drinks served to this day during most traditional South Indian Hindu weddings and birthdays.

The best part – they are probably some of the easiest festival recipes to make. And they are all raw which means no stove top needed and no messy clean ups so as you can guess this is my favorite festival recipe as well:) (Not counting the tadka/seasoning to the buttermilk of course where there is some stove top heating involved, but that step can be skipped if you’d like it to be completely raw. I recommend adding the seasoning as that adds the real traditional South Indian taste)

The panakam can easily pass off as a summer cooler punch the next time you have a summer lunch  get together. Its sweet but the ginger and lemon give it the apple lemon tea kind of zing and tart taste, perfect for a hot day.

And the neer mor (moar) or light buttermilk spiced with ginger and curry leaves is the perfect coolant for a hot summer outing in the sun. “Buttermilk cools the system” as my Appa (dad) says- this is still his go to drink when he returns home from his trips to the vegetable market. And according to him the secret to his “zen”:)

Recipe for Panakam:

  • 1/2 cup palm sugar or jaggery
  • 1 tsp dry ginger pd
  • 2 cardamom crushed (you may add the skin as well for flavor but we used only the crushed seeds)
  • 1 tbsp lemon juice (optional)
Method: Powder the jaggery in a bowl, add about 1 1/2 to 2 cups of water. You can add or reduce the water depending on how sweet you like the punch. Strain the water to remove any sediments from the jaggery mixture.
Add dry ginger pd, and cardamom pd .Mix well. Add lemon juice. Serve cold or at room temperature.
Recipe for Neer Mor :
20140411-103825.jpg
  • Yogurt -1/2 cup.
  • Water 1 1/2 cups 
  • Asafoetida -1/4 tsp
  • 1-green chili crushed,
  • few curry leaves
  • salt to taste
  • seasoning -1 tsp mustard seeds , 1/2 chopped green chilli.
Beat the yogurt in a bowl and mix with water. Mix the asafoetida & salt with little water separately. Add this to the beaten yoghurt. Crush the curry leaves and add.
For seasoning the buttermilk, heat 1/2 tsp oil in a small kadhai or heavy bottomed vessel, When the oil is hot, add the mustard seeds. Wait till it splutters then add the crushed green chili (optional). Pour this onto the buttermilk. Mix well.
20140411-103932.jpg
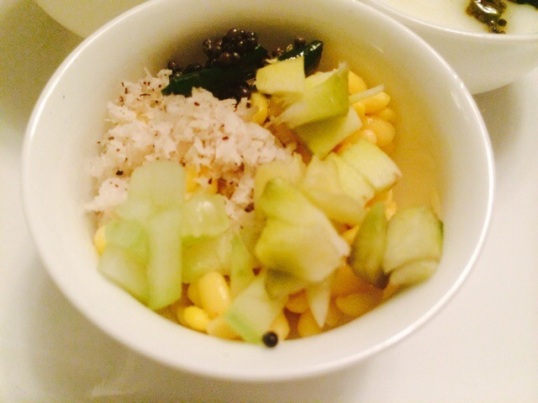
Recipe for Kosumalli or Kosambri (Raw moong dal, green mango salad)
  • 1/2 cup Indian yellow moong dal (skinned and split green gram)
  • 2 green chillies
  • 3 tbsp grated coconut
  • 1/2 raw mango grated
  • /1/2 cucumber cut in to very small pieces
  • salt to taste
For seasoning – 1/2 tsp mustard; 1 green chili crushed (optional)1 tsp oil, asfoetida – a pinch, a handful chopped cilantro
20140411-103843.jpg
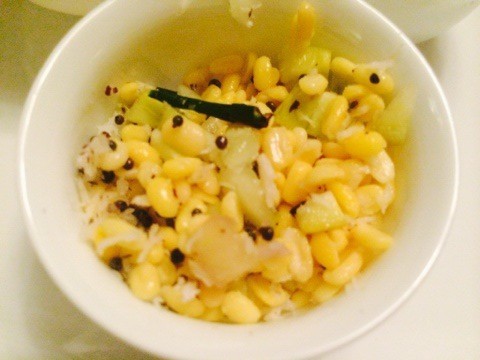
Wash & soak the moong dal for about 1/2 hr till it gets a bit soft. Drain the water, add salt, add the chopped cucumber and grated mango and coconut.
For seasoning, heat the oil, add mustard seeds. When they splutter add the crushed green chili, asafoetida. Add this to the moong dal salad. Garnish with cilantro. You may also add 1 tsp of lemon juice if needed.
20140411-103912.jpg

Andhra Vegetarian Pulao

This is a much awaited recipe contribution from Radhika, a fabulous cook and a very dear friend. I did promise to post some choice recipes collected during my recent visits back home – Dallas home that is – um yes I realize how the term “home” is absolutely where the heart is.

In any case Radhika invited us all over for lunch one weekend afternoon during my visit. I had nagged her for this special recipe so many times that she decided to do a live demo of the making of this Godavari style (a district in coastal Andhra Pradesh also known for its culinary dishes) vegetarian pulao even if it was well after all the guests had arrived. (I was running late and of course had to see the demo.) Which was actually a great idea or so I would like to think – this aromatic pulao was tantalizing enough for the guests – enough testament for the rest of the scrumptious meal she had cooked. So they/we all waited in anticipation and watched her cook and it was well worth it. Very flavorful and aromatic – you could almost call this a “quick biryani”. And notice that I refrained from calling this a vegetable pulao -this dish is better off without vegetables and just uses onions,garlic and spices. In any case thank you Rads for the recipe and for your patience (with me):)

After I got back to Singapore I needed to try the dish out myself before I could qualify posting it here. And though it was a tad  spicier than Radhika’s, the result was equally aromatic and full of flavor.

Here is the step by step recipe with pictures. I couldn’t get a very good picture of the finished dish on both occasions – it was gone before I could click it in the right light and circumstances but you get the idea:)

Ingredients: (for about 10-12 people)

  • 4 1/2 cups rice
  • 9 cups water
  • Garlic – 5-6 peeled and crushed
  • Garlic ginger paste – 1 ½ tsp (add more ginger here than garlic to make a paste)
  • Shahjeera (caraway seeds)– 1 tbsp
  • Bay leaf – 1
  • Cloves – 1 tbsp
  • Cardamom – 1/2 tbsp
  • Cinnamon sticks -2-3
  • Star anise- 2-3
  • Green chilies – 5
  • Red chilies- 2
  • Curry leaves – one sprig
  • Jeera (cumin seeds) – 1 tsp
  • Mustard seeds – 1 tsp

20140212-170856.jpg

  • Dhania jeera powder – Take 11/2 tsp dhania (coriander seeds) and 1 tsp jeera , roast and dry grind to a powder
  • Red onion chopped roughly into chunks – 1 big or 2 small

20140212-170911.jpg

  • Cashews- 1/4 cup
  • Oil – 2 tbsp
  • Ghee – 1 tsp

Method:

  • Heat oil in a pan, add the ghee. Now add mustard, jeera, red chilies, curry leaves, green chilies.

20140212-171009.jpg

  • Once the mustard seeds crackle, add the crushed garlic.
  • Fry the above well, then add whole masalas (cloves, cinnamon,bayleaf, star anise and shahjeera).
  • Add onion chunks, saute well then add the garlic ginger paste, saute again for about 3-5 minutes. Add cashews.

20140212-171030.jpg

  • Cover with a lid and cook for a few minutes, till you get an aroma and onions are lightly fried,not very golden brown.
  • Add 1- 1 1/2 tsp red chili powder
  • Add 2 tsp dhania jeera powder
  • Now add 1 to 11/2 tsp garam masala (see note below for home made garam masala) .Let the masalas fry well in the oil
  •  Cover with lid and simmer till well fried.

20140212-171047.jpg

  • Add washed and soaked basmati rice to this.You don’t have to soak the rice though I usually do for about a half hour.
  • Mix the rice well with the spice mixture till it is well coated with the spices/masalas.

20140212-171103.jpg

  • Fry on a  medium flame till the rice is coated with the oil and spices and feels a bit “fried”, about 5 minutes of sauteing. Make sure you keep stirring the pot so the rice doesn’t stick to the bottom and burn.

20140212-171114.jpg

  • Add salt to taste. You may need to taste for salt again after you add water.
  •  While the rice is being sauteed, boil about 8-9 cups of water separately in a saucepan or in a water kettle. (You will need approx 9 cups of water for 4 1/2 cups of rice so 1:2 ratio of rice to water)

20140212-171130.jpg

  • Add the hot water to the rice and spice mixture.
  • Now taste again for salt and bring the rice and water mixture to a boil. At this step don’t put a lid on the vessel.
  • After it boils for a few minutes, cover the vessel and cook the mixture on a medium flame. Keep checking in every 3-4 minutes and stir the mixture.

20140212-171145.jpg

  • You may also transfer to a rice cooker at this stage. I actually preferred to cook it in a vessel over a stove as I felt the aroma and spice was better distributed. If you are cooking over a stove, here is another tip to ensure the rice doesn’t get burnt. Keep a water bath or a flatter vessel with some water and then keep the vessel with the pulao inside the flat vessel. This double boiler technique helps in cooking the rice evenly and prevents burning. Alternatively you can also use a “tawa” or a flat iron pan before you place the vessel with the rice and water and heat it this way which is what Radhika did.

20140212-171209.jpg

Enjoy the hot pulao with onion raita. Finger licking good!

20140212-171223.jpg

Notes: Home made garam masala – 1 cup cloves, 1/2 cup cardamom, 3/4 cup cinnamon, 1/4 cup star anise, 3 tsp dhania or coriander seeds, 1 tsp cumin seeds or jeera, 1 whole nutmeg.

Grind all the above to a fine powder and store in an air tight container or in the refrigerator.

Anusuya’s Kitchen – Kuzhi Paniyaram

20140119-115744.jpg

This one comes from Anusuya’s kitchen…remotely that is. I have missed visiting and posting from her kitchen for the last two years since our move, but this winter visit to Dallas was a good reminder to bring this series back, and savor this amazing cook’s simple and yum recipes. This recipe was one I wrote down in 2010, when she was in the mood to share some quick and easy snack favorites. I’m not even sure if she remembers having shared this gem but this recipe came very handy this week as I was out of lunchbox ideas for Nikhil. Mix some left over idli batter, chilies, cilantro and sambar/vethalkuzhambu powder powder and you have a new savory “appam” dish that is quite healthy too. You may add grated carrot or beans or any vegetable of your choice though I left that out in this recipe. I did add some chopped onions but that is optional too. You don’t need to use oil at all if you use a non stick “appa-karal” or the ebelskiver pan. I barely used one to one a half tsp oil for making about 15-20 paniyarams.

They make a great breakfast or snack recipe and if your child or you like it enough even if cold can be a good lunchbox staple too. I have to thank my good friend Maha for suggesting this as a lunchbox recipe.

Enjoy with any chutney of your choice – coconut or peanut or tomato or anything spicy:)

Ingredients:

  • Left over idli batter – 2 cups
  • 1 tsp sambar powder
  • 1 tsp vethal kuzhambu powder (you may use 2 tsp sambar powder if you don’t have this one. You can find this occasionally in Indian stores abroad but I usually get mine from Grand Sweets in Chennai)
  • Ground ginger and chili paste (1 inch ginger plus 2-3 chilies or more if you like it very spicy)
  • Chopped cilanto 2 tbsp
  • Chopped curry leaves 1 tbsp
  • 1/4 tsp asafetida
  • Salt to taste
  • Olive oil or rice bran oil – 2 tsp
  • Optional – chopped onions and grated veggies like carrots or beans (1/4 cup each)

Method:

Take the idli batter in a mixing bowl and add all the other ingredients. Mix well.

Heat the appa karal or ebelskiver pan with about 1- 1 1/2 tsp of the oil. Just pour 1 tsp oil across all the cups in the pan so each cup gets a little to grease it a bit.

When the oil is hot, add one tbsp each of the batter. Cook till the batter is about golden brown and using a spoon or skewer or a chopstick turn the appam/paniyaram over to cook on the other side.

20140121-104220.jpg

When golden and puffy on both sides, the paniyarams are ready to eat.


Eggless Snickerdoodles – for an October birthday

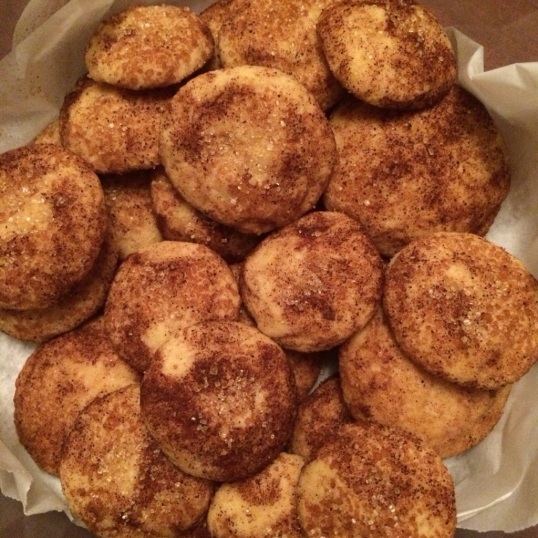
20131008-072529.jpgThis is my foodie son’s own creation and his experiments with baking. For his 12th birthday.

He made these with eggs a few days ago and they were chewy and just right. Tried them again without eggs and we actually couldn’t tell the difference. So here is the eggless recipe made for the birthday boy and his friends by him:).

When did he grow up to bake his own cookies?

There is a teeny tiny part of me that wishes I could continue to bake something for his birthday like I used to but the time together in the kitchen was fun enough to make me proud as I watched him don an apron:). We do it in style, you see.

Ingredients: (for 18 large cookies or about 24 medium ones) – Adapted from Food.com

  • 3/4 cup sugar (we used raw unrefined sugar)
  • 3/4 cup butter
  • 3 tablespoons milk
  • 3 teaspoons vanilla extract
  • 1 1/2 cups all-purpose flour
  • 2 1/4 teaspoons baking powder
  • 1 1/2 pinches salt
  • 4 1/2 tablespoons flour

For the topping:

  • 2 tbsp sugar
  • 2 tsp cinnamon powder

Method:

  • Preheat oven to 350°F
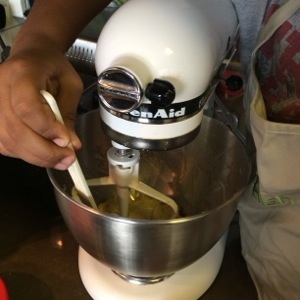
  • Combine butter (room temperature so it’s soft) and sugar in a bowl or stand mixer with paddle attachment, and mix on medium speed until it gets lighter and fluffier.
  • Add vanilla and milk to butter/sugar mixture. (You can be flexible with the amount of vanilla you use).
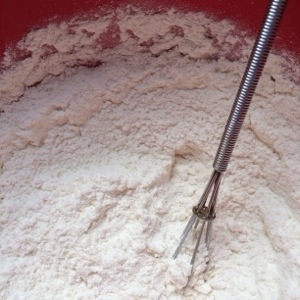
  • Combine salt, flour and baking powder in a separate bowl.

20131008-072358.jpg

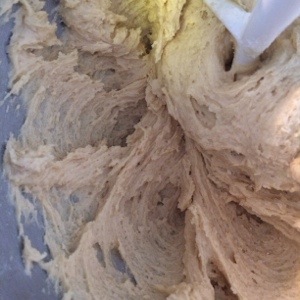
  • Combine the dry and wet ingredients, using either a spatula or your hands. (Dough should be a little bit sticky at this point).

20131008-072443.jpg

  • Add extra flour as needed until dough becomes less sticky and it’s easy to shape into round balls without the dough sticking to your fingers.

20131008-072458.jpg

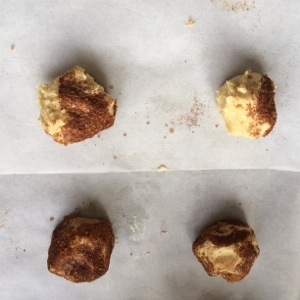
  • Form 12-18 equal-sized balls, flatten to about 1/2 – 2/3 inch in thickness. Coat one side with cinnamon sugar. (Lay about 1/8 Cup sugar on flat surface and lay each flattened ball of dough on it, pressing gently).

20131008-072519.jpg

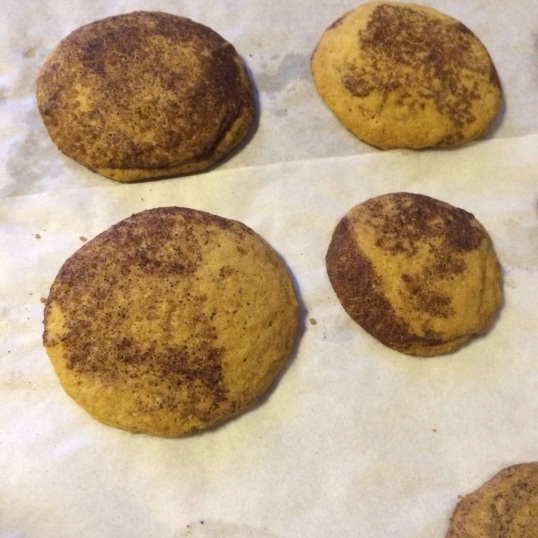
  • Bake for 8-10 minutes, until bottom is lightly golden.

If you’d like to try these using eggs, he used this Martha Stewart recipe. They were delish!

20131008-072548.jpg

20131008-072600.jpg

Sumathi’s Medley – Easy Gulab Jamuns

IMG_1126

I was introduced to this recipe more than 30 years ago by some good friends in Lagos, Nigeria. These ladies were not only formidable cooks, they were also masters of substitution – they had to be since dinner parties were the chief mode of entertainment and while the markets had plenty of locally grown vegetables and fruit, food stores were rare and supplies, basic. In the eight years we lived in Lagos, I don’t think I ever saw a packet of potato chips. If you craved chips, of any kind, you made your own.

From the vantage point of today, it seems we had an amazingly healthy – and sustainable – diet but back then the difficulty in finding many common food items only increased the determination to find a way to recreate the dishes we could no longer get so easily. I learned many tips, tricks, and shortcuts during those years – my friends were generous with their knowledge and enormously patient – but if I had to pick the one recipe that has worked every time and everywhere, it would have to be the gulab jamun. The traditional way of making these spongy, syrup-soaked balls of fried dough is daunting what with first having to boil milk down to its solid form (khoya).

There is a reason why I call these “easy”. Here, milk powder replaces the milk solids. Give this recipe a try and you’ll be amazed at how incredibly simple the process is – you need no more than 30-40 minutes from start to finish. Do watch the frying though – the oil shouldn’t be too hot or the jamuns won’t cook inside.

The end product is lighter than the traditional jamun but tastes just as good.

Serve the jamuns warm. If you’re not fussed about the calories, add a scoop of ice cream!

Makes 8-10
Syrup:
2 cups sugar
2 ½ cups water
Crushed cardamom seeds (optional)
A pinch of saffron, soaked in a tablespoon of warm water (optional)

Ingredients:
8 tablespoons full-fat milk powder
3 tablespoons self raising flour
¼ tsp baking soda
2-3 tbsps plain yogurt or full-fat milk
1-2 tsps butter or oil or ghee

Method:
1. Boil sugar and water until the mixture reduces a bit and the colour deepens to a pale caramel.
2. Add the crushed cardamom pods and saffron mix, if using.
3. Take the syrup off the flame but make sure it is warm when you add the fried balls to it.
4. Sieve the milk powder, self-raising flour, and baking soda.
5. Add the butter and then the yoghurt, a little at a time, and work the mixture with your hands until it forms a ball. Don’t overmix or you’ll end up with tough jamuns.
6. Heat the oil. If it starts to smoke, switch off the fire to let the temperature drop a bit – the oil should be hot enough so that a piece of bread rises to the top but not so hot that it browns immediately.
7. Break off small lime-sized pieces of dough and roll each between your hands to a smooth, crack-free ball. If the dough feels a bit dry, moisten your hands with some milk before rolling the balls.
IMG_1106
8. Drop the balls in the oil. Turn them often so that they brown evenly.
9. Drain the balls and add them to the warm syrup. Wait for an hour or more for the balls to absorb the syrup and swell.

Post Navigation