Roz Ka Khana

A blog about everyday food. Mostly Indian. All vegetarian.

Archive for the category “Snacks”

Quick Snack – Spicy Sprouts chaat on Toast

This is for one of those muggy and rainy days when you crave something spicy with a hot cup of chai or green tea:).
It can also double as a breakfast dish if you prep ahead and have sprouts ready to go by day 2 (soak the mung beans in water overnight, drain the water the next day and transfer the beans to a moist cloth. Keep it covered for a day till see you begin to see the sprouting happen).

Ingredients:

  • Sprouted mung beans – 1 cup
    Whole wheat or multigrain or gluten fee bread – 2 slices
    Olive oil – 1 tsp
    Cumin powder – 1/2 tsp
    Red chili powder – 1/2 tsp
    Coriander powder – 1/2 tsp
    Chat masala powder – 1/2 tsp
    Salt to taste
  • Small red onion – 1/2 finely chopped
  • Green chilly – 1-2 finely chopped
  • Juice of half a lemon
  • Curry leaves -6-8
    Chopped cilantro – 1/4 cup
  • Home made green chutney (recipe here). You may also use store bought.

Method:

1. Mix the chopped onions, green chilly and cilantro in a bowl. Add the chat masala and lemon juice to this mixture. Keep this aside while you prep the moong sprouts.

IMG_2580.JPG
2. Heat about 1 tsp olive oil or rice bran oil in a pan. When the oil is hot add the cumin seeds.
3. After the seeds sizzle add the curry leaves and the moong sprouts and sauté for about two minutes till the spices get well mixed and the sprouts are slightly cooked.

IMG_2579.JPG

IMG_2581.JPG

4. Take 2 bread slices and lightly toast them on a skillet. I prefer this method of toasting to the toaster as it keeps the toast soft while still browning it.

IMG_2582.JPG

5. Spread some homemade green chutney (recipe here) over a slice of toast. Add the moong sprout mixture on top and garnish with more cilantro. You may also add some nylon sev (available in Indian stores) as garnish for a crunchy bite.

IMG_2583.JPG


IMG_2584.JPG


Anusuya’s Kitchen – Kuzhi Paniyaram

20140119-115744.jpg

This one comes from Anusuya’s kitchen…remotely that is. I have missed visiting and posting from her kitchen for the last two years since our move, but this winter visit to Dallas was a good reminder to bring this series back, and savor this amazing cook’s simple and yum recipes. This recipe was one I wrote down in 2010, when she was in the mood to share some quick and easy snack favorites. I’m not even sure if she remembers having shared this gem but this recipe came very handy this week as I was out of lunchbox ideas for Nikhil. Mix some left over idli batter, chilies, cilantro and sambar/vethalkuzhambu powder powder and you have a new savory “appam” dish that is quite healthy too. You may add grated carrot or beans or any vegetable of your choice though I left that out in this recipe. I did add some chopped onions but that is optional too. You don’t need to use oil at all if you use a non stick “appa-karal” or the ebelskiver pan. I barely used one to one a half tsp oil for making about 15-20 paniyarams.

They make a great breakfast or snack recipe and if your child or you like it enough even if cold can be a good lunchbox staple too. I have to thank my good friend Maha for suggesting this as a lunchbox recipe.

Enjoy with any chutney of your choice – coconut or peanut or tomato or anything spicy:)

Ingredients:

  • Left over idli batter – 2 cups
  • 1 tsp sambar powder
  • 1 tsp vethal kuzhambu powder (you may use 2 tsp sambar powder if you don’t have this one. You can find this occasionally in Indian stores abroad but I usually get mine from Grand Sweets in Chennai)
  • Ground ginger and chili paste (1 inch ginger plus 2-3 chilies or more if you like it very spicy)
  • Chopped cilanto 2 tbsp
  • Chopped curry leaves 1 tbsp
  • 1/4 tsp asafetida
  • Salt to taste
  • Olive oil or rice bran oil – 2 tsp
  • Optional – chopped onions and grated veggies like carrots or beans (1/4 cup each)

Method:

Take the idli batter in a mixing bowl and add all the other ingredients. Mix well.

Heat the appa karal or ebelskiver pan with about 1- 1 1/2 tsp of the oil. Just pour 1 tsp oil across all the cups in the pan so each cup gets a little to grease it a bit.

When the oil is hot, add one tbsp each of the batter. Cook till the batter is about golden brown and using a spoon or skewer or a chopstick turn the appam/paniyaram over to cook on the other side.

20140121-104220.jpg

When golden and puffy on both sides, the paniyarams are ready to eat.


Lunchbox Series – Bombay Sandwich

20130907-101246.jpgI’ve been asked why the lunchbox series have stalled since my move to Singapore. I don’t think the move has much to do with it or the fact that Nikhil is almost a tween/teenager. My tween is quite the foodie as I said earlier so he still prefers his yummy and healthy lunch menus from home (even if I say so myself:) over the cafeteria food. The issue itself is the lunchbox:). I used to be particularly fond of packing lunches the “laptop lunch” way or add in a fruit, a vegetable, protein and carbs in the lunchbox and the cute laptop lunch containers ensured a balanced diet.  And I was super excited when we moved here to “bento land” or so it was I had assumed (with all the Asian/Japanese influence) that I invested – yes those fancy bento containers are frightfully expensive – in a Zojirushi 3 tier bento kit for Nikhil to take to his 5th grade.

Sadly it lasted a month. Zojirushi was deemed too “heavy” to carry and one day it never got home. Was apparently lost in some “black hole” in the school or was picked up by some lucky cleaning service employee – no one knows – bottom line, we are on our 7th lunch box which now has been resigned to a disposable container or even a foil wrapped burrito in a brown bag. Did it conveniently “get lost”? Not sure but it does seem to be a trend among middle schoolers to not tote the separate lunch bags. And so with the demise of the laptop type lunches, I lost the inspiration to showcase the contents.

Nikhil still cares about the contents of his lunch though and for the most part claims he prefers taking his lunch to the “sad” lunches he gets at school, except for the pizza or subway days. I can’t say for sure if they are really that sad  but am secretly enjoying it while it lasts – I take it as a compliment, never mind that he is very much still a Mama’s boy:)

So this past week’s lunch menu was the sandwich that can be found at every street corner in Bombay. I found this recipe from this book I recently bought in India – Sanjeeev Kapoor’s Tiffins – Delicious and Healthy Khana for your Dabba (Hindi word for container).

20130907-101439.jpg20130907-101446.jpg

Some quick and easy lunch recipes in here though many would be better off in a traditional Indian tiffin dabba or the bento tier boxes. Oh well, if we do decide to get back on that trend the recipes are tempting enough to make their way into our lunchbox – or better yet – I may start carrying one of those Indian dabbas to work just to try these recipes:)

You do need a wee bit of planning for this recipe like the green chutney and the boiled potatoes but once you have those handy this is a very simple recipe to put together in a jiffy for those crazy Monday mornings.

Quite a lip smacking sandwich and this now makes it in our every other lunch week calendar – yes I do have to make one so I don’t go crazy with the schedules. (Happy to share my weekly lunch menu here for those interested:)

Ingredients:

  • 4 slices bread
  • 1 tbsp butter (optional)
  • 1/2 cup green chutney (coriander and mint chutney – recipe below)
  • 1 medium onion cut into thin rounds
  • 1/2 medium cucumber cut into thin round slices
  • 1 medium tomato cut into thin round slices
  • 1 medium potato, boiled, peeled and sliced into thin rounds
  • 1/2 tsp sandwich masala or chat masala (you can find both in India grocery stores)
  • 1/2 tsp crushed peppercorns
  • Salt to taste

Method for green chutney 

I use this brilliant recipe from Panfusine for the green chutney. There are several green chutney recipes you will find but I like the fact that this one uses a very unusual ingredient – feta cheese – to add to the slightly “fermented” or yoghurty consistency which I think is what gives it a brilliant chutney green color and the thick consistency – perfect for a sandwich spread. I changed it a bit to add some mint as well.

Ingredients:

  • 1 bunch cilantro – 2 cups approx
  • 1/2 bunch mint – 1/2 cup
  • 1/2 to 1 cup Crumbled Feta Cheese
  • 2 cloves garlic
  • 2 green chilies
  • Salt to taste

Blend all the above to a smooth paste in a blender by adding a little water.

Method for Bombay sandwich:

  1. Trim the bread slices and spread butter and green chutney on one slice (You can skip the butter or you may add it to lessen the spice level)
  2. Arrange two slices of bread smeared with the chutney with the chutney slide facing up. Now add the onion, cucumber, tomato and potato slices on the chutney slide.
  3. Sprinkle some sandwich masala or chaat masala and top with crushed peppercorns.
  4. Cover with another chutney smeared bread slice – chutney side facing down.
  5. Cut each sandwich into two equal portions, if you’d like and pack with some tomato ketchup. You may also just pack them as is wrapped in grease proof paper to keep them from getting soggy. These sandwiches hold through quite well in the lunch box for later afternoon lunches.

Persimmon Orange Creamsicle Smoothie with Homemade “Kind” Bars

20121206-124102.jpg

The best part about living in Singapore is the abundance of fresh fruits and veggies, and some exotic ones too, readily available and mostly imported from the rest of the neighboring world . Persimmons are native to Asia specifically Japan and China, and seem to be “in season” here as the local wholesale fruits and veggie market had the non-astringent Fuyu persimmons on sale this past week.  So of course I grabbed them, without a clue of what I was going to do with them:)

I’d had persimmons in the US mostly in salads and didn’t think they had a distinct flavor except for a slight tanginess to them. Which is probably what makes these versatile enough to add in salads, juices and smoothies, so they add to the texture but don’t necessarily mask any flavors. A quick look at my Pinterest board collections gave me this interesting smoothie recipe (probably the first time I’m really trying something from Pinterest – I usually just hoard my boards). I added all orange fruits and veggies to this – carrot, orange and persimmon with a dash of the usual smoothie ingredients and the result was this creamy, quite flavorful smoothie with enough Vit C to keep colds at bay this Singapore rainy season:)

I have also been trying extra hard to stay healthy with Nikhil’s snacks – and I cannot say this enough times – but Whole Foods and Sprouts and yeah, maybe Trader Joes (now that you are in Dallas too) – you seriously need to think about opening shop in SE Asia, yes Singapore specifically. With the number of American expats living here, you will give the local Marketplace and Supernature a run for their money. While fresh fruits and veggies are in abundance and relatively easy on the wallet, organic dry goods (grains, cereals) are frightfully expensive at local grocery stores. And so, I’ve been trying to make some things from scratch that previously I would buy from those huge bins of goodness  at WF and Sprouts.  I suppose that’s all for good reason if you really think about it.

This recipe was one I chanced upon from this interesting blog called Iowa Girl Eats and I adapted the recipe for the most part and changed some ingredients and measures a bit to call it the homemade “Kind” bar recipe. Kind bars have always been my most favorite bars not just for their taste but for what they stand for. (Do the Kind thing for your body, your taste buds and the World). This is a recipe for Almond-Cashew-Cranberry-Apricot bars all held together with a touch of coconut and honey. All I could say is YUM!

Persimmon Orange Creamsicle Smoothie 

Ingredients: (for 3 6 oz. cups)

2 Persimmons – peeled and quartered

1/2 carrot

1 orange, peeled

1 1/2 tbsp non fat dry milk powder or almond milk

1 tsp vanilla essence

1/2 cup water or skim milk (or almond milk)

2 cups ice

1 – 1 1/2 tsp honey or agave syrup

Put all the ingredients in the order listed in a high speed blender ( I use Vitamix) and run the blender from slow to high speed for about 2-3 minutes. Enjoy cold.

Almond-Cashew-Cranberry-Apricot Bars Recipe

20121206-124121.jpg

Ingredients:

3/4 cup Almonds and Cashews mixed

1/4 cup dried cranberries

1/4 cup chopped dried apricots

1/2 cup of rolled oats

2 tbsp coconut oil

4 tbsp honey or agave syrup or a mix of the two

Method:

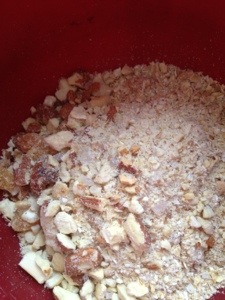
1. Add the oats, 1/2 cup each of the almonds and cashews to a blender or food processor and pulse till you get a coarse powder.

20121206-123404.jpg

2. Now take the remaining nuts and very coarsely chop them. Add this to the above mixture

20121206-123411.jpg

3. Chop the dried cranberries and apricots as well and add to the above .

20121206-123417.jpg

4. Take a mixture of the coconut oil and honey/agave in a small saucepan and heat it on a low flame. Keep stirring till the mixture starts to foam and get cooked.

20121206-123422.jpg

5. Now pour the oil/honey over the oat-fruit and nut mixture. Mix well till the dry ingredients get well coated with the wet ingredients.

6. Line a 8×8 inch baking tray or a loaf pan (depending on how thick you want your bars) with a cling wrap or parchment paper sheet. Make sure the sheet hangs over the ends of the pan. Spread the mixture onto the bottom of the pan.

7. Wrap the sheet over the poured mixture and press the mixture with the bottom of a steel or glass container so it gets evenly flat.

20121206-123428.jpg

8. Place the pan in the fridge for a few hours till the mixture hardens.

9. Cut into bars while its still in the pan, cover with parchment paper and store in airtight containers.

Notes – You can modify the coconut oil and honey quantities as needed for taste and consistency. I initially used  a bit more than needed and the bars got quite sticky when I left them out of the fridge. I have modified the amount used in the ingredients above which resulted in just the right consistency for me but if you like your bars chewy, feel free to modify the measures slightly.

In preparation for the Festival of Lights

After an amazing landslide victory for America, it seems befitting this year that Diwali, the festival of lights follows soon after. Apt for a resounding celebration with lights and fireworks, don’t you think?  It just seemed quite the coincidence that we will soon be celebrating a victory with this special festival which symbolizes “the return of king Rama” – one of the most popular festivals celebrated in India and many of its neighboring countries.

Being in Singapore this year for Diwali is a new experience. With its diverse population and a relatively large number of Indians, it isn’t surprising that Singapore gets an official holiday, the streets are lit up (well, Little India is) and little shops are bedecked with lights, lamps, firecrackers (sparklers only) and decorations. (Little India Picture Courtesy: Vaishali Shah)


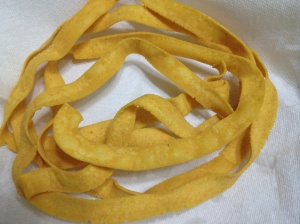
And so when my friends and I got together to explore the city and lunch (as you can see there are enough options here for that) we were in for quite a colorful treat. Some of us have already begun to prep for Diwali and it’s quite inspiring to see ideas for Diwali snacks and decorations. I’ve usually been remiss in making snacks or sweets ahead of time, and usually cobble things together last  minute, some home made and some store brought. This year, my good friend Preethi was my source of inspiration. I could gather from our conversations that she is quite the foodie and an expert at Diwali snacks. Ribbon Pakoda, the traditional Diwali savory, was her forte, or so I overheard as she reeled off the proportion of the flour and the recipe.

So it seemed timely (for me:) when she casually mentioned she was going to start making her batch of Diwali snacks yesterday and I asked if I could be her assistant in her kitchen and watch her make it. Turns out I was also the official taster – I sampled the first batch of hot, crisp ribbon pakodas with a cup of hot Preethi’s ginger tea. The highlight of this recipe – she doesn’t use a lot of butter and the pakodas don’t seem to soak up much oil either. The result – non-greasy, crisp pakodas of perfection.

Ingredients: (for 2 cups of pakodas)

1 tbsp butter (you can add more unto 1 1/2 to 2 tbsp. The more the butter the crisper, but it will also soak up more oil)

1 cup rice flour

1/2 cup gram flour or besan

1 1/2 -2 tsp red chili powder

1/2 tsp asafetida

salt to taste

Water as needed for the dough

1 1/2 cups oil for frying

Method:

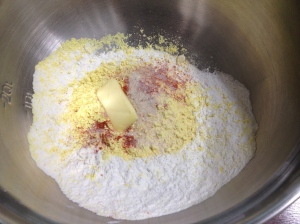
1. Mix the rice flour, besan, salt, red chili powder and asafetida in a mixing bowl. Add the butter and mix well.

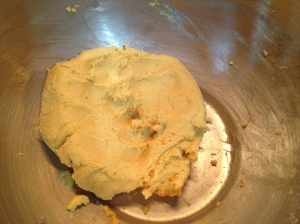
2. Slowly add water to make a smooth and soft dough.

3. Heat the oil in  a kadai or a round bottomed vessel till the oil is hot. Drop a small piece of the dough in the oil and if it sizzles and immediately rises to the top, the oil is piping hot and ready to use for frying.

4. Take an iron press (this is a traditional press that comes with several variable plates of different shapes. Kinda like a cookie cutter press but more robust. I wonder if anyone has tried these with a cookie cutter?), drop a round ball of dough into the press, put the top of the press together.

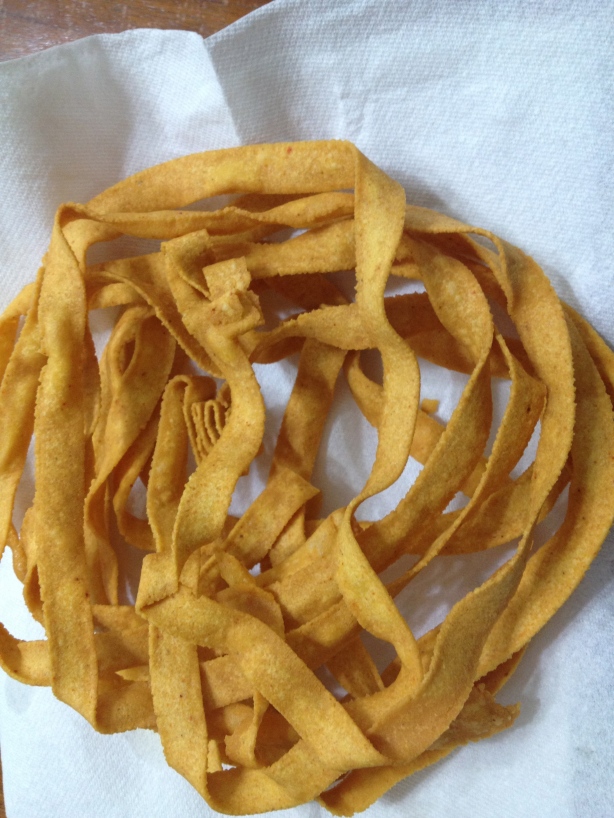
5. Now squeeze the ribbons into the hot oil while moving your hand in a circular motionso the ribbons take shape of a circular almost floral design. Cook for about 5 minutes turning it once until golden brown.


6. Serve with a hot cup of chai.

Preethi’s tip – When you finish using the ladle to fry a batch of the the pakodas, keep the ladle in the mixing bowl that holds the dough. Drops of the hot oil from the ladle mixed in the dough helps add to the crispness. You can alternatively sprinkle a few drop of the hot oil and mix the dough well before frying the next batch.

Have a joyous and wonderful Diwali!!

Vaghaar Idli

Two weeks of traveling have taken its toll – I’m so behind on blog posts all over again:(. They were an amazing two weeks though as we were visiting Bangkok and then India. And not surprisingly, full of gastronomical adventures. I will save the Bangkok food pictures for a later post which is an entire food album.

This was our first weekend back together at home as a family again. Home in Singapore I mean. Someone asked me what “home” really means to me these days – India where I grew up and spent all my “formative” years, the US where I spent almost a decade and a half of my “grown up” life, or Singapore where I am barely a few weeks old . Tough question, when travels take you everywhere and you aren’t sure what’s next. Truth be told, I do miss the US every single day, but remind myself that this is a short stint and I need to make the most of my experiences here in Singapore. And India of course is just a “stone’s throw away”, well, at least compared to the distance from the US. So I suppose I have the best of all worlds here:). Humor me, will you, as I call this home (for now:).

In any case, I had so much idli batter left over from yesterday’s Varalakshmi pooja (again, a separate post. Told ya I was behind:) that I tried this quick recipe which turned out great for using leftover cooked idlis. This recipe is courtesy “Sankalp” restaurant in Dallas. I tried this dish when we went to Sankalp during their first opening weeks and I know Nikhil loved it. This will be a lunch box staple for him over the next few weeks when school starts:)

Ingredients:

Red onion chopped – 1

Medium tomato chopped – 1

Green chilies – 3-5 per taste finely chopped

Mustard seeds – 2 tsp

Urad dal – 1 tsp

Jeera or cumin seeds – 1 tsp

Turmeric powder – 1 tsp

Curry leaves – 1 sprig

Olive oil – 2 tsp

Mini idlis – about 15-20. Alternatively you can cut one idli into quarters, so you will need about 4-5 full idlis.

Method:

1. Take a heavy bottom vessel or kadhai and add the oil. When the oil is hot add mustard seeds.

2. Wait for the seeds to crackle and then add the urad dal. Saute a little and then add the jeera.

3. When the urad and jeera are lightly browned, add the chopped onion and stir until the onions are slightly glazed. Now add the curry leaves and saute for about 2 more minutes. Make sure the onions don’t get too brown. Add the green chilies and turmeric powder.

4. Add the chopped tomatoes and saute for another 2 minutes. They shouldn’t get mushy, just lightly cooked.

5. Now add the mini idlis and stir till the “masala” has completely coated the idlis. The idlis should be yellow from the tuemeric coating etc.

6. Garnish with chopped cilantro, and serve hot.

Punjabi Samosa

Growing up in Dehradun, Punjabi Samosa used to be a treat during the monsoon and winter weekends. One person who remains in my memory is Sitap Singh, our house help, who also dished out scrumptious North Indian dishes. As my mom mostly cooked traditional South Indian, Sitap Singh’s Punjabi dishes were always a welcome change. From soft phulkas (thin wheat tortillas) with aloo gobhi (potato cauliflower dry curry) to his famous Punjabi Samosas, his dishes were delectable. Looking back, they were sadly taken for granted. As a 9 year old boy, I used to hang around Sitap Singh while he cooked and it amazes me that these are still etched in my memory.  I still remember his tips for making samosas, and the tip about rolling the dough to a thin,  transluscent disc (almost wonton like) which adds to the crispy flaky texture. We tried this for the first time ever last weekend and were quite proud of the results. Let’s just say this one was for Sitap Singh:)

Ingredients for Samosa Crust:

Olive oil – 3 tbsps
All purpose flour or maida – 1 cup
Carom seeds or ajwain – 1/2 tsp
Water – 1/4-1/2 cup as needed for dough consistency

Method for crust:

1. Mix the flour, carom seeds, salt and oil in a mixing bowl.
2. Add water little by little and knead to a stiff dough.
3. Cover with a damp paper towl and set aside for about 10 minutes

Ingredients for filling:

Potato, 1 inch cubes 4-5 medium
Green peas, boiled 1/2 cup
Olive oil 2 tbsp
Cumin seeds 1 tsp
Ginger, chopped 1 inch piece
Green chillies, chopped 3-4
Red chilli powder 1 tsp
Dry mango powder (amchur) 1 tsp
Garam masala 1 tsp
Coriander seeds 2 tsp
Fennel seeds 1 tsp
Salt to taste

Method:

1. Take the coriander seeds, fennel, cumin seeds and crush in a mortar pestle into a coarse powder

2. Boil the potatoes and roughly chop or mash them into cubes; do not over mash the potatoes into a mushy paste.
3. Add the thawed frozen or boiled peas.
4. Add the ginger, green chilies , ground coarse powder of coriander, fennel and cumin, and the garam masala, chili powder and salt to taste.

5.Add some oil to a heavy bottomed vessel and when the oil is hot, add the potatoes peas mixture.
6. Saute for a few more minutes, then add the dry mango powder or amchur. Mix well.
7. Cool before making the samosas.
8. Divide the filling into sixteen equal portions.
9. Divide the dough into eight equal portions and roll them into balls.
10. Apply a little flour and roll them into round chapathi or small tortillas.
11. Cut into half, apply water on the edges. Shape each half into a cone and stuff it with the potato and peas filling. Seal the edges well.

12. Heat sufficient oil in a kadai (wok) and deep-fry the samosas in medium hot oil till crisp and golden brown. Drain and place on an absorbent paper.
13. Serve hot with sweet date and tamarind chutney.

Contributed by Girish Ratnam

Grilled Corn with Cilantro-Chili-Lemon

Happy 4th of July to all! It’s been an annual tradition (at least for the last 3 of the 5 years that we have been in Dallas:) to celebrate this day and the middle of summer with a picnic with our near and dear friends. We venture out to the greens with coolers, chairs, blankets, hats, sunscreen, bug spray and of course, the yummy treats doled out of all our kitchens and theirs. It’s more of a potluck, and there’s almost always something new to try and taste. I usually pick up something from the local store as it’s always a last minute trip after running a gazillion errands on Sunday afternoon. But since the 4th fell on a Monday this year, it somehow felt a little more relaxed. I thought I would make something at home for a change:) I wanted to try this dish I had seen in the July issue of the Real Simple magazine as it seemed easy enough, and I added some of my own seasoning to this recipe, which was quite the hit with the group. This dish is a tangy take on the simple grilled corn and served in bite-sized portions which makes it even easier on the palate.

Ingredients
Corn, husked and cleaned – 10
Olive oil – 2 tbsp (you can also use olive oil flavored with chili flakes for added spice)
Black pepper – 2 tsp
Salt to taste
Chopped fresh cilantro – 1 1/2 cups
Lime or Lemon juice – 1/2 cup
Garlic flakes, crushed – 2 tsp
Thai green chili, crushed (optional) – 2 tsp
Chaat masala, optional – 2 tsp (available in Indian stores)

Method:
1. Heat grill to about 350F
2. Mix the olive oil (I used flavored chili olive oil) with the salt, and garlic flakes.
3. Brush this mixture over the corn and place on the grill for about 10-15 minutes till done.
4. In a separate mixing bowl, mix the lemon or lime juice, cilantro, thai green chili, a little more salt to taste, chaat masala and combine.
5. Cut the grilled corn into about 5-6 pieces each. Toss in the mixing bowl and mix with the lemon-chili-cilantro mixture.
6. Serve with lime wedges and more cilantro for added garnish.

20110704-113309.jpg

Hot Bread Tikkas


Its Snow day #2 in Plano, TX…17F with a wind chill of minus whatever, 2 inches of ice, (ice, not snow) on the streets, rolling blackouts everywhere, frozen pipes…you’d think the world was coming to an end in Plano! Jokes aside, it has been pretty serious and I have to say I’m very thankful I’m still typing this. This means that I have power at home, heat to keep us warm, groceries to last us for at least the next day…and, internet connection.  At least for now. Thank you (silent prayer) for an uneventful day today.

You’d think that a day like this is perfect to cook and blog…only, when you have a bored 9 year old at home for 2 whole days and you have to work, its the perfect recipe for disasters, cooking or otherwise. “Amma, can you play with me?” or “Can I go outside to play by myself”…only to be back in 5 minutes with a frozen chin and a “Do we have anything to cover my chin?”  to “I’m sledding umm ice-skating outside”…aargh!! We’ve had painted t-shirts, hand made water bottle people traps (don’t ask!), catapults, paper ninjas strewn all over the house..all Nikhil’s original creations. And school just announced that they are closed again tomorrow. Help!! Who has time to cook, or blog!

But again, I’m thankful for Amma, who continues to ensure her babies (me and her grandson:) are well-fed, as she whips up the perfect antidote to a gloomy snow day…steaming hot bread tikkas! Add some chili sauce and ketchup and I’m all set for snow day #3:)

Ingredients:

Whole wheat bread – cut into small squares – 4 slices

1 cup chickpea flour (besan)

1/2 Yellow onion chopped fine

1/2 cup cilantro, chopped

1tbsp red chili powder (add more if you like it spicy)

1 tsp garam masala (available in Indian stores)

1 tbsp oil

1/2 cup water

salt to taste

Method:

Take the chickpea flour in a mixing bowl. Add about 1/2 cup water to make a smooth paste. The batter needs to be a little runny so as to coat the bread, not too watery but a slightly thicker paste, so adjust the water accordingly.

Add the onions, chili powder, salt and cilantro and mix well.

Take a bread cube, dip it in the batter so it coats the bread completely.

Heat a flat skillet and the oil, when the skillet is hot. Add the bread slices coated with the batter and shallow fry till well browned on all sides. Serve piping hot with ketchup or chili sauce.

“Nana’s” Banana Bread

Got this nice note from Sheela, my dear friend from Hyderabad who also happens to be a regular RKK reader (she doesn’t have a choice sometimes when I also call her to tell her about it ;), RKK’s proof reader, critic and an eloquent freelance journalist in the very happening metroplex in India, Hyderabad. Here it is…

Read this in the Reader’s Digest.Thought I might share it with you.

Mariel Hemingway:

” I learned that less can be more, that pulling back is good, that slowly is okay. These beliefs are all contrary to our way of life where life is so full, busy and fast. We think that if we’re not doing something, we’re not valuable. Not true! I learned that making time for myself was vital to good health.
My other solace is Nature.
I’ve retained an appreciation for good food, but I’ve learned to serve meals from a place of love. We should cook good food because we care about the people we’re doing it for. It’s not about playing the gourmand.”

She suggested that she wanted to send this for the RKK anniversary but this was probably the best time for it.

Couldn’t have been more apt. For the last month, I’ve been nagged by guilt – the guilt of procrastination. I realize I haven’t been as prompt as I should in writing, as recipes and pictures keep piling up, waiting to get some life of their own. As much as I love poring through other blogs, this guilt has led me to almost be a little fearful to look at the other gourmet creations, fearful that the guilt will haunt me even more.

The words mentioned above make me take a deep breath and realize that this hobby of mine is more than recreating Amma’s recipes or visiting Anusuya’s kitchen or even packing Nikhil’s lunches…it’s about the satisfaction of dishing it out, on the table and in words, with love. It has to come from the heart and sometimes that only happens once or probably two or three times a month. It’s okay to stop and smell the roses, or the food once in a while.

Enough pontificating. This recipe is one that I’ve tried for many months with many variations and I finally think that it deserves to be shared here. I added the quotes to Nana since this recipe is adapted for one. The other reason is that Nana obviously means Grandma and I don’t call my grandmother “Nana”. She is “Paatti” to me. So maybe this should be renamed “Patti’s Banana Bread”. But my Paatti never really made banana bread. And so it will remain in quotes as an adapted recipe.

I’ve used eggs in this recipe after many attempts at making eggless kinds. Though I have to say one recipe from “Understocked Veggie Kitchen” penned by another good friend of mine is probably one of the best eggless variations I’ve tried.

This particular recipe calls for eggs and substituting it with Egg replacer or flax seeds or other variations doesn’t really give you the same results. If you do stick to the measurements and the ingredients, you get a really moist, flavorful bread.

Ingredients:

5 tbsps butter

1/2 cup organic natural sugar

1/2 cup firmly packed light brown sugar

1 large egg

2 egg whites

1 tsp vanilla extract

1 1/2 cups mashed, very ripe bananas

1 3/4 cups all-purpose flour (here I used half measure white flour and half measure whole wheat flour)

1 tsp baking soda

1/2 tsp salt

1/4 tsp baking powder

1/2 cup heavy cream (optional, you can also use milk)

1/3 cup chopped walnuts

Method:

1. Preheat oven to 350F. Spray the bottom of a loaf pan with nonstick cooking sprat.

2. Beat butter in a large bowl with an electric mixer set at medium speed until light and fluffy.

3. Add sugar, brown sugar and beat well. Add egg, egg whites and vanilla; beat until well blended.

4. Add mashed banana, and beat on high speed for 30 seconds.

5. Combine flour, baking soda, salt and baking powder in a medium bowl. Add flour mixture to the butter mixture alternately with cream, ending with the flour mixture. Add walnuts to the batter and mix well.

banana-bread-dough

6. Pour the batter evenly into the loaf pan. Bake until browned and toothpick inserted in center comes out clean. This will take approximately 1 hour 15 minutes.

banana-bread-1

7. Cool the bread in the pan on a wire rack for about 10 minutes. Remove bread from the pan and cool completely. You can also wrap it in plastic wrap after it cools and leave it out overnight. It always tastes better the next day!

banana-bread3

Post Navigation